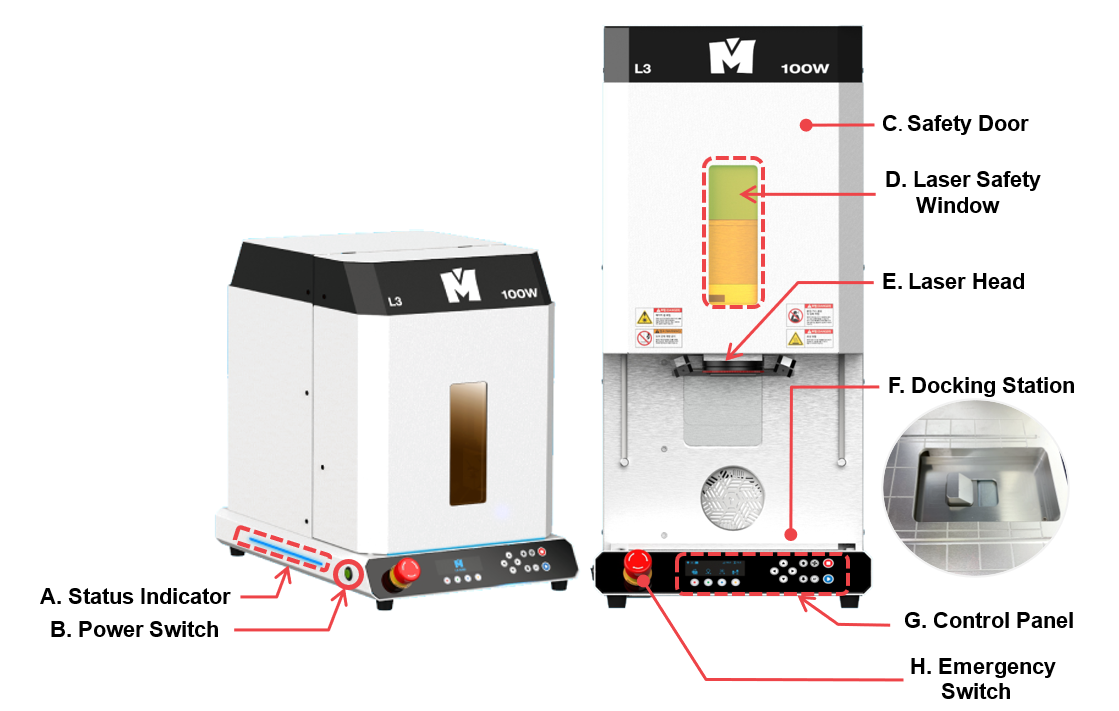
| A | Status Indicator | Shows the status of the device via blinking interval |
| B | Power Switch | Turn on/off the power switch. |
| C | Safety Door | Opens/closes the cover automatically. ※The cover automatically opens once the program is connected. |
| D | Laser Safety Window | Protects the eyes from being exposed to laser light. ※Wavelength protection: 1064nm/Optical density: OD6 |
| E | Scan Head |  Laser Source Do not stare at the specular/diffuse reflection of laser. It may result in blindness. |
| F | Docking Station | Connects the rotary clamp to the machine. |
| G | Control Panel | Controls the power button and the manual control for regulating engraving operations. |
| H | Emergency Switch | Stops the machine during emergency. |
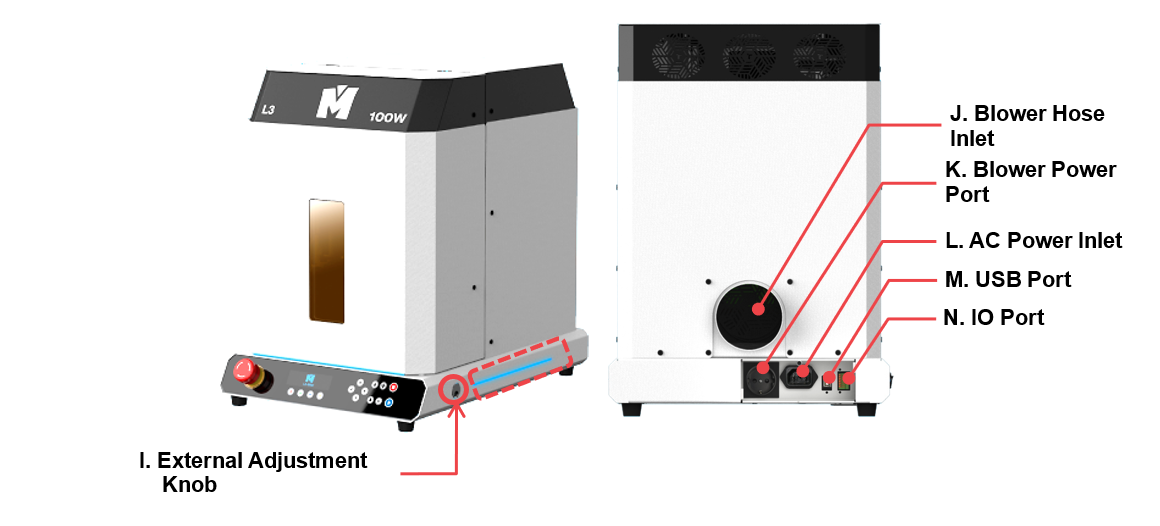
| I | External Adjustment Knob | Adjusts the position of the rotary clamp with a finger chuck handle. |
| J | Blower Hose Inlet | Connects the blower hose to the outlet to remove dusts and debris produced during marking operation. |
| K | Blower Power Port | To supply power to the blower by connecting it to the machine.(110~220V/2A) ※Auxiliary Power Device must be used if the external blower has more than 2 Ampere. |
| L | Power Port | To supply power to the machine. ※Use a grounded outlet only. Do not plug the machine into an ungrounded outlet. |
| M | USB Port | To connect USB cable to PC. |
| N | IO Port | To receive internal/external signal when connected to an external device. ※The external IO port input to the machine must be 5V, 50mA or less. |