Calibrate the size and position of a guide laser.
¶ How to calibrate guide laser
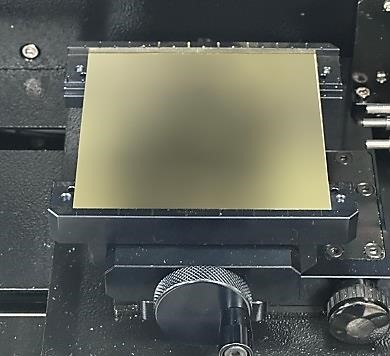
1. Place the material on the work area. ※ Please use metal materials.
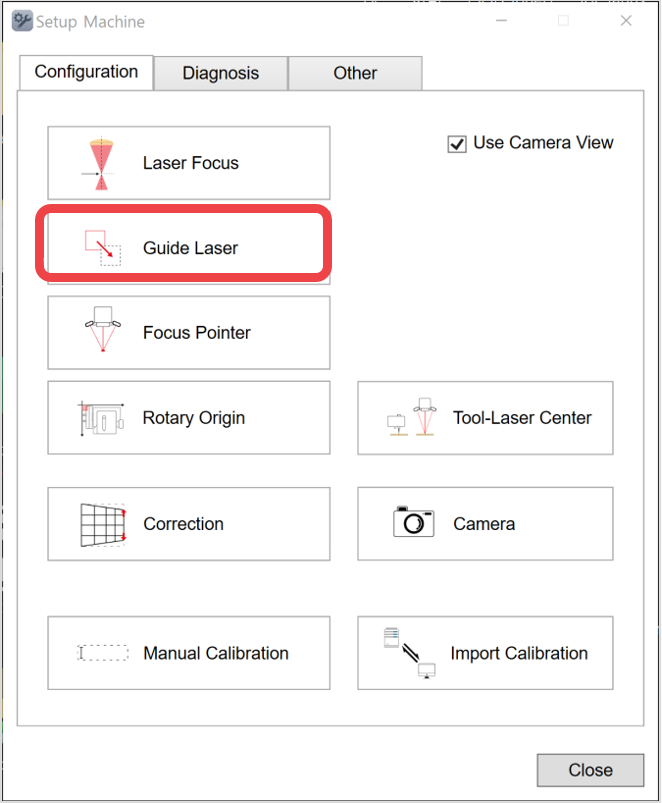
2. Click [Guide Laser].
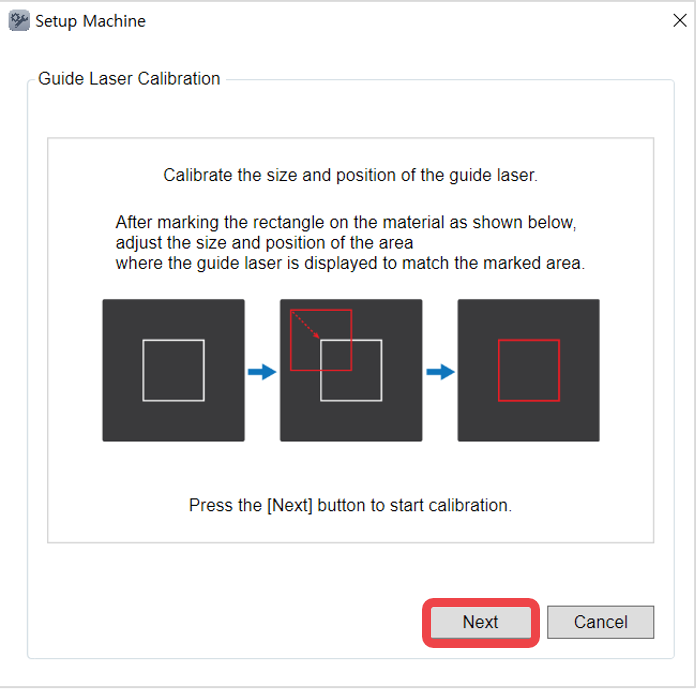
3. Read the notification then click [Next].
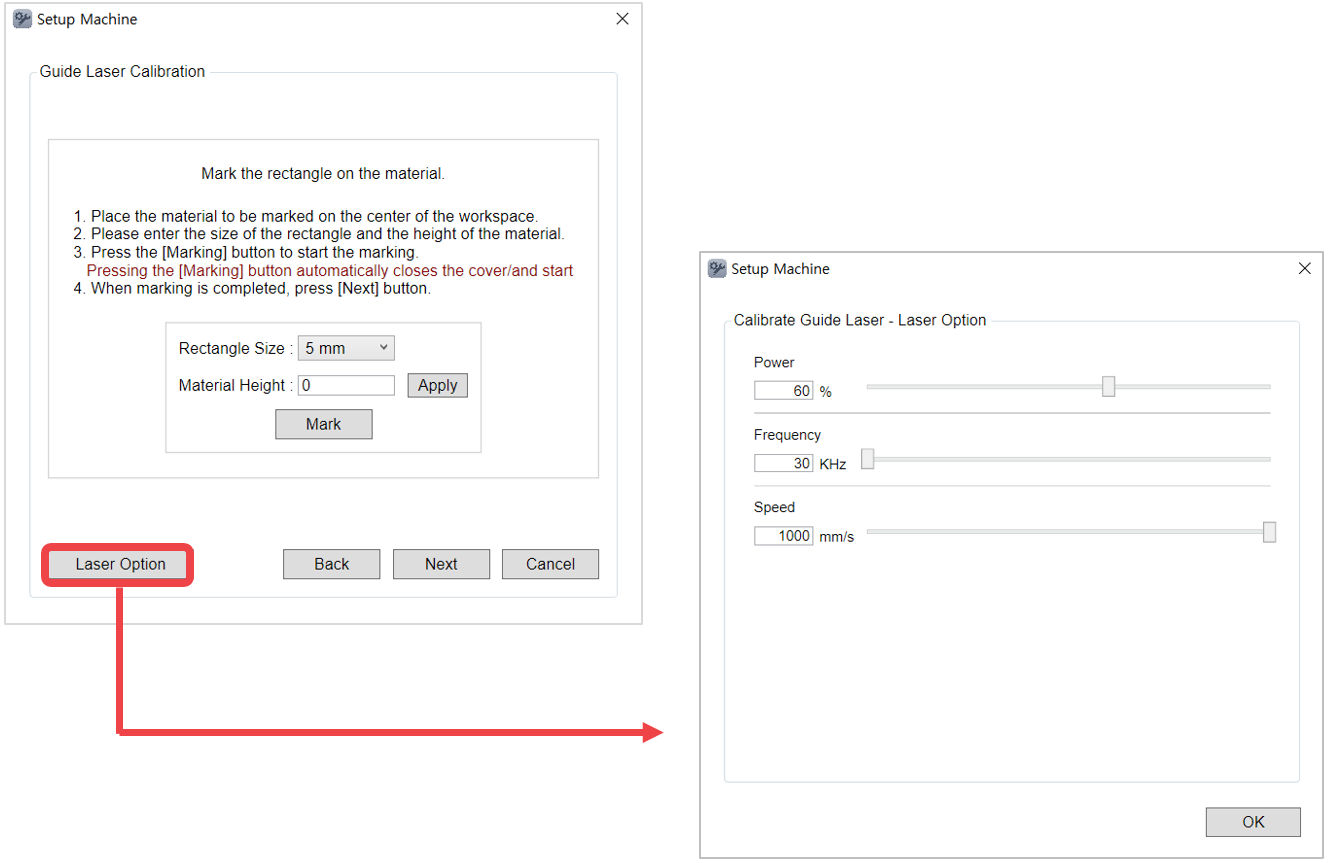
4. Select the rectangle size, then enter the material height. Click [Apply] to set the height, and then click [Mark]. After clicking the [Mark] button, manually close the machine cover. The rectangle will then be marked on the material.
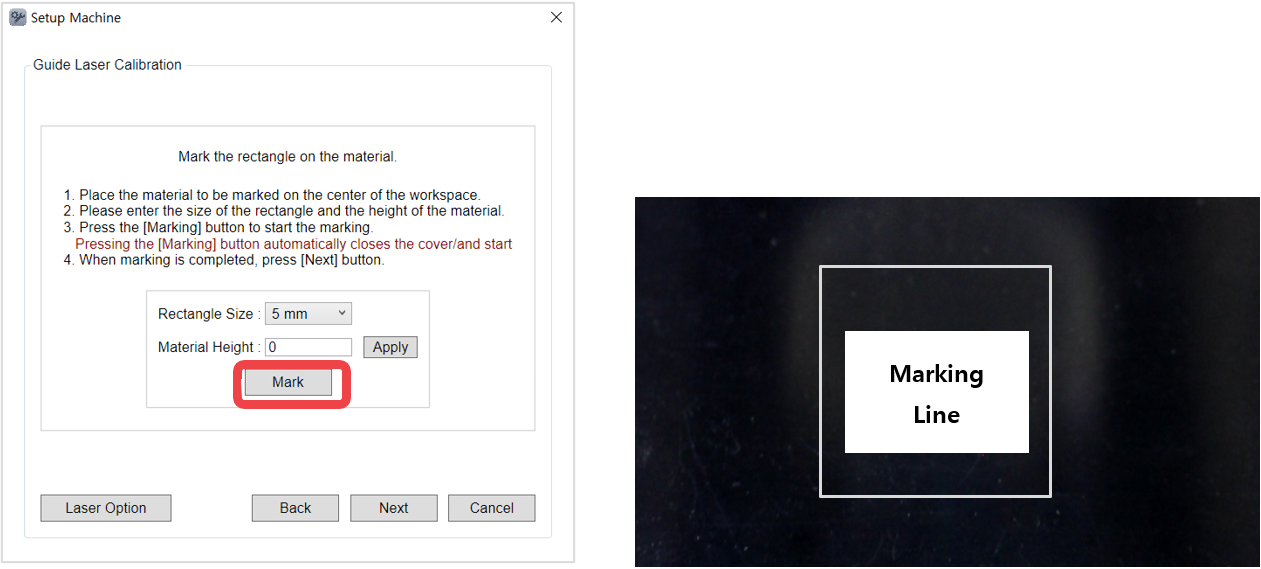
*A 20mm rectangle is marked on the material at a 0.5mm height.
5. Once the guide laser appears at the end of marking, adjust the offset values, width and height to fit in the rectangle in [2. Parameter Setting] then click [Apply].
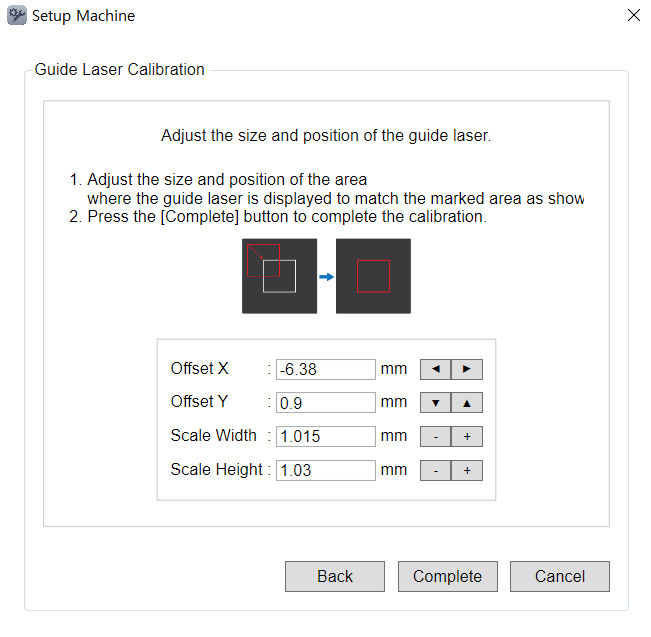
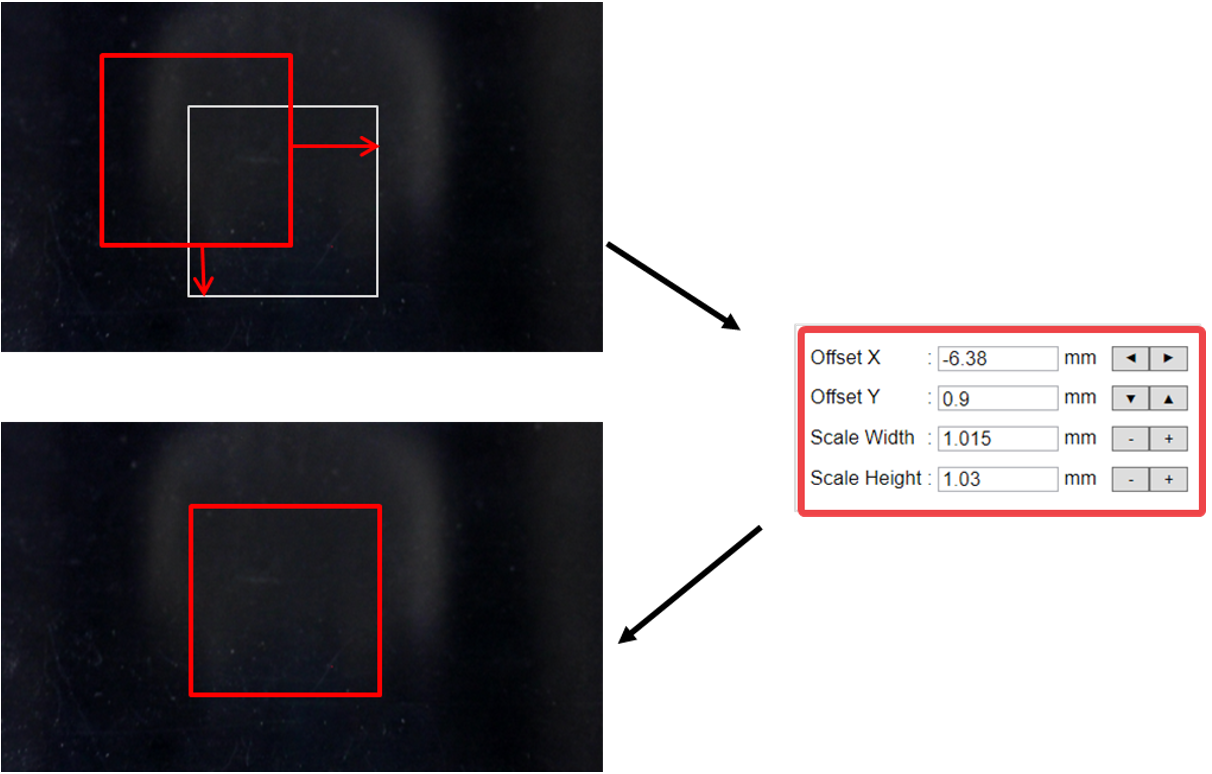
※Select [Laser Option] in the [Guide Laser Calibration] window to adjust the laser options.
¶ Advanced Guide Laser
1. In [Setup Machine] window, click [Other].
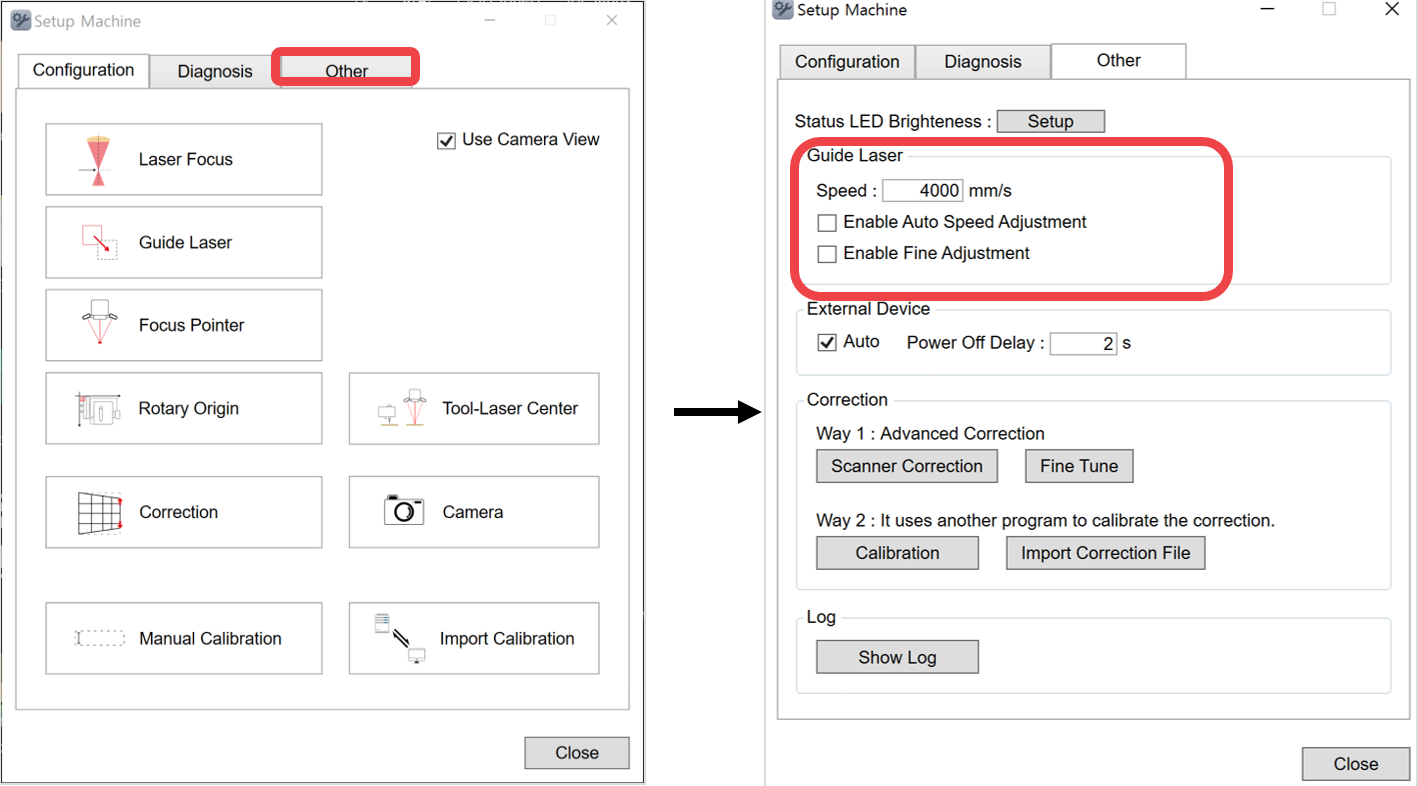
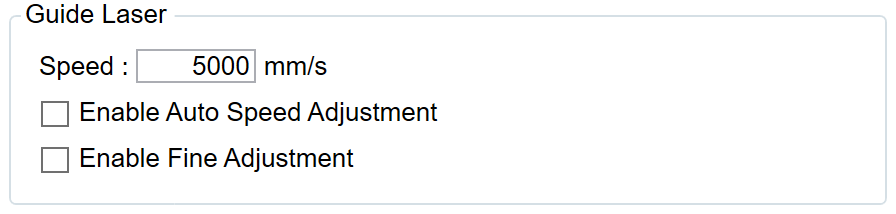
| Speed | Sets the guide laser speed |
| Enable Auto Speed Adjustment | Automatically adjusts the guide laser speed according to the size of the object to be marked when selected. |
| Enable Fine Adjustment | Automatically moves to the guide laser focus position (when checking the marking area) to enable precise marking area position when selected. ✽[Advanced Guide Laser] menu is added to the [Setup Machine] window when [Enable Fine Adjustment] function is selected and/or activated. ✽[Advanced Guide Laser] is required for calibration, and the calibration method similar to guide laser calibration method. 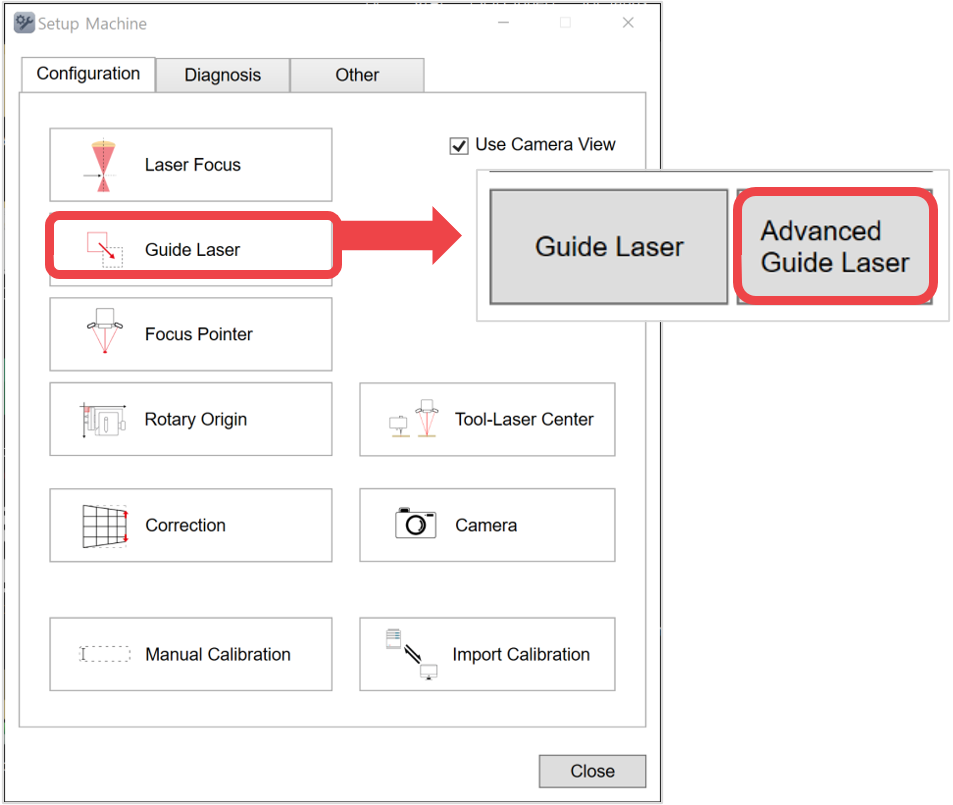 |