¶ Contents
- 1. Machine Installation How to install the machine
- 2. Program Installation How to install the software
- 3. Driver installation How to install the driver
- 4. Blower box installation How to install the blower
- 5. External device How to install the External device
- 6. Operation of the marking machine How to operate
※Please follow the instructions below for proper installation of the machine, software and other devices.
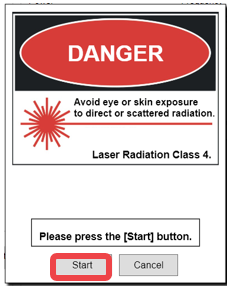
※The software program requires Windows OS 7 or higher.
¶ 1. Machine
JANUS cannot operate alone as a desktop engraver. It cannot proceed to laser marking and cutting operation without the use of a computer and software.
The machine should be connected to a personal computer for the machine to operate.
The software provided along with the machine must be installed to the computer to run the program for laser marking and cutting.
¶ How to install the machine
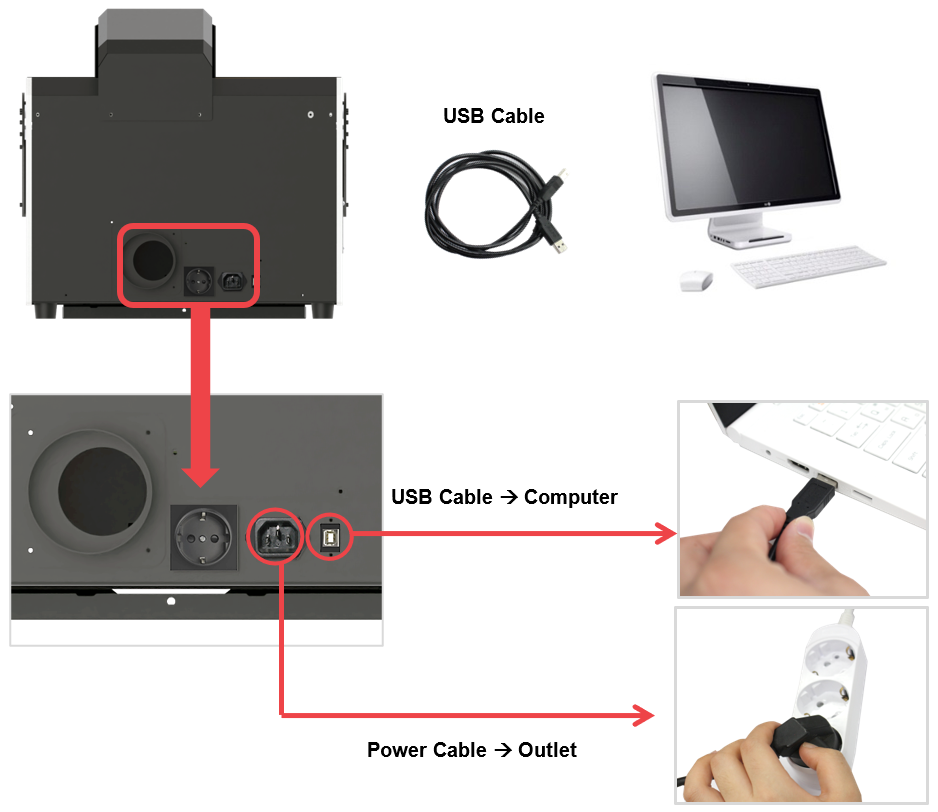
1. To start the machine, plug its power cable into a grounded outlet. ※See precautions for use for safety.
2. To connect the machine to the computer, plug in the USB cable on the back of the machine then on the computer’s USB port.
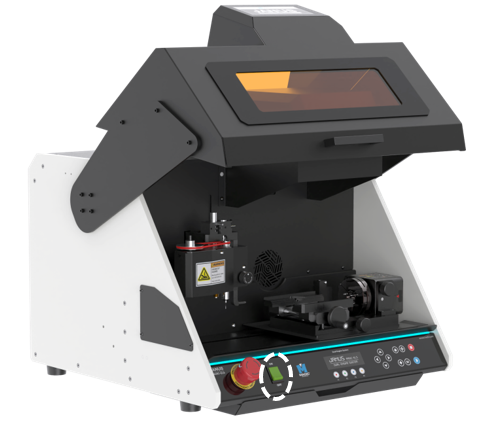
¶ Power switch
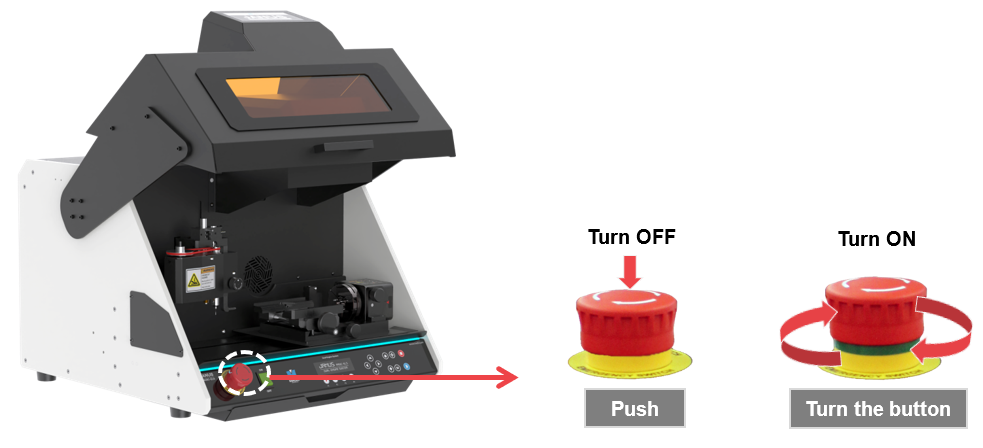
¶ Emergency Switch
※If the machine won’t turn on, check the emergency switch.
¶ 2. Program
[System requirements]
-Supported devices: PC
-Operating system: Windows 10 or higher
-Processor: Intel® Pentium® CPU or higher
-Memory: 4GB or more
[How to install the software]
1. Insert the USB into your computer`s USB port. A notification will pop-up on your screen regarding installation. ※USB is included in the package.
2. Follow the instructions below to install the software.
3. Follow the steps in order until installation is complete.
4. In case program installation won’t automatically run upon inserting the USB into your computer, go to My Computer’s USB drive then run Install program.
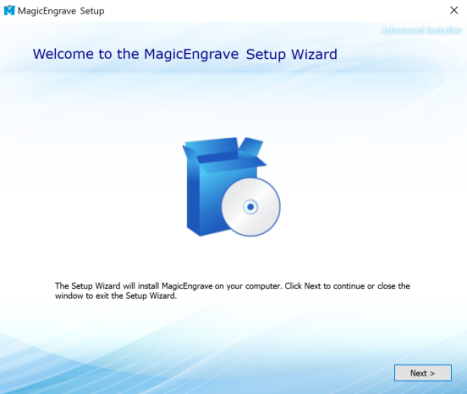
| 1. Setup wizard. |
 |
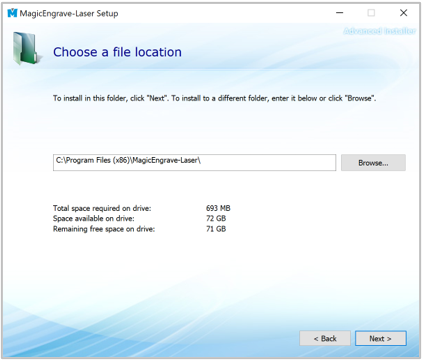
| 2. Select installation folder. |
 |
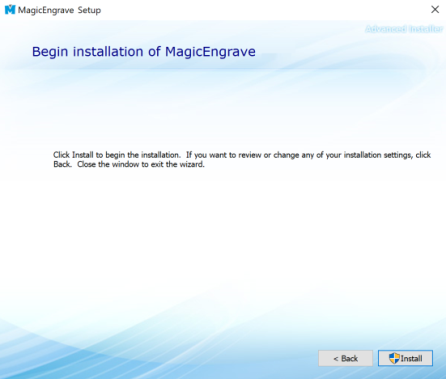
| 3. Confirm installation. |
 |
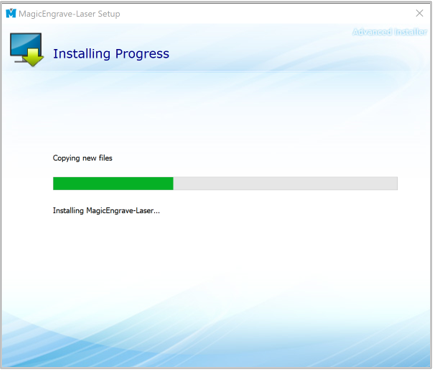
| 4. The file is copied onto the hard disk. |
 |
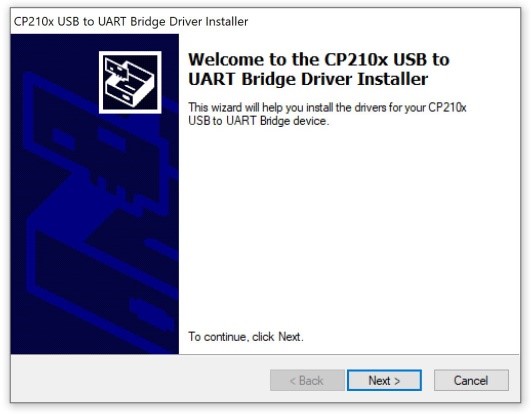
| 5. USB driver setup wizard. |
 |
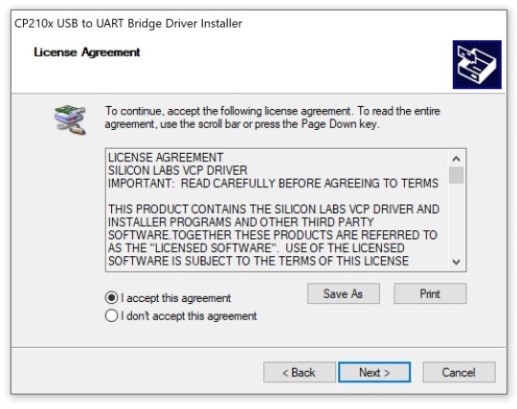
| 6. Check [I accept the agreement], then click [Next]. |
 |
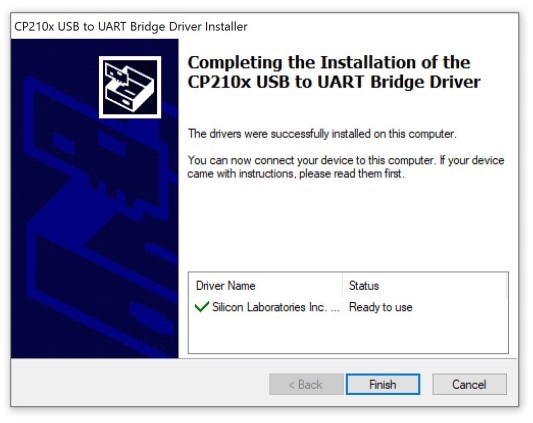
| 7. Check [Status: Ready to use], then click [Finish]. |
 |
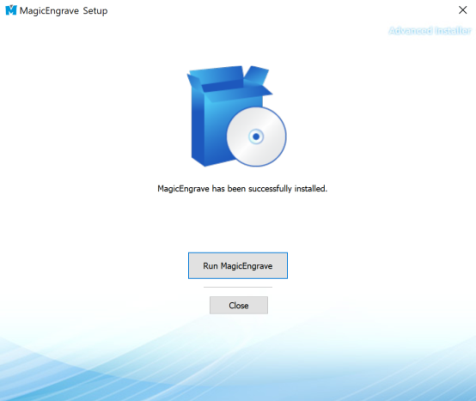
| 8. Click “Run MagicEngrave” button to complete program installation. |
 |
- Program Description
Once the installation is completed, the following icon will appear on your desktop. The description of the icon is as follows:
 |
As a design & marking software program, it features the following functions: marking design, marking option, Toolpath setting, transfer of Toolpath data. |
 |
As a machine setting program, It features the following functions: Laser focus, Guide laser, Rotary origin, Manual calibration. |
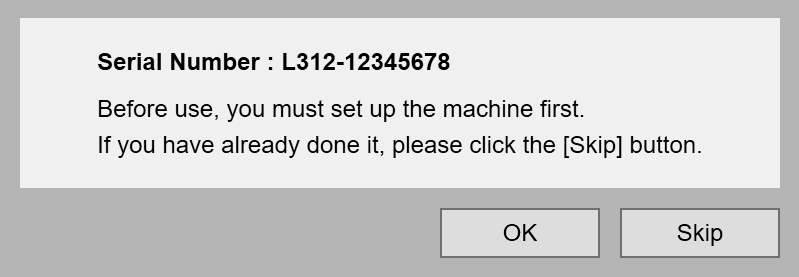
- Program serial number
After installation, the machine’s serial number is recognized and the stored set values in the server is automatically recalled and set.
-Click [OK] button to run set up automatically then the program automatically reconnects once setup is completed.
-Click [Skip] button to skip this process and the setting value will not be set automatically.
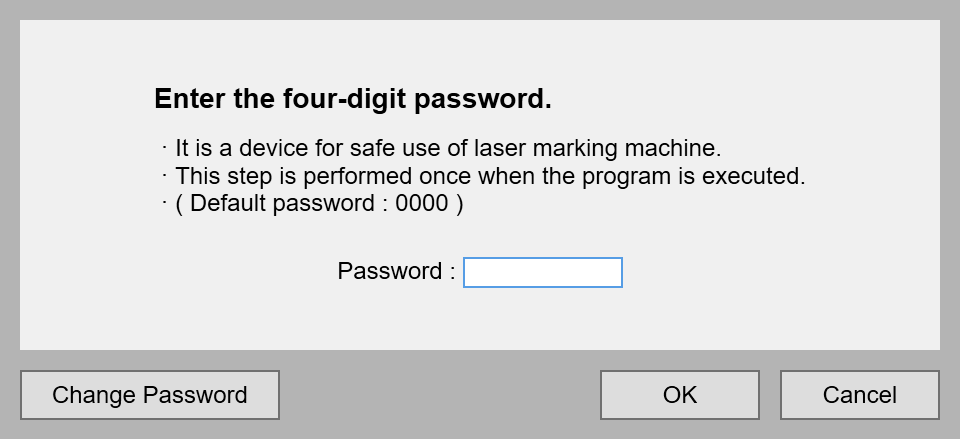
- Program password
Only administrators can use the program by using the program password.
Please make sure to change the default password.
The program default password is [0000].
¶ 3. Driver
※The driver is automatically installed upon running program installation. If the driver is not properly installed, do manual installation.
※Be sure to connect the USB cable to the machine to run program installation.
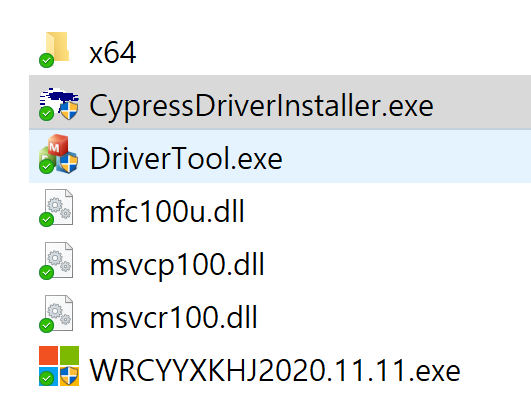
Follow the instructions below.
| 1. Run CypressDriverInstaller.exe from the Driver folder on the included USB drive. |
 |
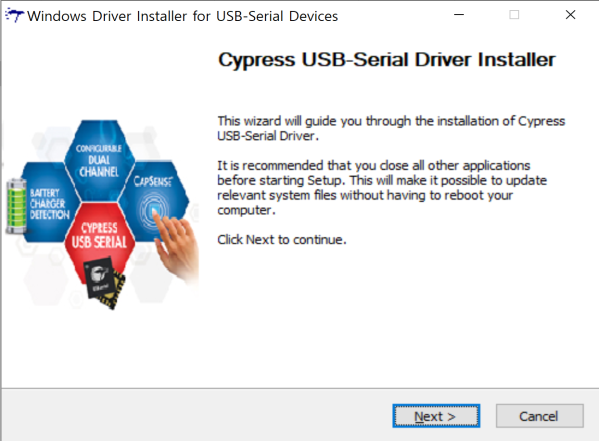
| 2. Click the [Next] button. |
 |
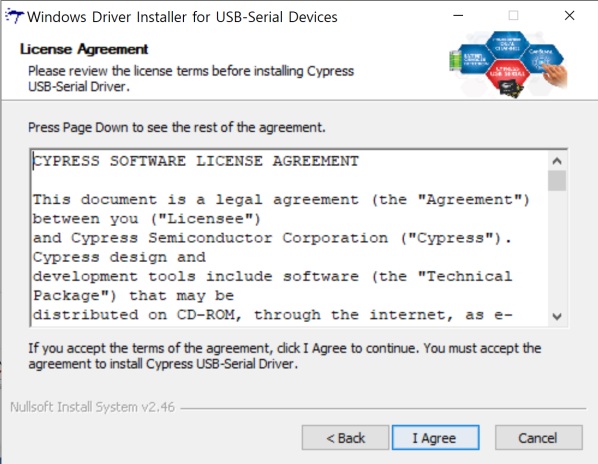
| 3. Read the license agreement. |
 |
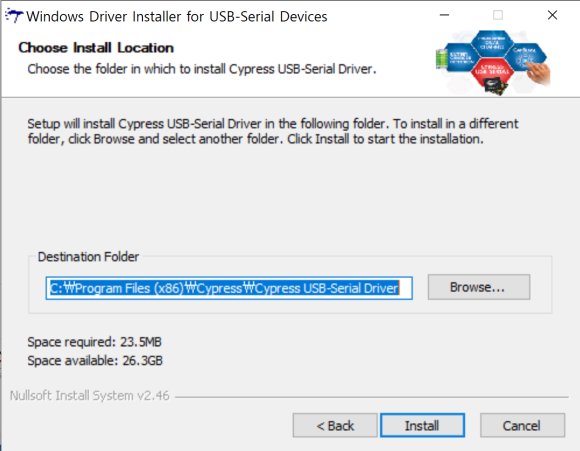
| 4. Select the installation folder, then proceed with the installation. |
 |
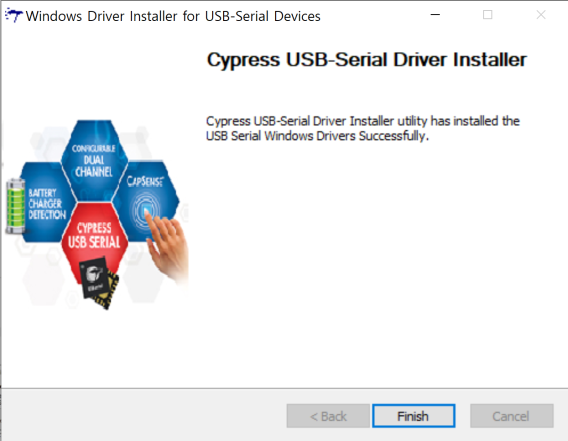
| 5. Click “Finish” button to complete program installation. |
 |
¶ 4. Blower Box
※Blower box set is sold separately.
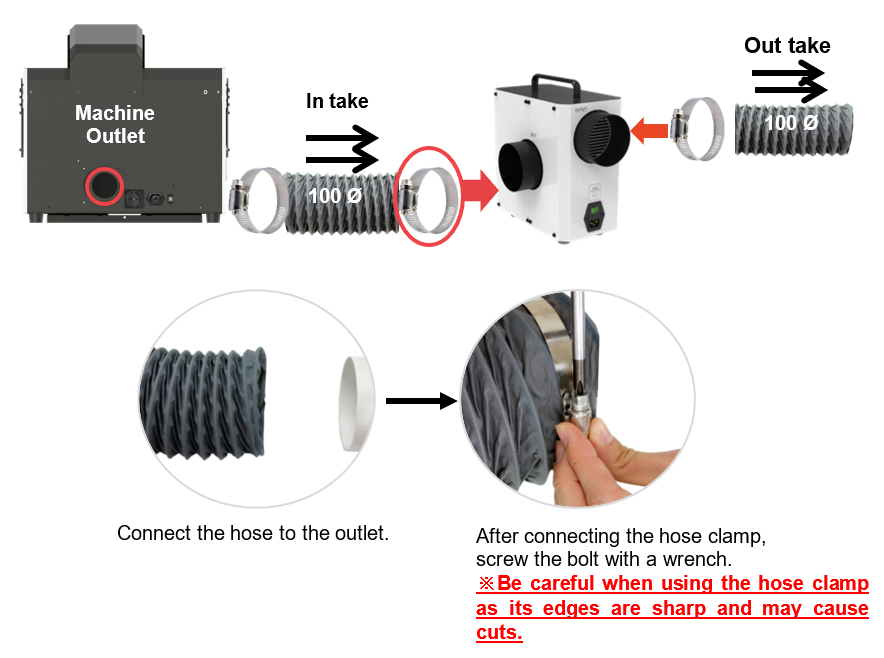
※Be careful when using the hose clamp as its edges are sharp and may cause cuts.
※Using a dust collector or blower rated over 2A may cause machine malfunction. Do not connect or use products that exceed 2A.
| Blower box (LMC-200) |
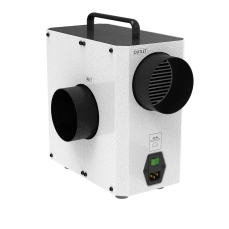 |
1EA | Exhaust for dust & smoke. |
| Blower Hose(100Ø) (LMB-09-100) |
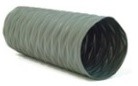 |
2EA | Blower connection hose (2.5M) |
| Hose clamp(4inch) (LMB-10-4) |
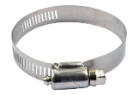 |
3EA | For connecting to blower and hose. ※ Please be careful of the cut surface of the hose clamp as it may cause injury. |
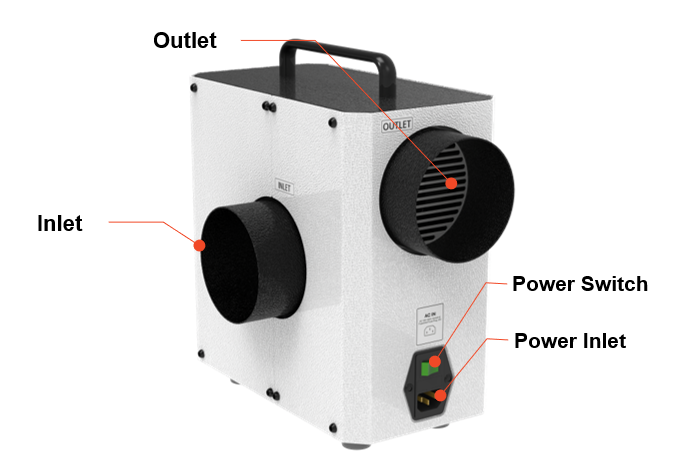
| Inlet | Connects to the duct hose to remove dust generated during processing. |
| Outlet | Connects to the duct hose to discharge dust after collection. |
| Power Switch | Turns the blower ON/OFF. |
| Power Inlet | Connects the blower to the power source. |
¶ How to install the blower box
¶ 5. External device
※Blower Power Inlet: 110~220V/2A
※Auxiliary Power Device must be used if the external blower has more than 2 Ampere.
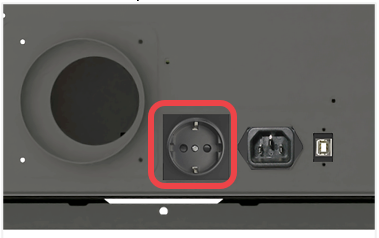
1. Connect the power to the back of the machine.
2. Click [OTHER] in [Setup Machine].
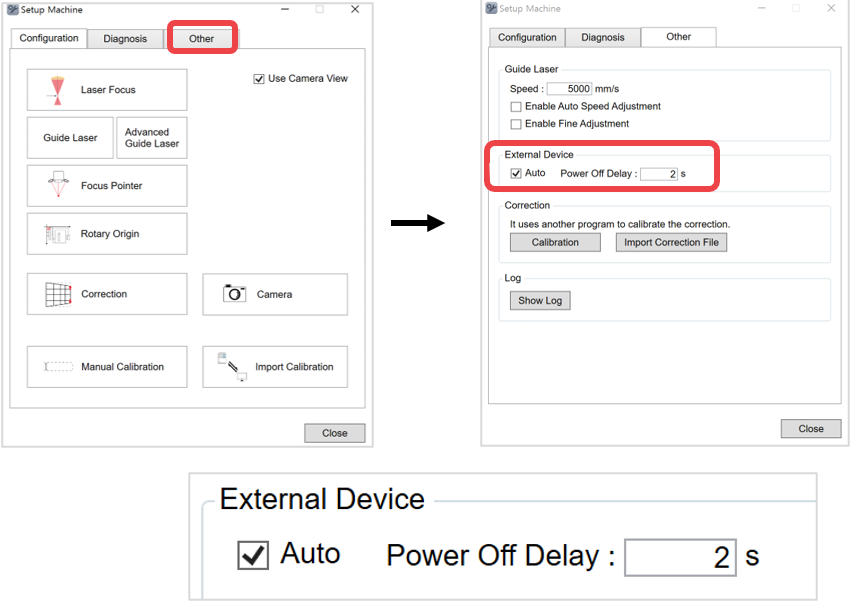
| Auto | If [Auto] checkbox is selected, the auto on/off function of the externa device is enabled during machine operation. If [Auto] checkbox is not selected, the auto control function of the external device is disabled. |
| Power Off Delay | The external device automatically turns OFF after a delay. |
¶ 6. Operation of the marking machine
JANUS performs self-diagnosis upon turning ON. During self-diagnosis, the machine checks the following in order:
¶ Self-diagnose procedures when the system is turned on
- If an axis is detected by a sensor, the machine moves that axis away from the detection area.
- Checks probe sensor and returns to the origin point
- Checks laser head Z-axis sensor and returns to the recent position
- Checks the CNC head Z-axis sensor and returns to the origin point.
- Checks the CNC head Y-axis sensor and returns to the Origin point
- Checks the clamp X-axis sensor and returns to the Origin point
- Emits a confirmation sound and enters standby mode.
If no problem is found, it goes into standby mode with a confirmation sound.
¶ Marking Procedures
1. Turn on the marking machine.
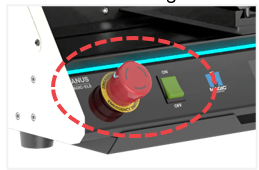
※ If the machine does not turn on, check the emergency switch.
2. Run the program to connect it to the machine.
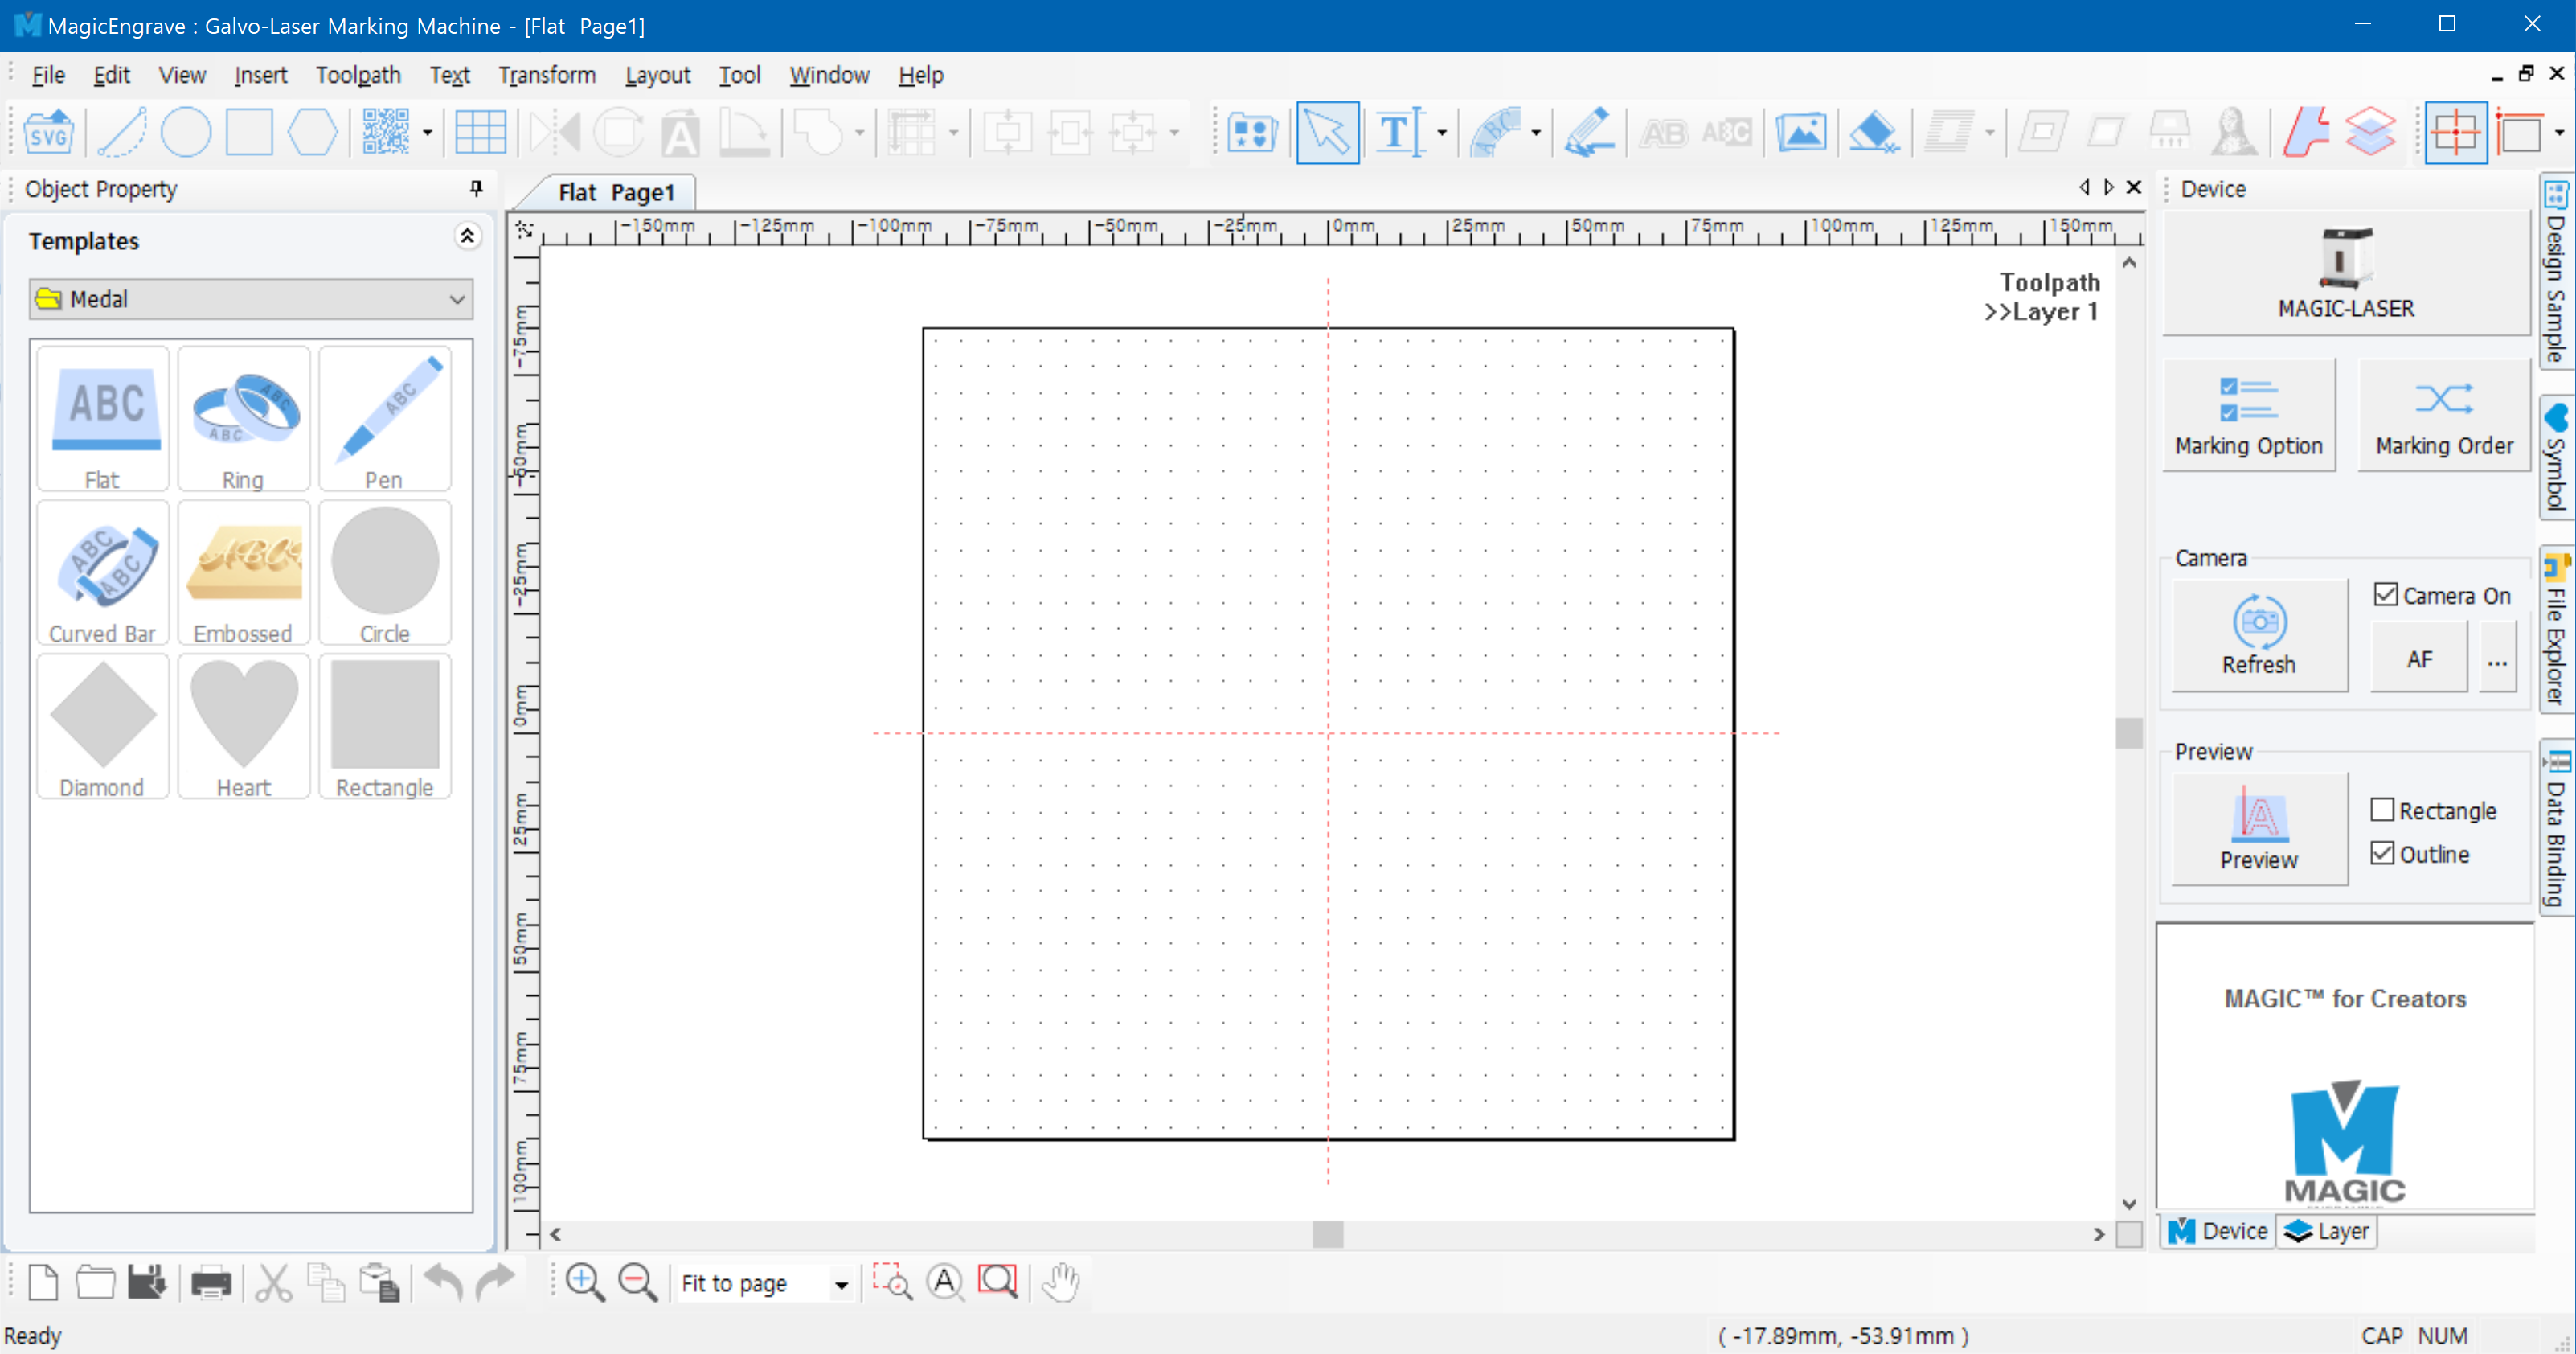
3. Place your material on the work area.
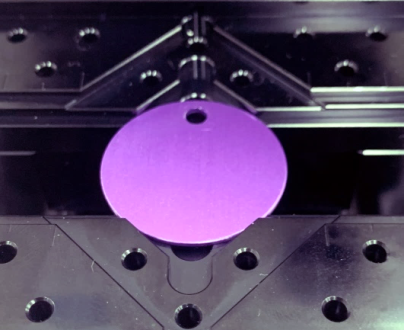
4. Press the AF button on the keypad to measure the material height. * Using the AF function is recommended.
A. Automatic: Press the AF button in the program to measure the height automatically.
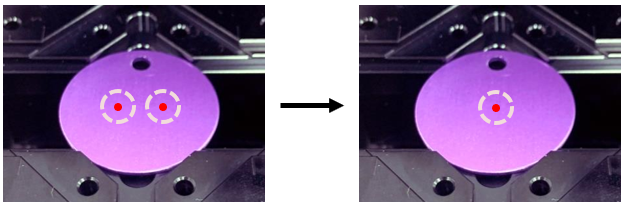
B. Manual: Press the ▼▲buttons to adjust the height until the focus pointers meet at a single point.
(※ The machine must be in laser flat mode.)
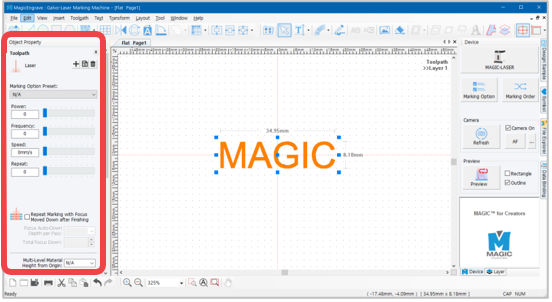
5. Make your design then create a toolpath.
A. Select CNC when generating CNC toolpaths
B. Select laser when generating laser toolpaths
6. Set the laser marking option. *Laser marking only.
7. Click the [Machine] button to send the marking data.
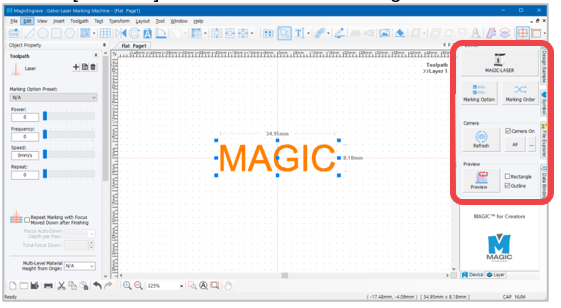
8. Click [Start] or long-press ▶ button (for more than 2 seconds) to start marking.