¶ What is the Ring Scan Feature?
The Ring Scan feature uses the built-in camera to scan the position and shape of a ring.
Based on the scanned data, the software automatically calculates and corrects the laser marking position.
With conventional rotary marking, the user must manually align the ring before engraving.
Using the Ring Scan function, however, the software determines the marking position from the scanned data, improving both positioning accuracy and repeatability for ring engraving operations.
¶ Supported Versions for Ring Scan
- Firmware v5.19 or later (Released: July 10, 2026)
- MAGIC™ Engrave Laser 2 is v3.6.14 or later (Released: July 10, 2026)
¶ Ring Scan Procedure
- Secure the ring.
- Select the ring template and enter the ring dimensions.
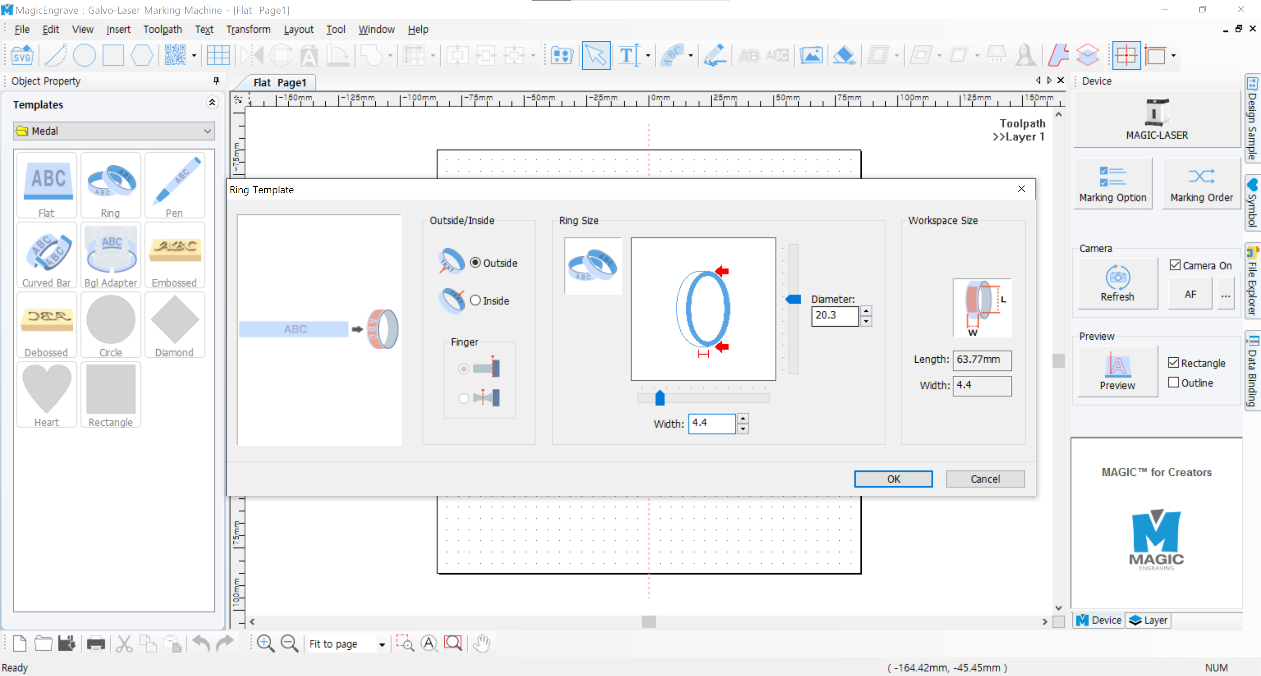
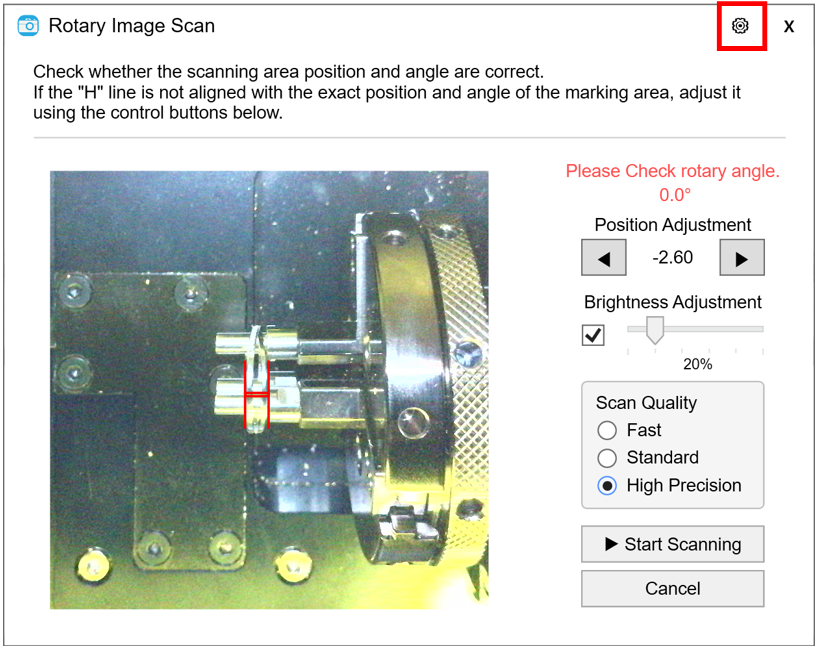
- In the Camera options, click "Refresh" button. The Rotary Image Scan window will open.
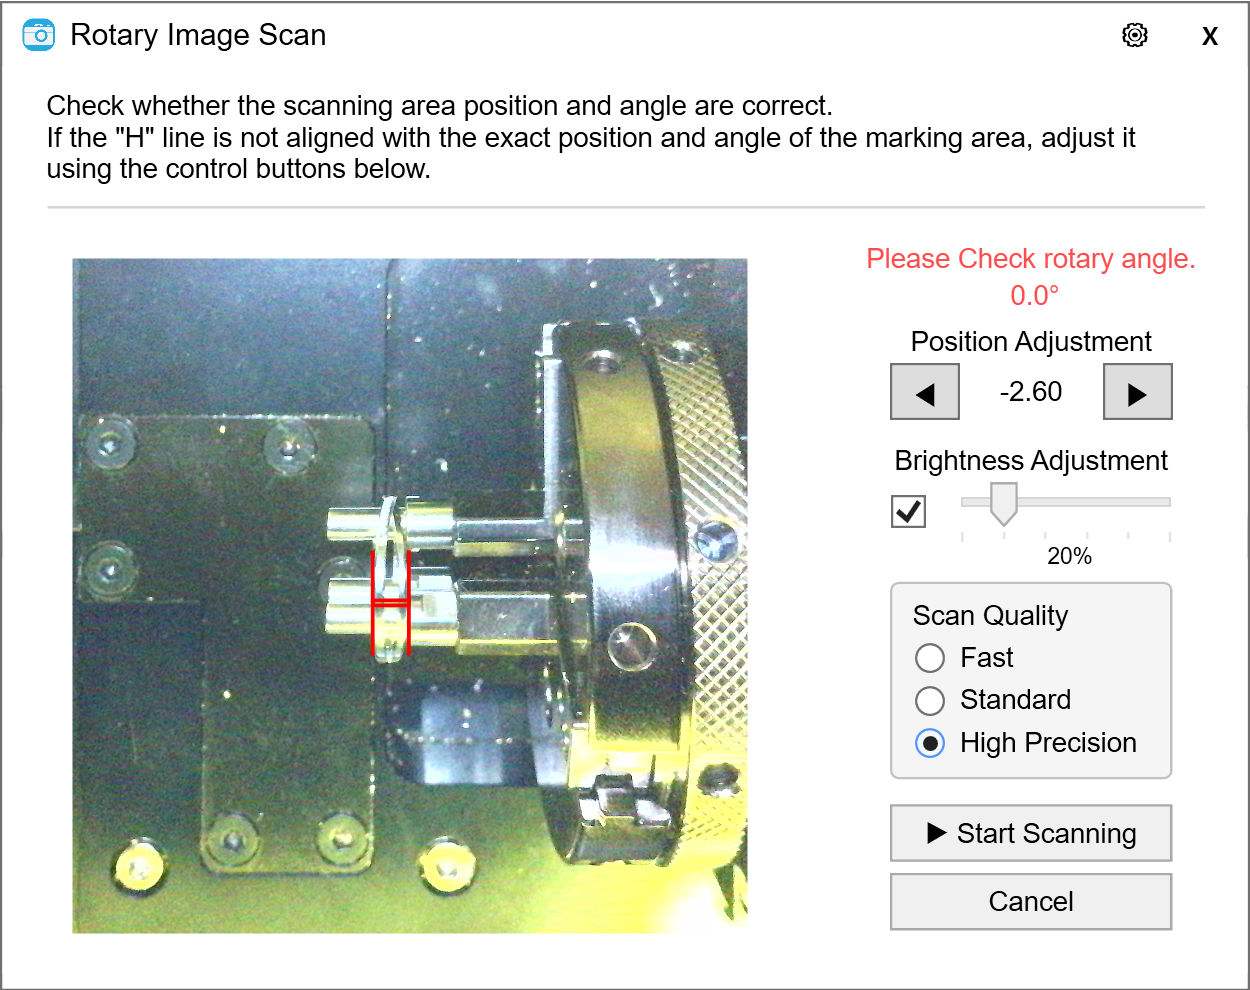
- Rotate the rotary to match the angle displayed in the software.
- Verify that the laser is properly focused on the ring surface.
- Click "Position Adjustment" button, then position the "H" marker at the area you want to scan.
- If the image is not detected correctly, adjust the Internal LED and Pointer Brightness.
- Select the scan quality. Scan time increases as the quality is set from Low to High.
- Click Start Scanning to start scanning.
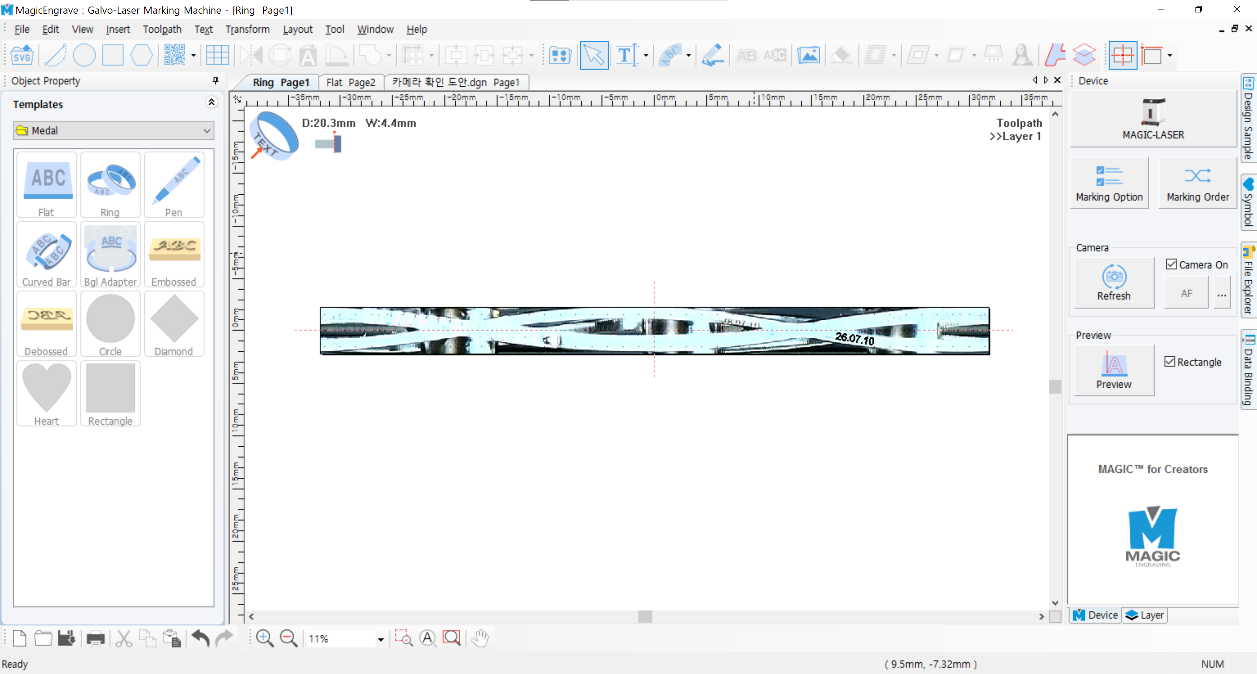
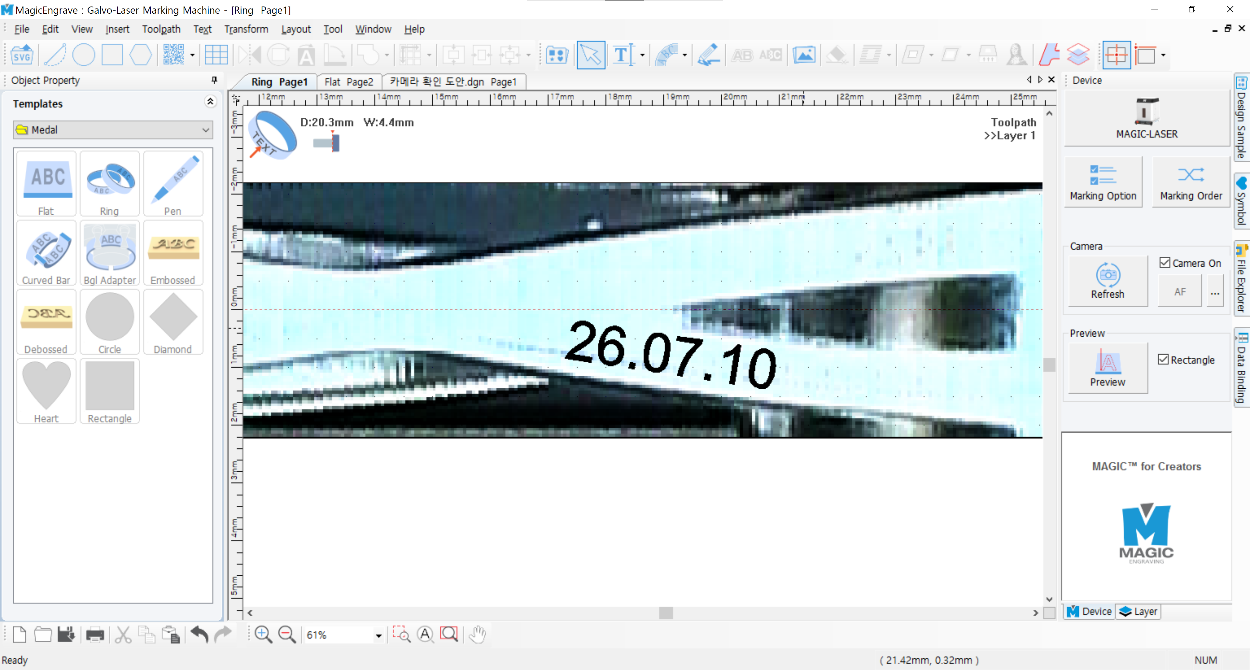
- After the scan is complete, add text or other objects at the desired position, then proceed with laser marking.
¶ Ring Scan Calibration
If the marking position is not accurate, you can correct it using the Fine Position Adjustment function.
- Click the Settings icon in the upper-right corner of the Rotary Image Scan window.
- Without moving the ring, perform the scan again.
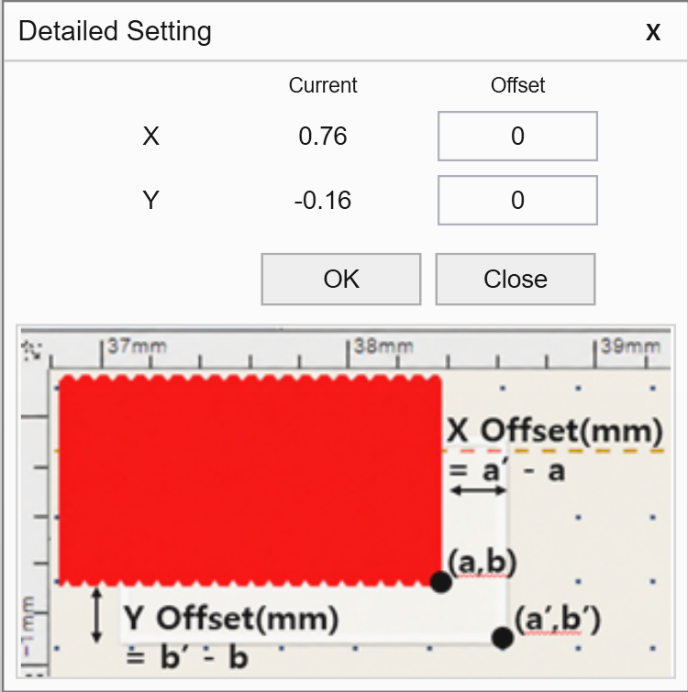
Compare the scanned position with the actual position of the ring, then enter the X and Y Offset values in the Detailed Settings window to correct the marking position.
- A. X Offset: Corrects horizontal (left/right) positioning errors in the scanned result.
- B. Y Offset: Corrects vertical (up/down) positioning errors in the scanned result.
- C. Current: Displays the currently detected position error. Enter the required correction values in the Offset fields.
- D. Calibrate the Outer Diameter scan and Inner Diameter scan separately.
- E. The Outer Diameter Offset configured during OD scanning is automatically applied to the Inner Diameter Offset during ID scanning.
¶ Keypad Operation
¶ Rotary Scan Preparation Mode
In Rotary Scan Preparation Mode, you can adjust the ring position and lighting before starting the scan.
| Key | Operation |
| FRONT / REAR | Rotate the A-axis |
| LEFT / RIGHT | Move the X-axis of the vise |
| UP/DOWN | Move the Z-axis |
| F1 | Adjust the Laser Pointer Brightness |
| F2 | Turn the Head Pointer On/Off |
| F3 | Adjust the Internal LED Brightness |
| F4 | No function |
| START / ORG | No function |
| END / STOP | Cancel scan preparation |
¶ During Scanning
During scanning, most keypad functions are disabled to ensure safety and maintain scan stability.
| Key | Operration |
| END / STOP | Stop scanning |
| All other keys | No function |
¶ Precautions
Before scanning, make sure the laser is properly focused on the ring surface.
Incorrect focus may significantly reduce the accuracy of both the scan and the marking position.
For Inner Diameter scanning, adjust the rotary angle before setting the laser focus.
Enter the correct ring diameter and width.
These values directly affect the accuracy of the scan result and the marking position
¶ Troubleshooting
If the system does not enter the Scan Ready Status
Check the device connection status, firmware version, and software version.
If the scanned image is unclear
Check the internal LED brightness and the reflective condition of the ring surface.
If the marking position is incorrect
First, check the laser focus. If the problem persists, perform the camera calibration again.