¶ Contents
- 1. Touch Sensor (Tool Calibration)
- 2 Laser Pointer Calibration
- 3 Saving Multi-performance Clamp Origin Position
- 4 Camera calibration
※ The machine is initially set up at the factory. Please contact your reseller first before making any changes to the settings of the machine.
※ Only carbide and diamond tools can be calibrated. Do not calibrate tools such as endmill and cutter.
※ Be sure to unlock the pressure lock when calibrating the machine. Nose, tool and material can be damaged if the head is fixed or when the pressure lock is locked.
 |
Tool change | 1. Change the tool: Short-press to change tool. 2. Probe calibration: Long-press (for more than 5 seconds) to adjust probe settings. |
|
Press the AF  button while pressing/holding the corresponding button. button while pressing/holding the corresponding button. |
|||
  |
Pointer On/Off | Laser pointer On/Off | |
 |
Pointer calibration | Set laser pointer calibration | |
 / / |
Change Origin | Current tool position | • Another position: Move to the origin • Origin: Move to a different origin (Center ↔ Left-top origin) |
 (more 3 seconds) |
Save Origin | Save the current position as the origin. | |
¶ 1. Touch Sensor (Tool Calibration)
- Place and secure the material on the clamp.
- Long-press and hold the button (for more than 5 seconds) to run probe calibration.
- Press button to lower the tool. Lower down the tool until it comes into contact the material (placed at the center of the clamp).
- Lower the tool by using buttons or loosening the fixing bolt of the tool with a wrench, or lift the material with your hand to make the tool and material come in contact as shown in the picture below.
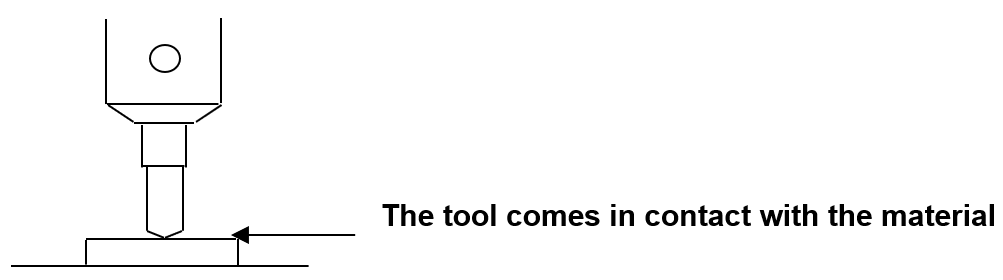
- Long-press and hold button (for more than 3 seconds) until it beeps to confirm that the setting is saved then the tool will measure the material’s height.
¶ 2 Laser Pointer Calibration
- Place and secure a flat material on the clamp.
- Press
 button while pressing/holding the button to run the laser pointer calibration.
- The tool draws a cross (+) line on the material and the laser pointer is turned on.
- Move the laser pointer to the center of the cross by using the direction keys then press button.
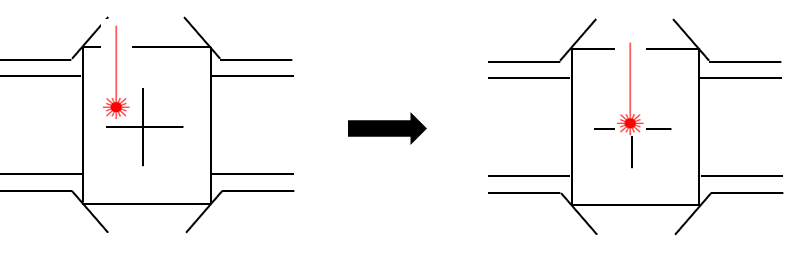
- The laser pointer moves closer to the material to calibrate the laser pointer’s origin. Move the laser pointer to the center of the cross by using the direction keys on the engraving machine then long-press and hold the button (for more than 3 seconds) until it beeps to confirm that the setting is saved.
¶ 3 Saving Multi-performance Clamp Origin Position
- Press button while pressing/holding the button to turn on the laser pointer.
- Once the laser pointer is on, use direction keys to move the pointer to the desired position on the clamp then designate the position as origin.
[Origin1]- Center
- Use the direction keys to set the laser pointer origin.
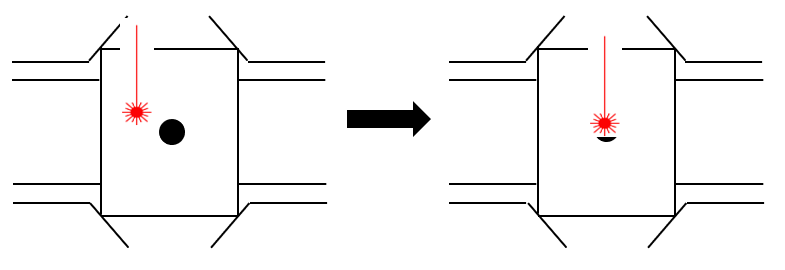
[Origin2]- Additional
-Use the direction keys to move to the position to save as the origin.
- Press button while pressing/holding the button (for more than 3 seconds) to save the current position as origin.
¶ 4 Camera calibration
| Bakelite plate (120x100x2t) |
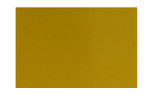 |
- Camera can be calibrated in the MagicEngrave program.
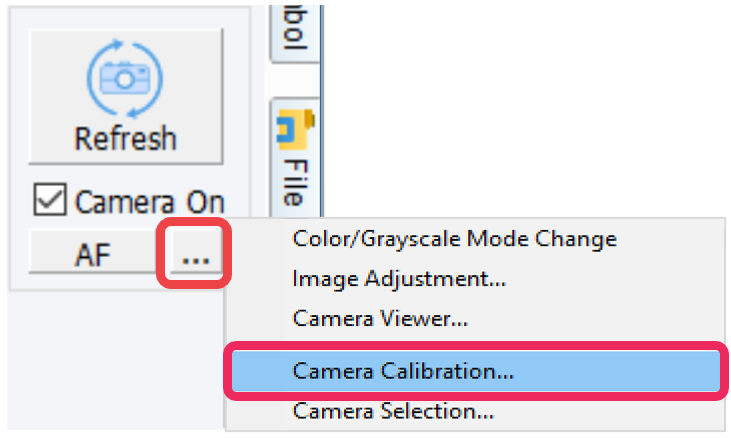
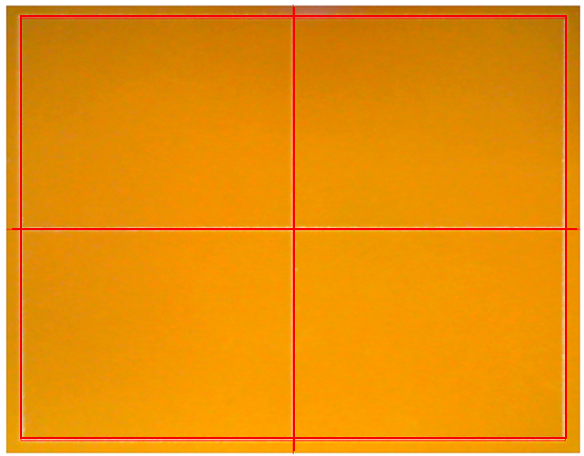
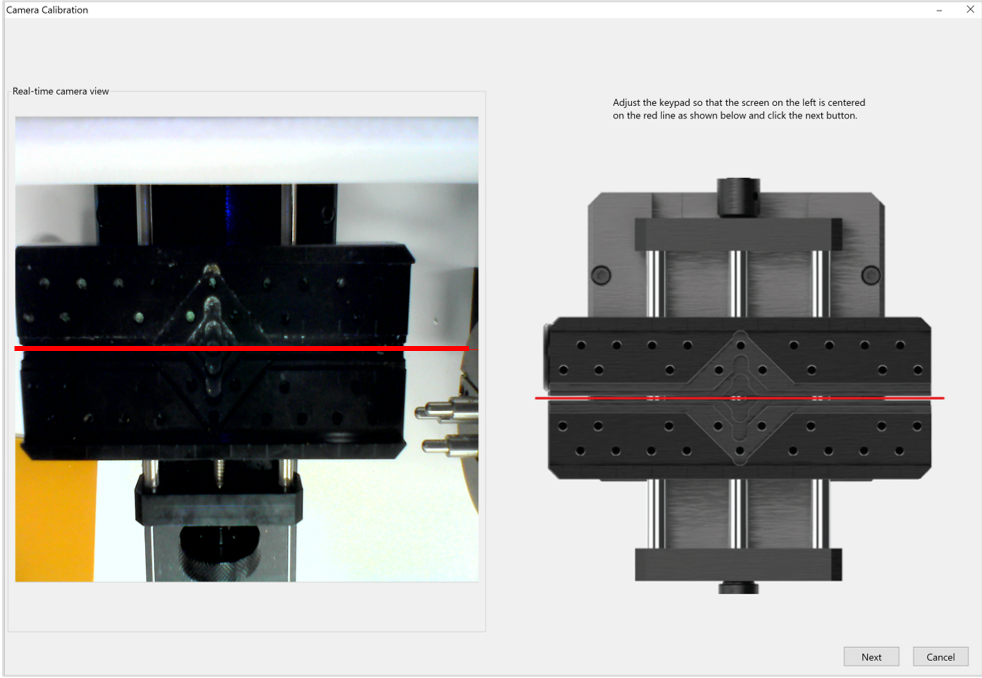
- Use the button to adjust the red line (that appears on the screen) to center of the clamp. Once the red line is adjusted to the center, click [Next].
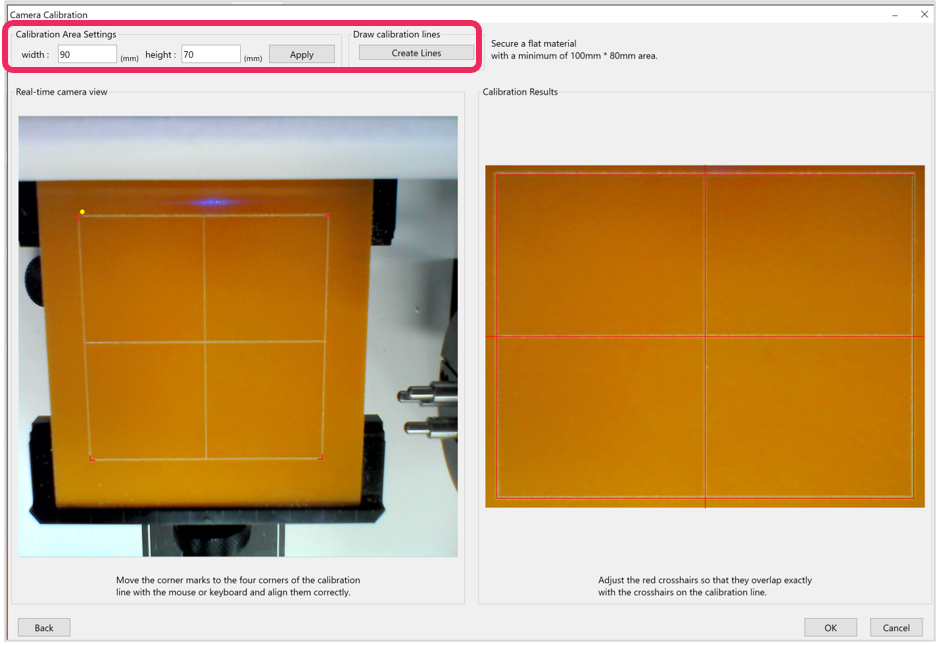
- Place and secure the bakelite to the clamp. Set the calibration area to 90 x 70mm then click [Create Line]. Check the calibration results then click [OK].
- Press and hold the button (for more than 3 seconds) until it beeps to start engraving. A rectangle will be engraved for calibration.
- Align the red corner marks to the calibration line corners with the mouse or keyboard.
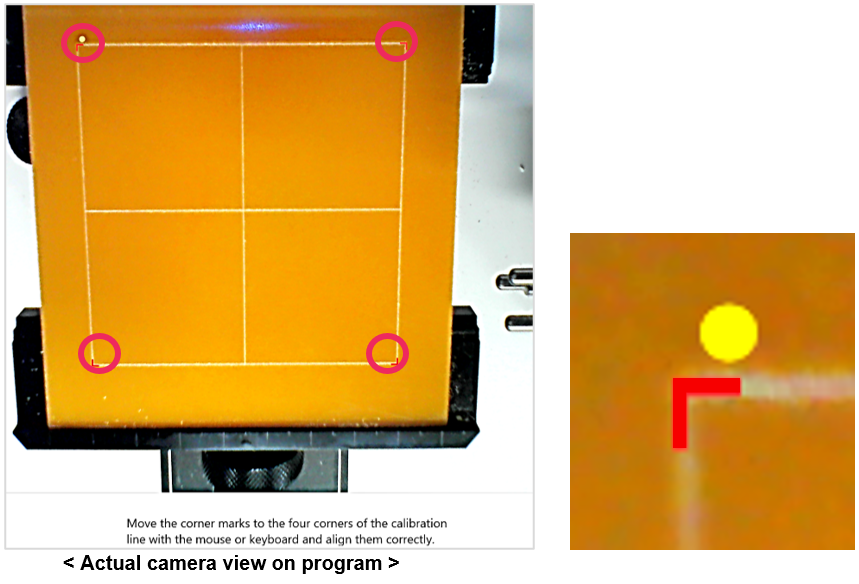
- Check the calibration results on the program. Be sure that the red lines are marked over the calibration lines. Click [OK] to complete the calibration.