[System requirements]
-Supported devices: PC
-Operating system: Windows 10 or higher
-Processor: Intel® Pentium® CPU or higher
-Memory: 4GB or more
[How to install the software]
1. Insert the USB into your computer`s USB port. A notification will pop-up on your screen regarding installation. ※USB is included in the package.
2. Follow the instructions below to install the software.
3. Follow the steps in order until installation is complete.
4. In case program installation won’t automatically run upon inserting the USB into your computer, go to My Computer’s USB drive then run Install program.
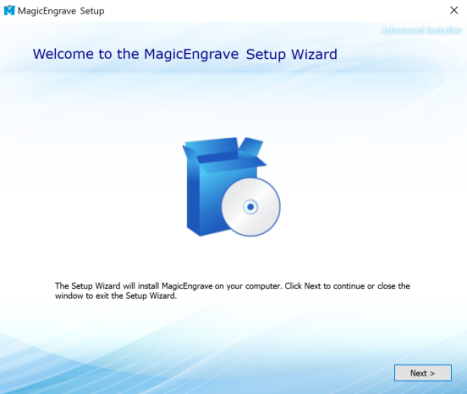
| 1. Setup wizard. |
 |
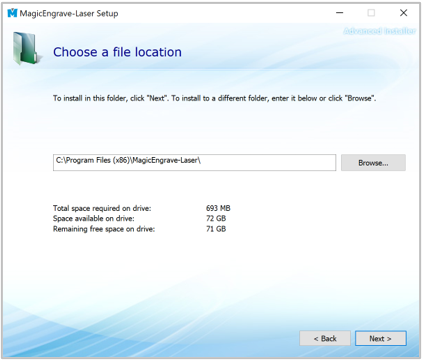
| 2. Select installation folder. |
 |
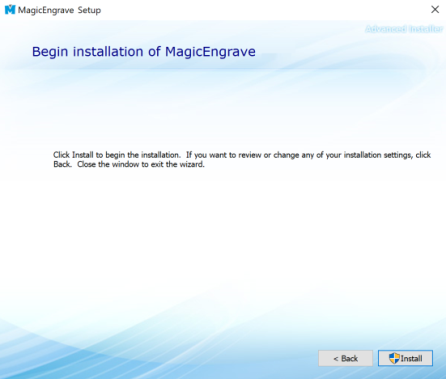
| 3. Confirm installation. |
 |
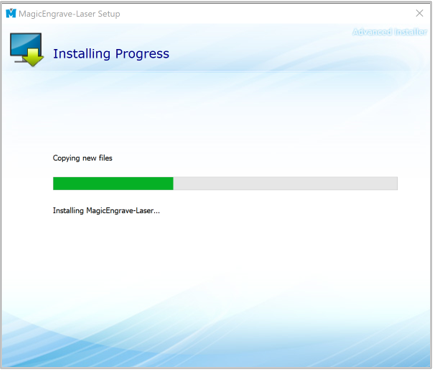
| 4. The file is copied onto the hard disk. |
 |
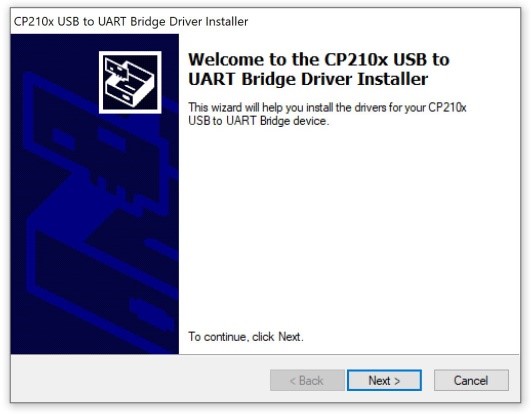
| 5. USB driver setup wizard. |
 |
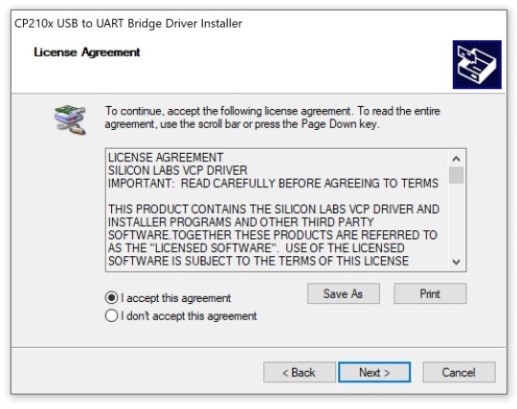
| 6. Check [I accept the agreement], then click [Next]. |
 |
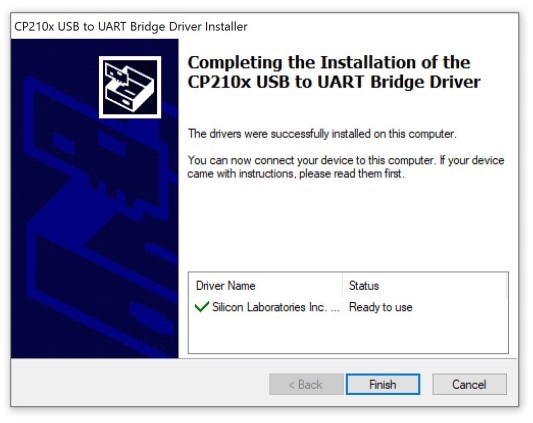
| 7. Check [Status: Ready to use], then click [Finish]. |
 |
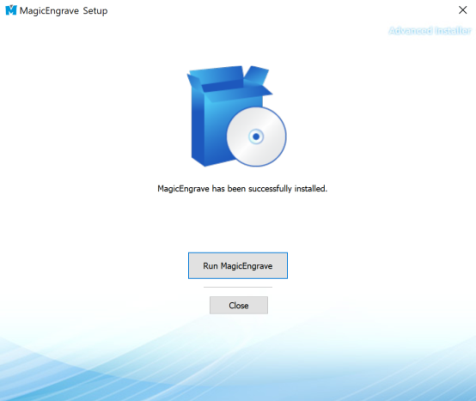
| 8. Click “Run MagicEngrave” button to complete program installation. |
 |
- Program Description
Once the installation is completed, the following icon will appear on your desktop. The description of the icon is as follows:
 |
As a design & marking software program, it features the following functions: marking design, marking option, Toolpath setting, transfer of Toolpath data. |