¶ Curved Materials Marking
When marking on materials with curved surfaces, select a curved surface template in the MagicEngrave program. Enter the height, width and depth of the material then click [OK]. Once the measurement is entered, the z-axis automatically moves along the material’s surface and marks each text.
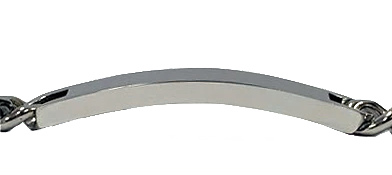
Take note that the machine only marks texts on materials with curved surfaces; other designs are not applicable.
- Select the [Curved Bar] template.
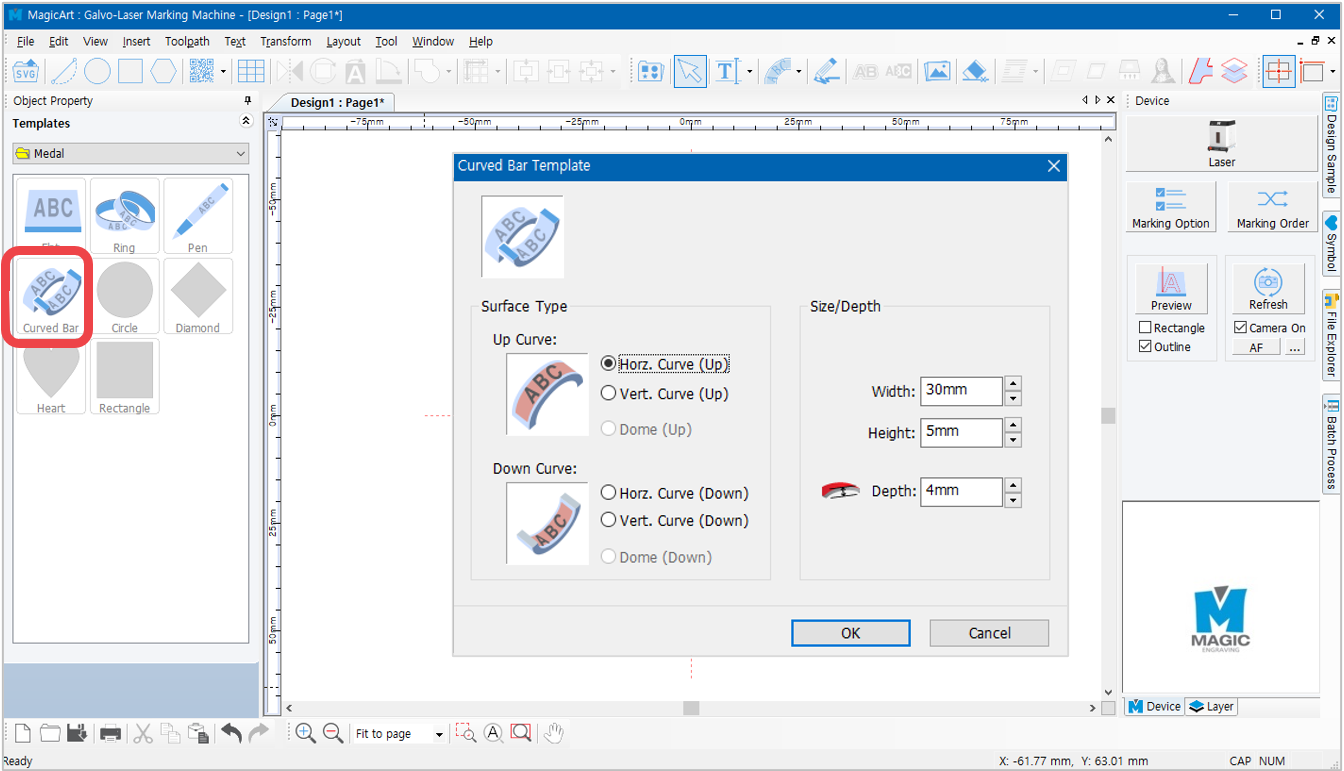
Z-axis movement is calculated based on the measurement entered. Entering incorrect measurement may result in z-axis movement error.
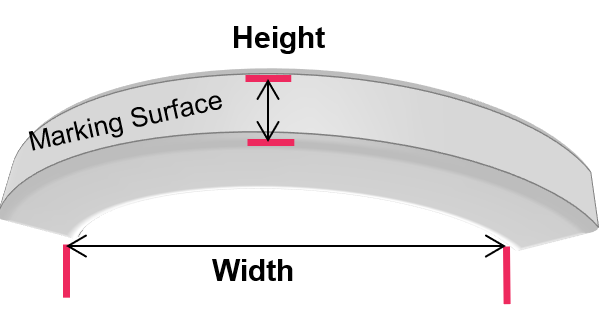
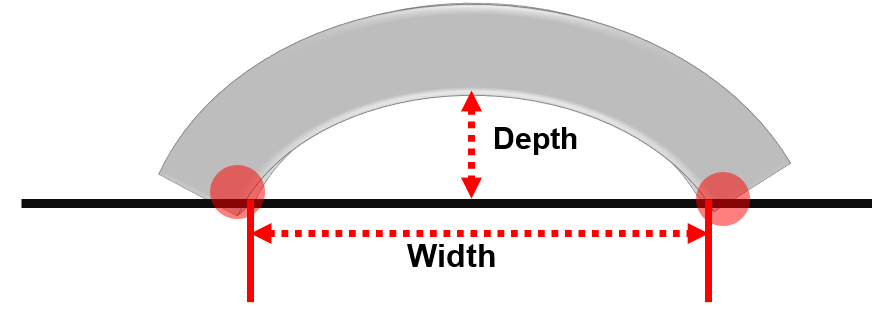
To achieve accurate measurement data, place the curved material on a flat surface then measure its height, width and depth (as shown below). The distance between the two end points must be measured based on the end points that touch the surface.
- Enter the text then create a tool path.
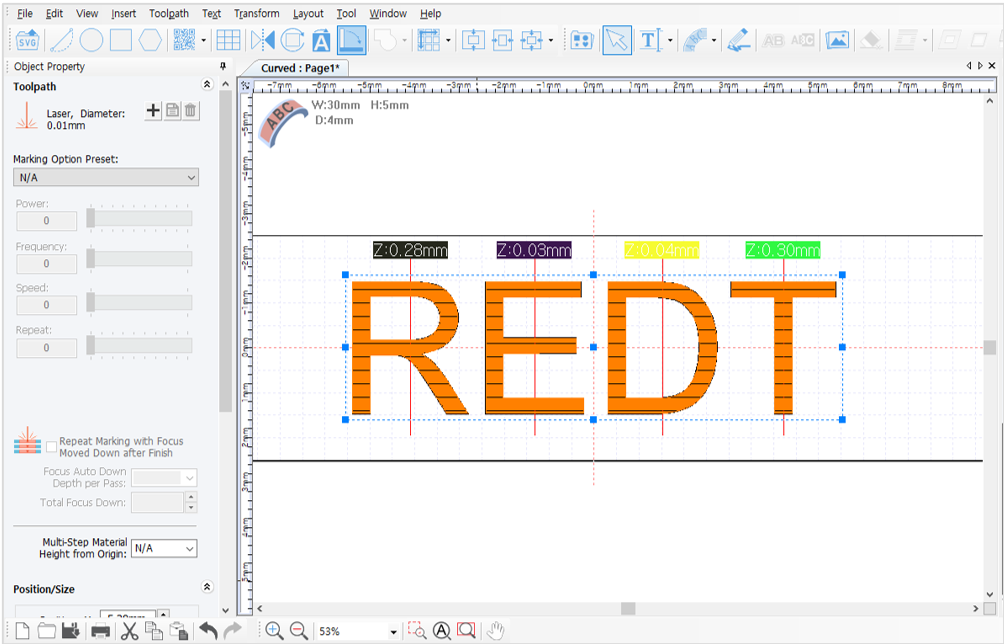
*Z-axis marking movement data is displayed on the screen (as shown below).
- Send the data to start marking.
*Z-axis automatically moves along the surface and marks each text based on the calculated angle.

¶ Shape distortion
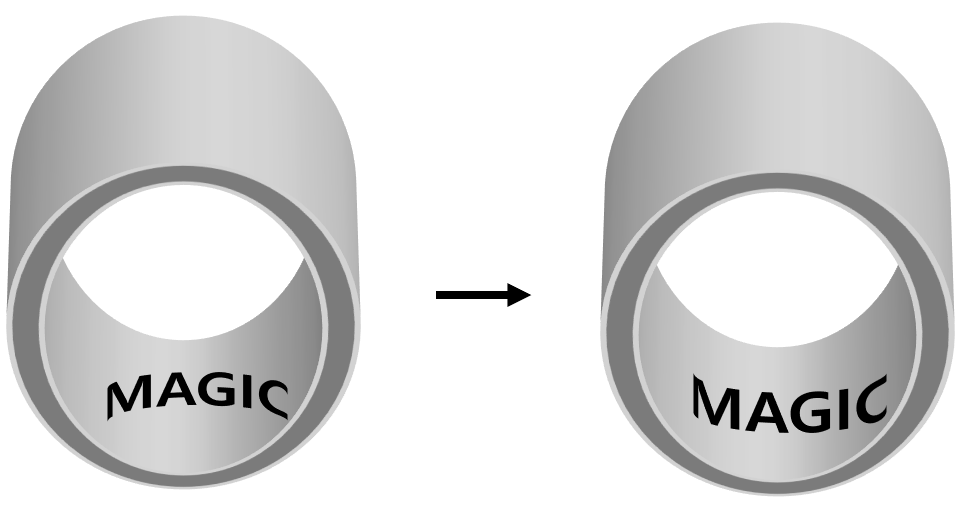
Text shape can be distorted during laser marking process. Distortion in text shape can be corrected with [Text Shape Distortion] function.
Be sure to check the guide laser and enter the distortion value.
Take note that this function applies only to texts and shape figures; not images or circular texts.
¶ Curved Text Distortion
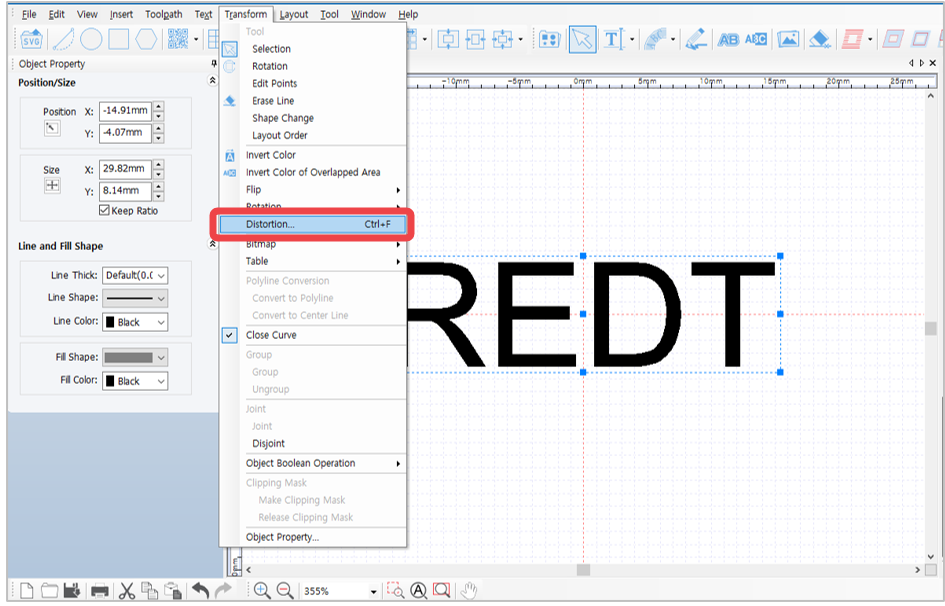
Text shape can be distorted with the use of MagicEngrave program. To create shape figures go to [Menu] → [Transform] → [Distortion].
¶ How to Distort Text Shape
When [Distort Shape] is clicked, the shape of each text is distorted even without converting each text object into a curved text.
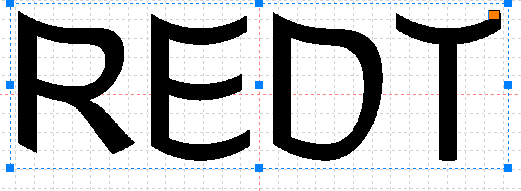
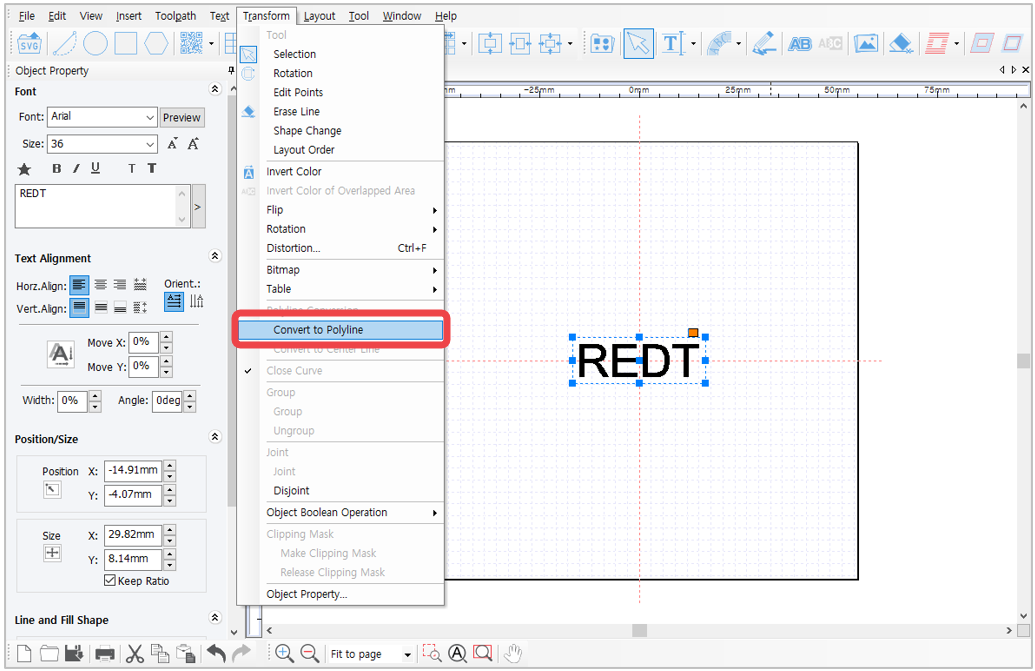
- Enter the text then click [Menu] → [Transform] → [Convert to polyline].
(Or select the text object then right-click → [Convert to polyline])
* The text is converted into shape figure (i.e., curved text).
Editing text is not applicable once the text is transformed into figure.
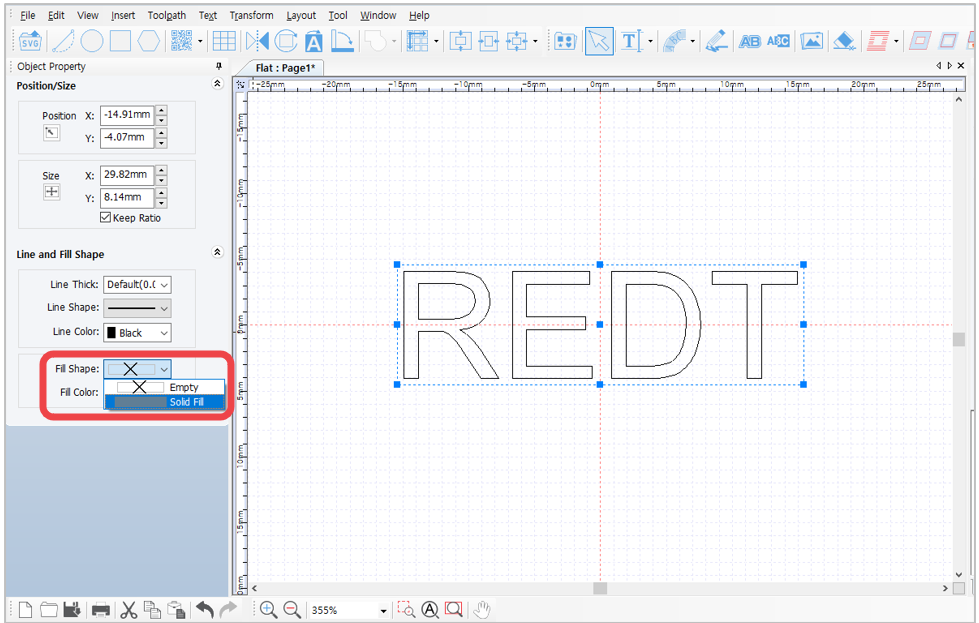
2. Once the text is converted into curved text, go to Line and Fill Shape options (in the Object Property window on the left) then change [Fill Shape] to [Solid Fill].
- Then go to [Menu], click [Transform] → [Distortion].
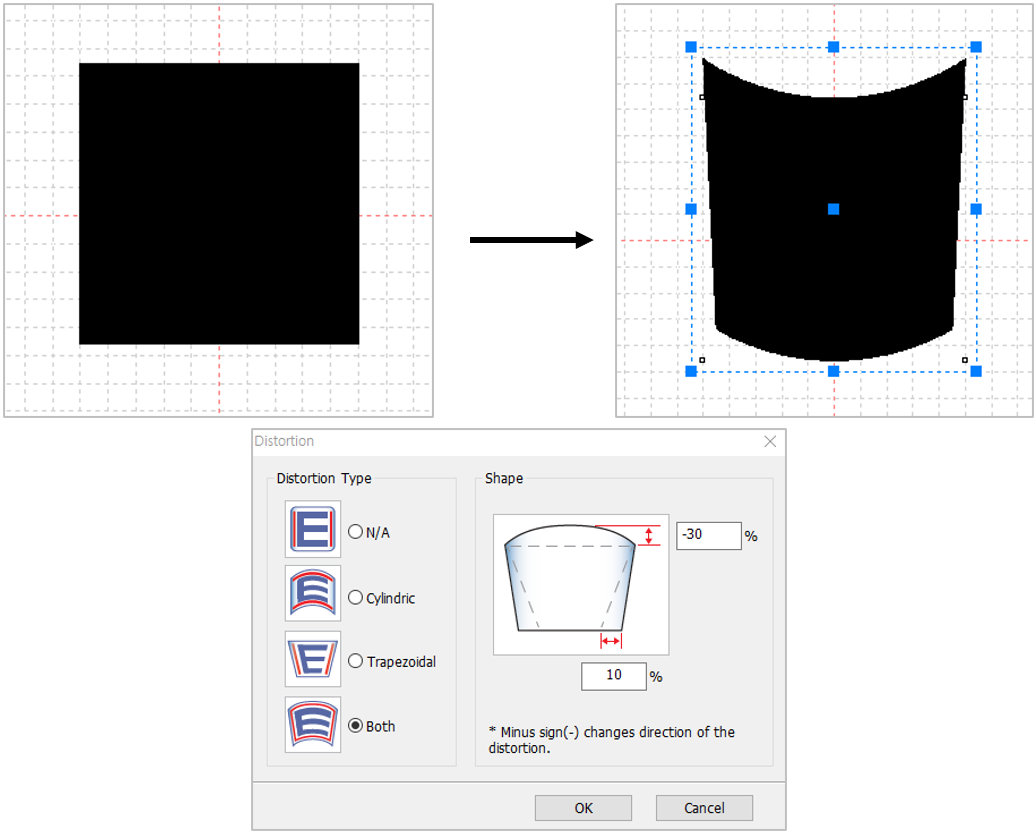
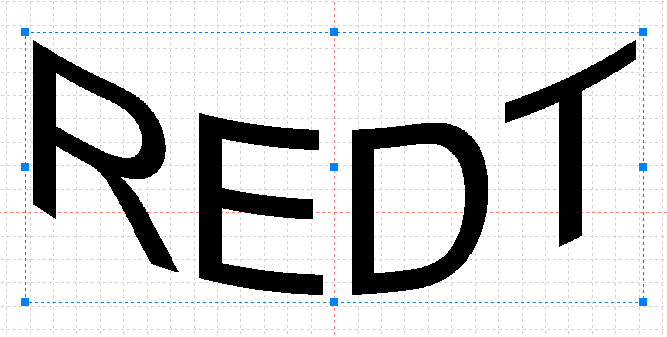
- Select a shape and enter a value. If a negative value is entered, the shape of the shape selected is reversed.
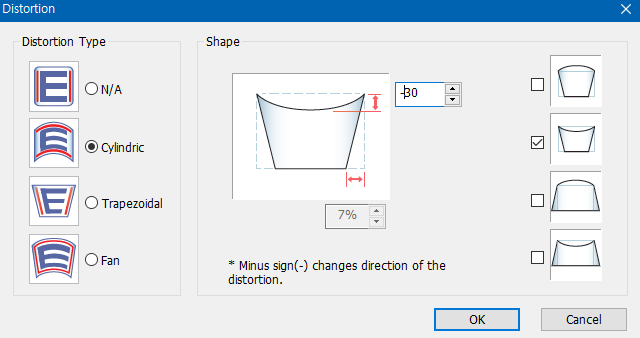
- For example, if [Cylindric] shape is selected and a negative value is entered, the shape of the text will appear reversed (as shown below).
¶ Layout of text in a circle
Texts can be arranged around a circle by using circular text object.
¶ Circular Text
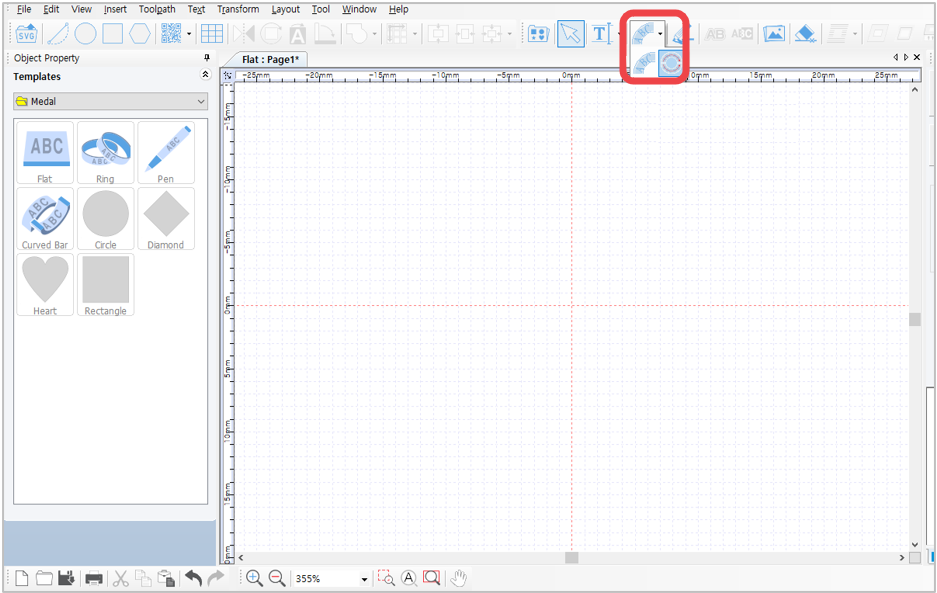
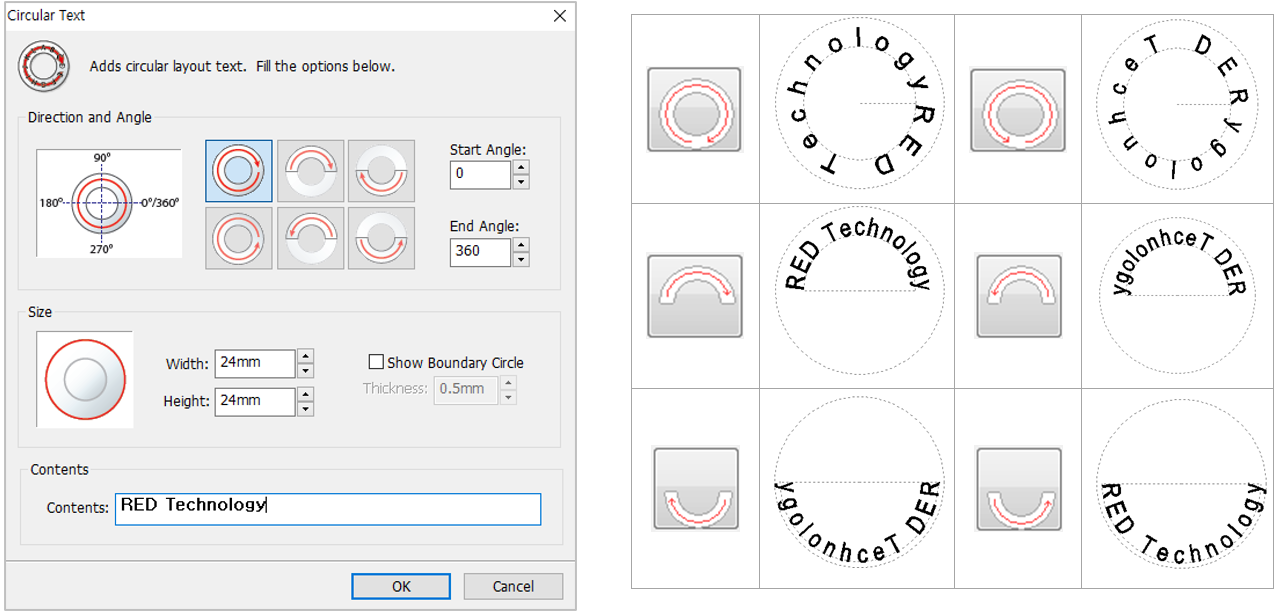
Click  button to display “Circular Text” window. Designate direction and angle, enter the size and text, then click “OK” button.
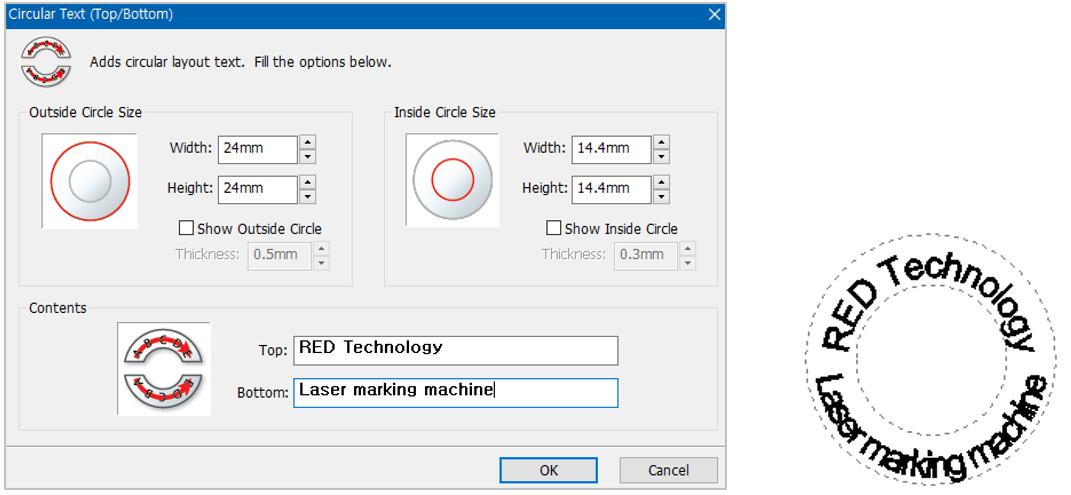
¶ Circular Text- Top/Bottom
¶ Adjusting layout angle
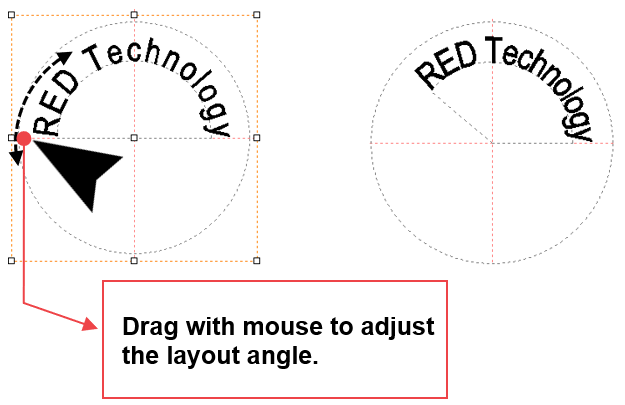
Drag the first character [R] or last character [y] in the text to adjust the angle of the layout.
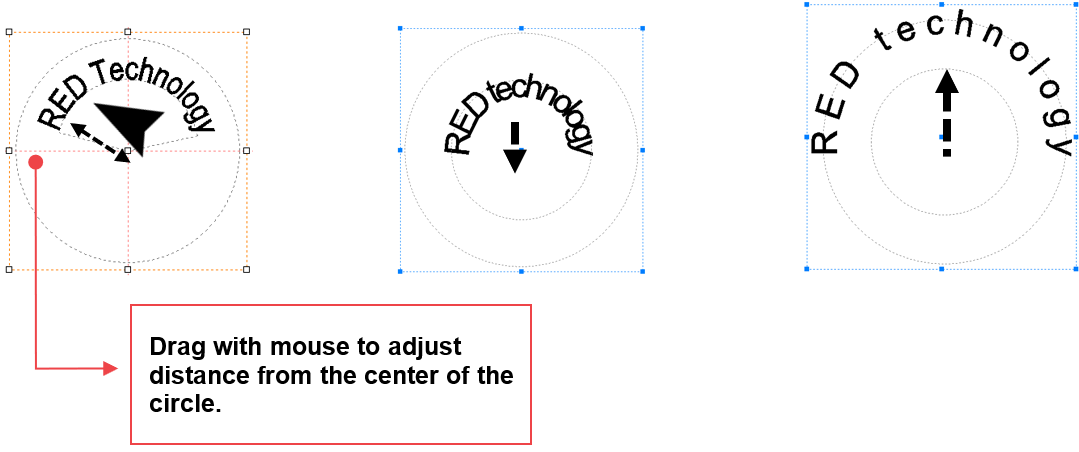
Drag other characters with the mouse to adjust the distance to the center of the circle.
¶ Layout of text in a curve
- Click the
 [Line/Curve] button.
- Left-click to display the dotted lines then designate a distance.
Drag the mouse to make a curve appear then right-click to create one.

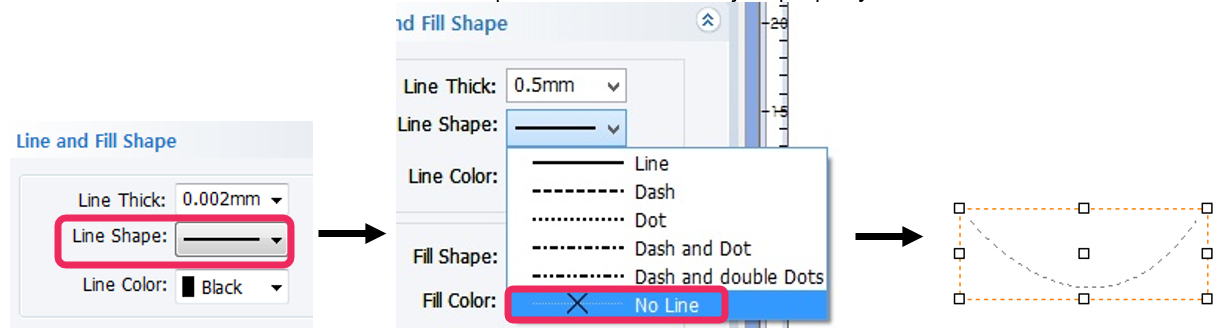
- Select “No Line” on the “Line and Fill Shape” window on the object property window.
- Click [Text Input] button then move the mouse cursor to the curve line. The cursor will change to text cursor as shown below.
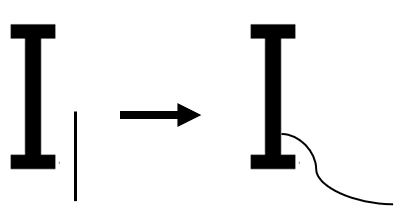
- When the cursor changes to text, click the curve line then enter the text.

Go to the L3 Prime Application➜