¶ 1. Quick Setting
Once the toolpath is created, you can set the laser marking options in the object property window then proceed to immediate marking by clicking the [Laser] button.
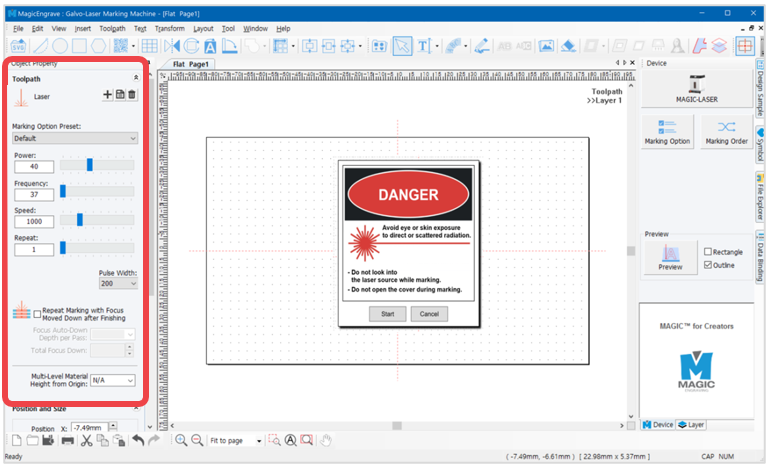
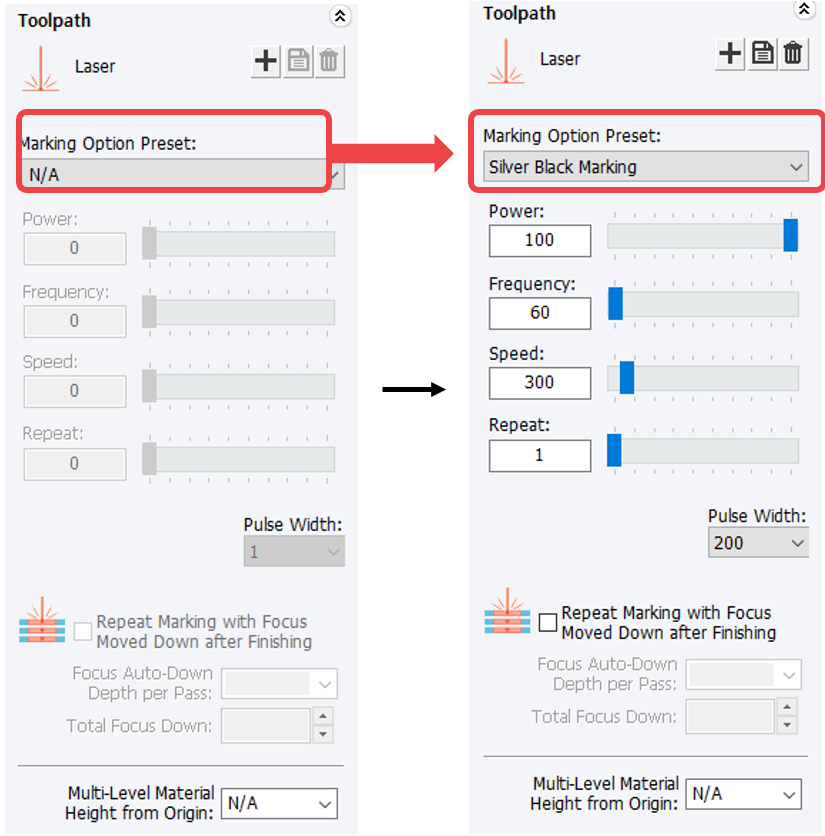
| Marking Option Preset | Selects the marking option ※See details below. |
| Power | Adjusts the laser power. |
| Frequency | Adjusts the laser frequency. |
| Speed | Adjusts the marking speed. |
| Repeat | Adjusts the marking repetition. |
| Pulse Width | Adjusts the pulse width. |
| Repeat Marking with Focus Moved Down after Finish |
Sets the marking depth when setting up Deep Marking. ex) 0.05mm per marking, 2 times - Auto lowering depth after marking :0.05mm - Z auto lowering total depth: 0.1mm |
| Multi-Level Material Height from Origin | Batch engraving on materials with multi-heights. Enter the heights from the focus surface to marking surface in the program, then the system adjusts focus according to the material heights automatically and performs engraving. ex) Marking moves up by 1mm ※See details [Multi-Height Auto Leveling Marking]. |
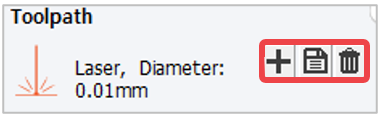
¶ Add/Edit and Save/Delete
Laser options such as power and speed can be set in advance.
Click [Edit and Save] then click the button at the bottom to change options.
¶ 2. Marking option window
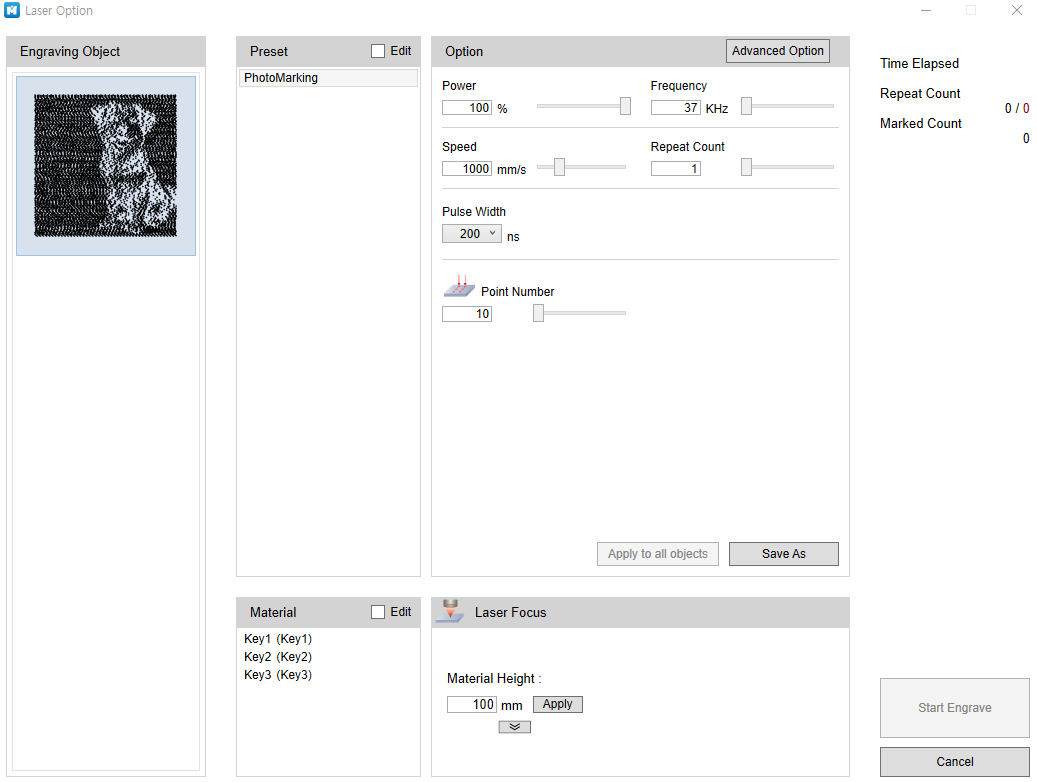
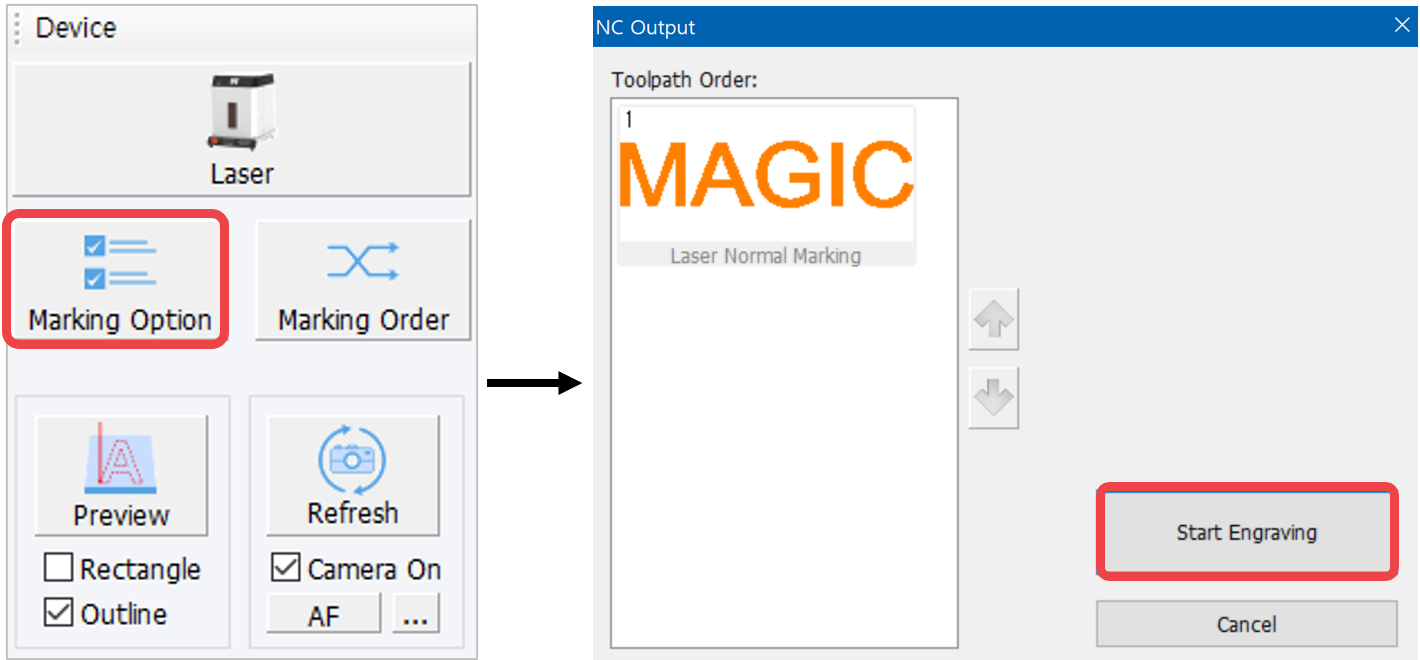
After creating the toolpath, click [Marking Option] button to set the laser option. In the NC Output window adjust the laser option then click [Start Engraving].
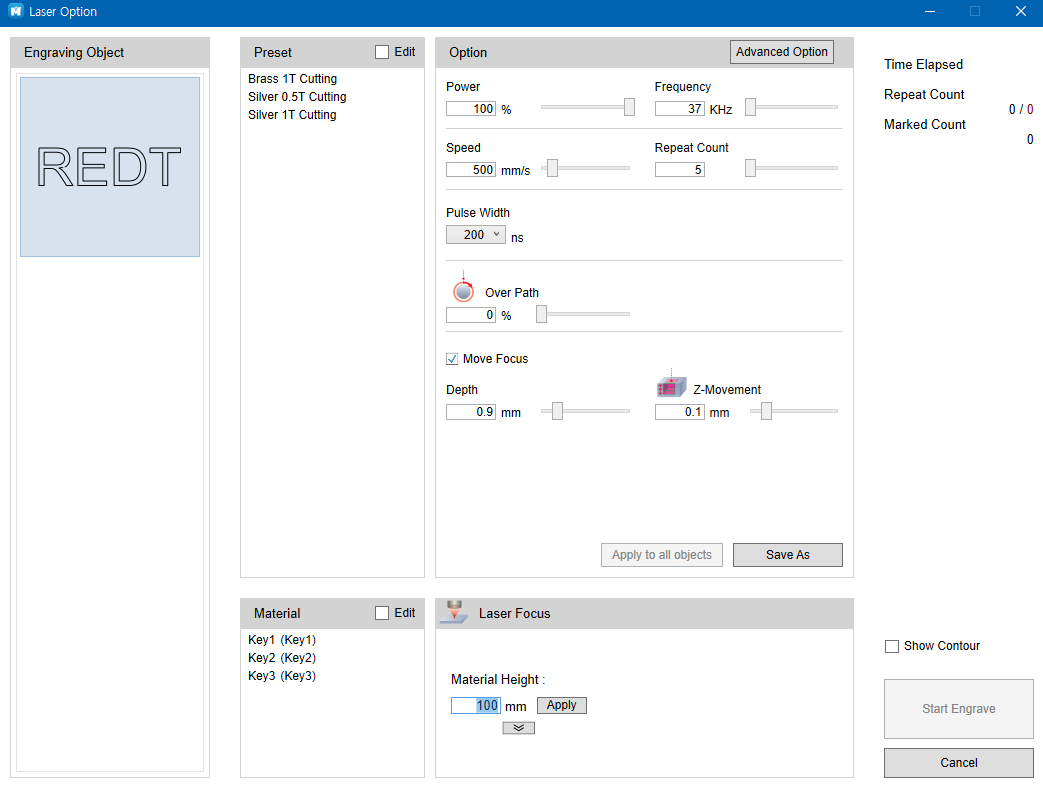
In the Laser Option window, you can select the preset engraving options and adjust the laser options. Click [Save As] to save the options.
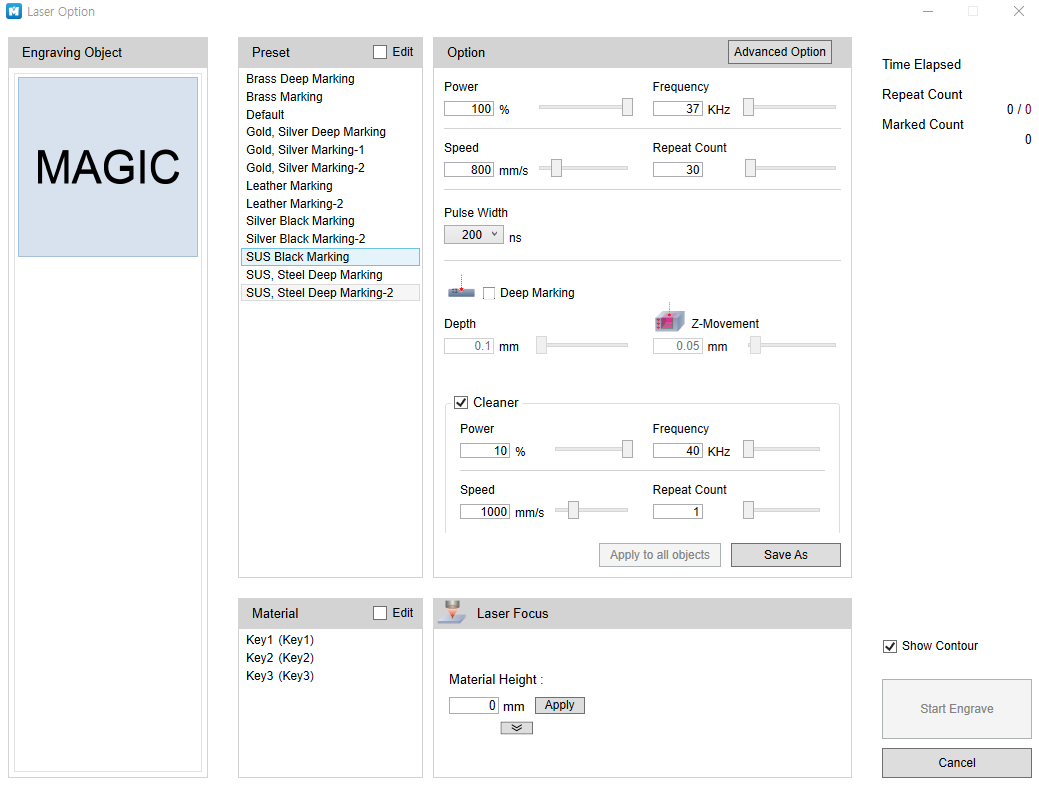
| Engraving object | Checks the object to engrave | ||
| Preset | Selects the marking option※See details below. | ||
| Option | Changes the laser option **※See details below.** | ||
| Advanced Option | Changes the advanced option | ||
| Power | Adjusts the laser power | ||
| Frequency | Adjusts the laser frequency | ||
| Speed | Adjusts the speed | ||
| Repeat Count | Adjusts the repetition | ||
| Pulse Width | Adjusts the pulse width | ||
| Deep Marking | Depth | Adjusts marking depth upon selection of Deep Marking | |
| Z-Movement | The depth specified upon selection of Deep Marking is not marked at once but is divided and adjusted by Z-axis moving unit. E.g.) Deep Marking-specified depth: In the event of 1.2mm/0.3mm Z-axis moving unit, a depth of 1.2mm is marked (0.3mm per marking, 4 times). | ||
| Cleaner | Polishes the material after marking | ||
| Material | Selects the preset marking height ※See details below | ||
| Laser Focus | Material height | Sets the height of the material. The laser focus is adjusted according to the height of the material. It can also be set by entering the material height | |
| Show Contour | Instead of checking your design on the work area, use ‘View Contour’ function to preview your design.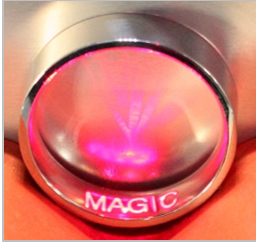 Ex) L-type clamp internal diameter Ex) L-type clamp internal diameter |
||
¶ Preset
Set the laser options in advance.
Select [Edit] then click the button at the bottom to change options.
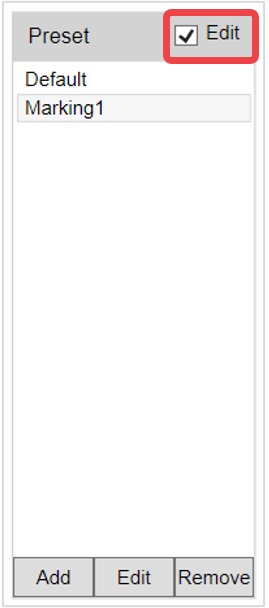
-Add
Add a new marking option.
Set the options and click [Save].
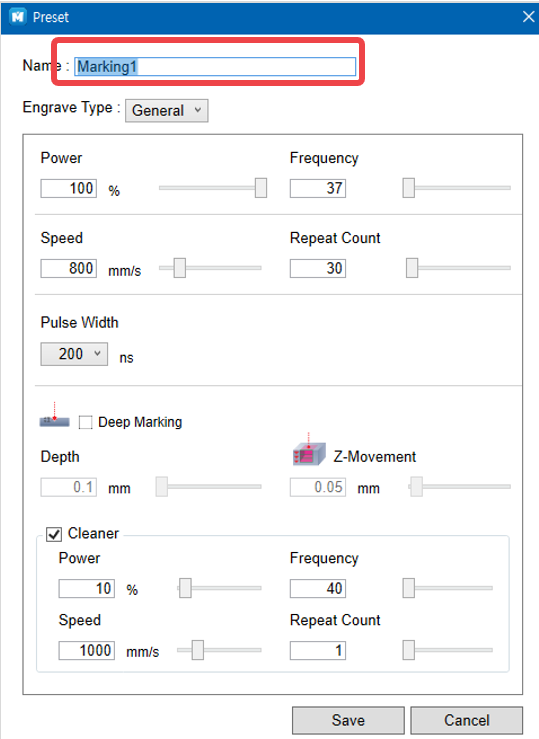
-Edit
Edit marking options.
Edit the options and click [Save].
-Remove
Remove marking options.
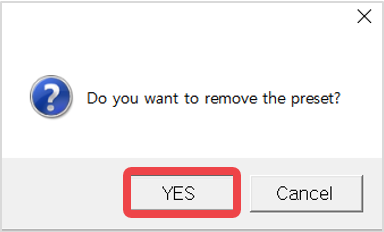
¶ Options
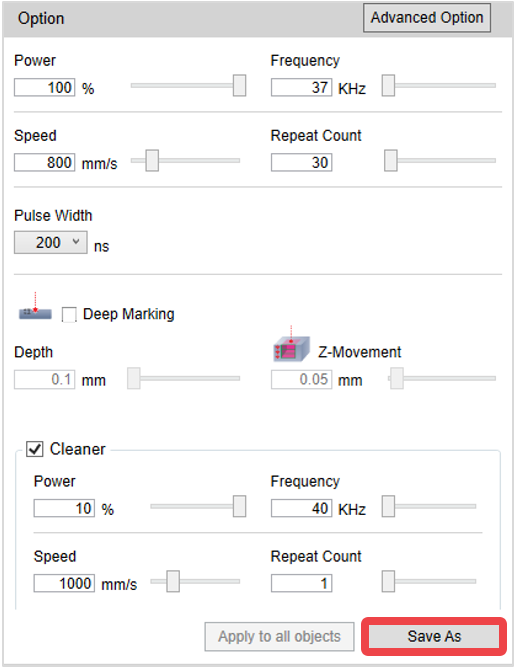
Laser options can change depending on the marking type. Select a marking type, adjust the laser options value then click [Save as].
¶ Material
The height of laser focus can be set by material.
Select [Edit] then click the button at the bottom to change options.
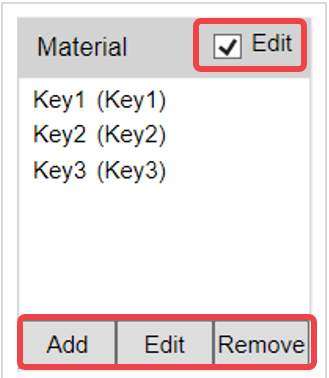
-Add
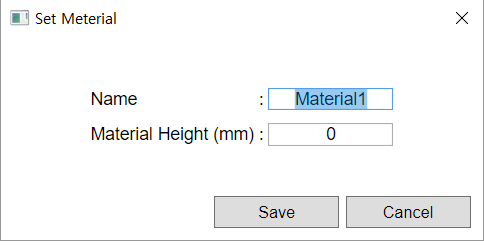
Add new material settings.
Set the name and material height and click [Save].
-Edit
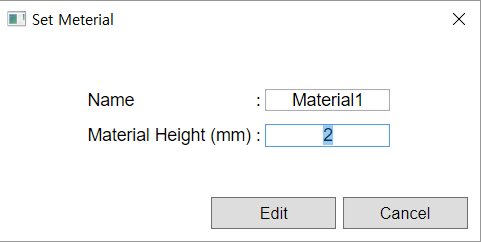
Edit material settings.
Edit the options and click [Save].
-Remove
Remove material options.
¶ Rotary Engraving Option
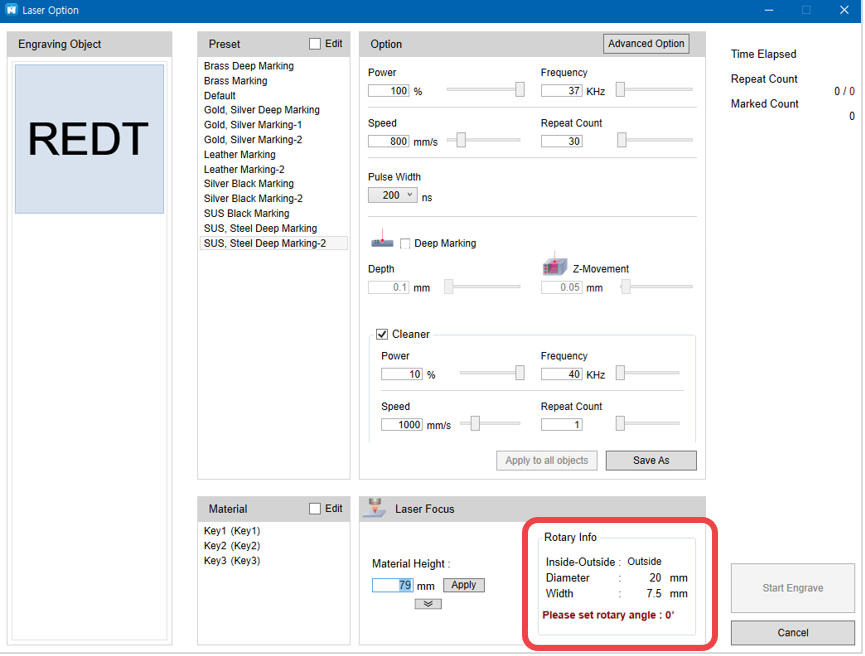
When laser marking with a rotary, the diameter and width input of your design in the MagicEngrave program is applied and displayed as it is. The laser focus is automatically set using the values entered.
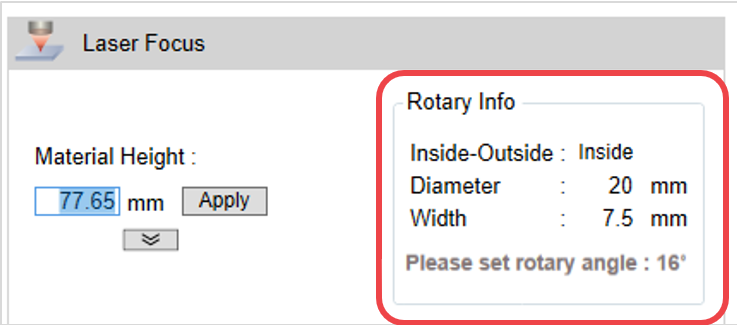
For auto-tilt rotary clamp, the device auto calculates the height based on the titled angle when marking on the inside or outside of a rounded material.
When marking on the inside of a rounded material, the device calculates the angle then sends a notification.
¶ Laser Option by Toolpath
Laser options vary depending on the Toolpath created.
-Cutting Toolpath
•Overpath: Laser cutting with the set value past the cutting start point for enhanced cutting quality.
•Move Focus: Similar to focus depth setting: designate the depth when cutting the depth little by little.
depth.
-Image Marking Toolpath
•Number of Points: For image marking, the image is laser marked with tiny points. The number of points to mark on the image at once is already set by default. You may adjust the number of points to achieve enhanced marking quality.