¶ (2) Laser
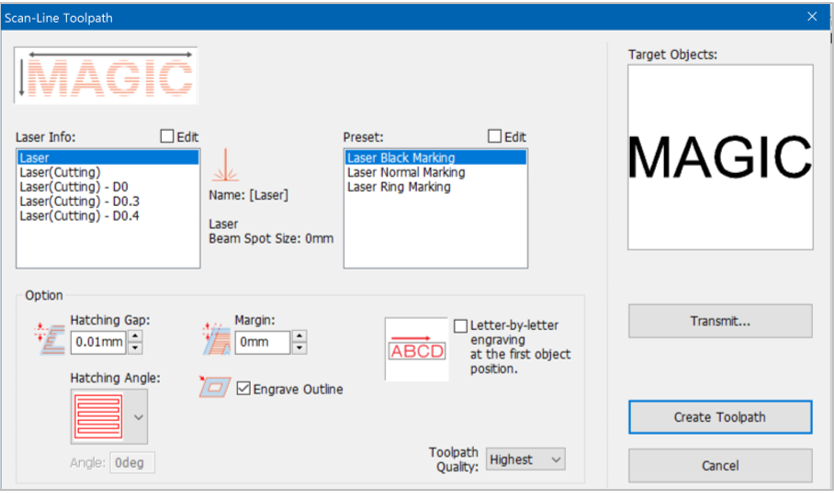
¶ 1) Laser beam
[Add/Delete/Edit]
Select the laser beam. Each engraving option value can be changed by pressing Edit or Add button.
Check “Edit” button to see Add/Delete/Edit buttons.
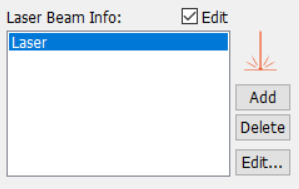
| [Add] | Designate a name for the tool to be added along with its type and other options like tip width, then click “OK” button. The tool will then be added to the tool selection list.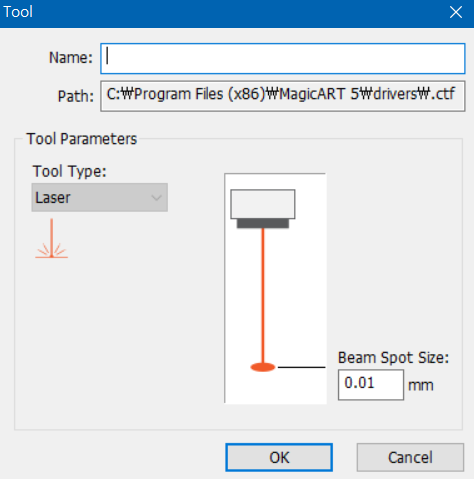 |
| [Delete] | Select a tool to be deleted then click “Delete” button to remove the tool from the list. |
| [Edit] | Select a tool to modify then click “Edit” button. Click “OK” button to save the modified value. |
¶ 2) Preset
[Add/Delete/Edit]
Hatching angle, gap and others are pre-set for each engraving option. Therefore, it is not necessary to designate hatching gap, angle and others every time and they will be automatically set with their pre-set values. Each engraving option value can be changed by pressing Edit or Add button.
Check “Edit” button to see Add/Delete/Edit buttons.
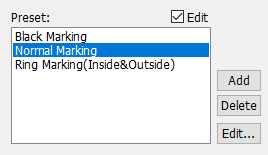
| [Add] | Designate a name for the tool to be added along with its type and other options like tip width, then click “OK” button. The tool will then be added to the tool selection list.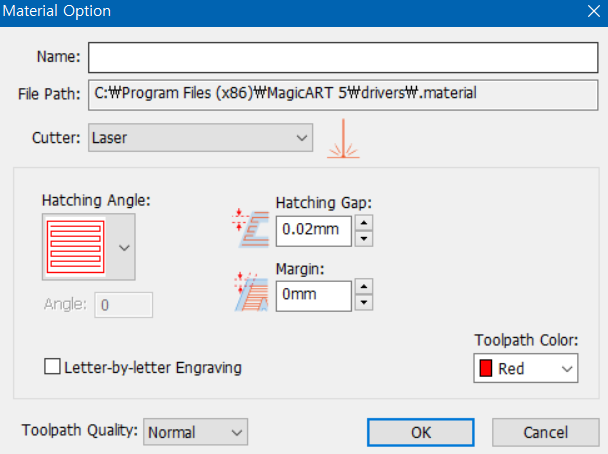 |
| [Delete] | Select a tool to be deleted then click “Delete” button to remove the tool from the list. |
| [Edit] | Select a tool to modify then click “Edit” button. Click “OK” button to save the modified value. |
[Option]
| Hatching gap | Designate hatching gap.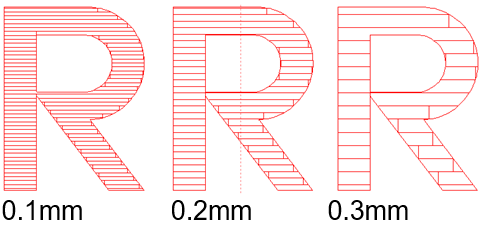 |
| Margin | Designate a margin between object outline and toolpath.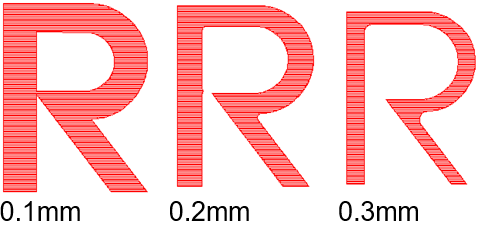 |
| Direction | The following hatch lines are applied to hatching toolpath only: : A tool path is created in the horizontal directions : A tool path is created in the horizontal directions  : A tool path is created in the vertical directions : A tool path is created in the vertical directions  : A tool path is created in the left diagonal directions : A tool path is created in the left diagonal directions  : A tool path is created in the right diagonal directions : A tool path is created in the right diagonal directions  : A tool path is created in the diagonal cross hatched directions : A tool path is created in the diagonal cross hatched directions 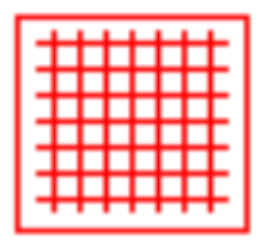 : A toolpath is created in horizontal and vertical directions : A toolpath is created in horizontal and vertical directions ※ These toolpaths are not recommended to be applied to materials with plated surfaces as they may cause possible damage to the material. |
| Engrave outline | If this option is checked, a toolpath with an outline is created. If unchecked, a toolpath without an outline is created.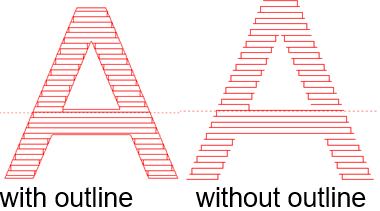 |
| Letter-by-letter engraving at first object position | After marking the first letter, it waits, then marks the next letter and repeats the process until all letters are marked in sequential order. Here, the user manually adjusts the marking position of each letter after each marking. (For example: If the letters to mark are ABC, enter the number of characters to mark (e.g., ‘1’) in input then the machine will start to mark each letter by sequence. Once letter ‘A’ is marked, the user manually adjusts the marking position of the next letter then the machine proceeds to mark the next letter which is ‘B’, repeats the same process then marks ‘C’. 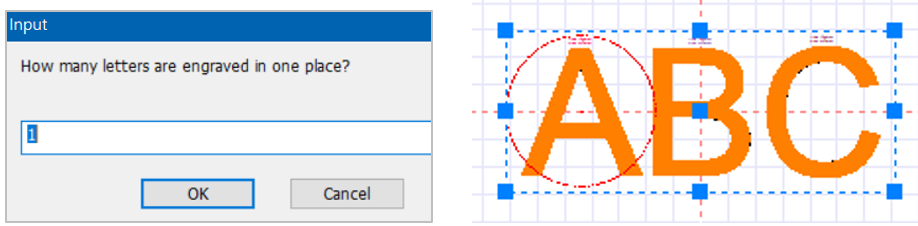 |
| Toolpath quality | Select the toolpath quality. The higher quality, the longer toolpath creation time. |
| Transmit | Toolpath output window is displayed. |
¶ 3) Convert object to toolpath
 |
Convert the selected object to toolpath. It’s not necessary to set toolpath settings each time. It will be automatically set to its preset values. |
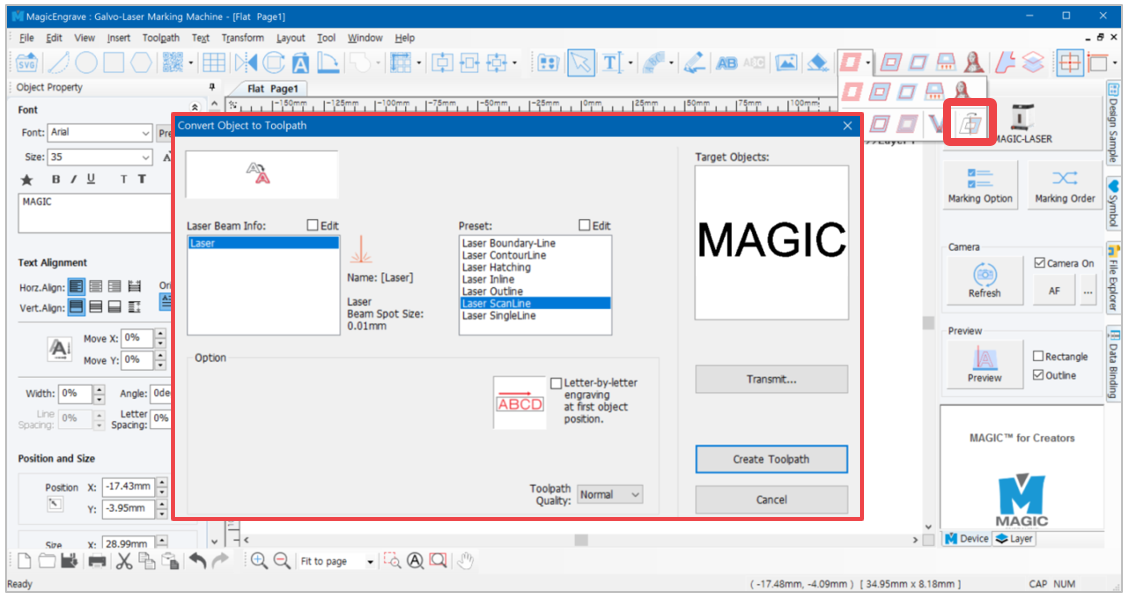
[Laser Beam Info: Add/Delete/Edit]
Check “Edit” button to see Add/Delete/Edit buttons.
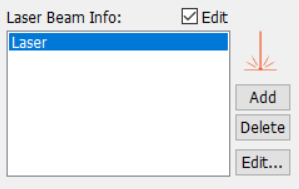
| [Add] | Designate a name for the tool to be added along with its type and other options like tip width, then click “OK” button. The tool will then be added to the tool selection list.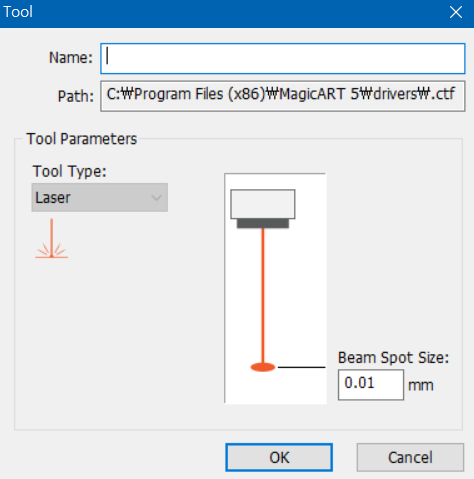 |
| [Delete] | Select a tool to be deleted then click “Delete” button to remove the tool from the list. |
| [Edit] | Select a tool to modify then click “Edit” button. Click “OK” button to save the modified value. |
[Preset: Add/Delete/Edit]
Toolpath setting pre-set for each toolpath. Therefore, it is not necessary to designate hatching gap, angle and others every time and they will be automatically set with their pre-set values. Each toolpath setting value can be changed by pressing Edit or Add button.
If “Edit” button is checked, Add/Delete/Edit buttons will appear.
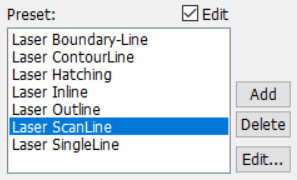
| [Add] | Designate a name for the tool to be added along with its type and other options like tip width, then click “OK” button. The tool will then be added to the tool selection list.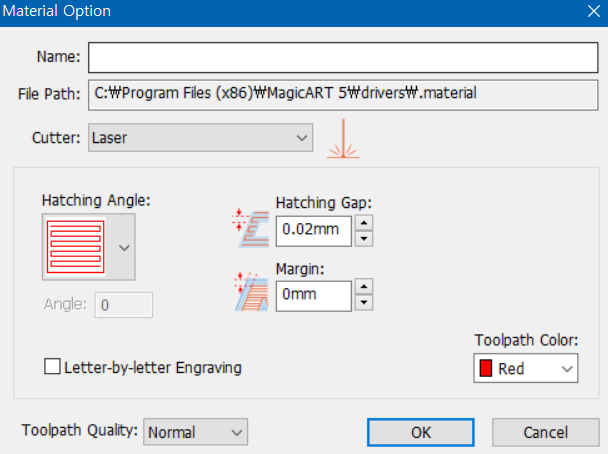 |
| [Delete] | Select a tool to be deleted then click “Delete” button to remove the tool from the list. |
| [Edit] | Select a tool to modify then click “Edit” button. Click “OK” button to save the modified value. |