What is Photo Marking?
Photo marking is a marking method that marks the shade of an image with dots.
1. Place the material on the clamp.
[Laser]
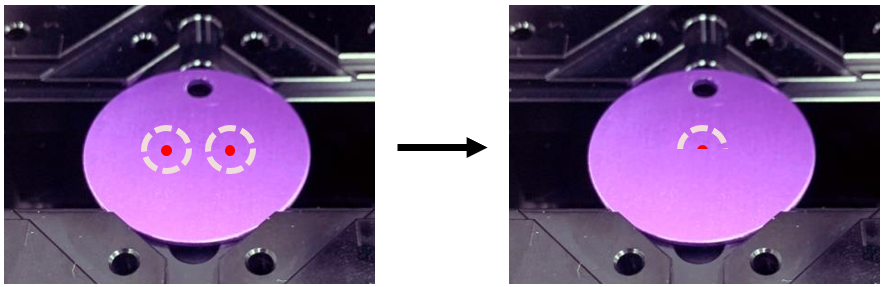
Press the AF button on the keypad to measure the material height. * Using the AF function is recommended.
A. Automatic: Press the AF button in the program to measure the height automatically.
B. Manual: Press the 
 buttons to adjust the height until the focus pointers meet at a single point.
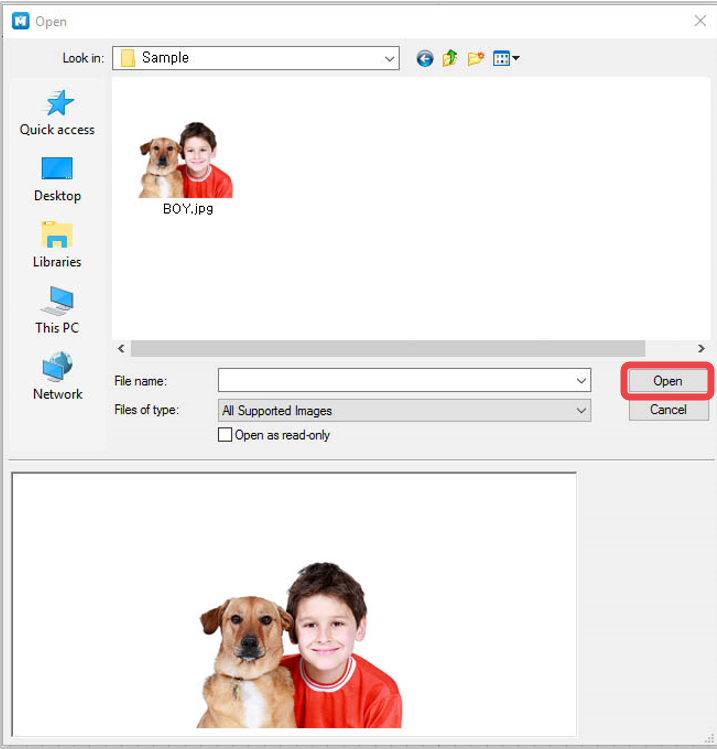
- Click
 [Image] to import an image for marking.
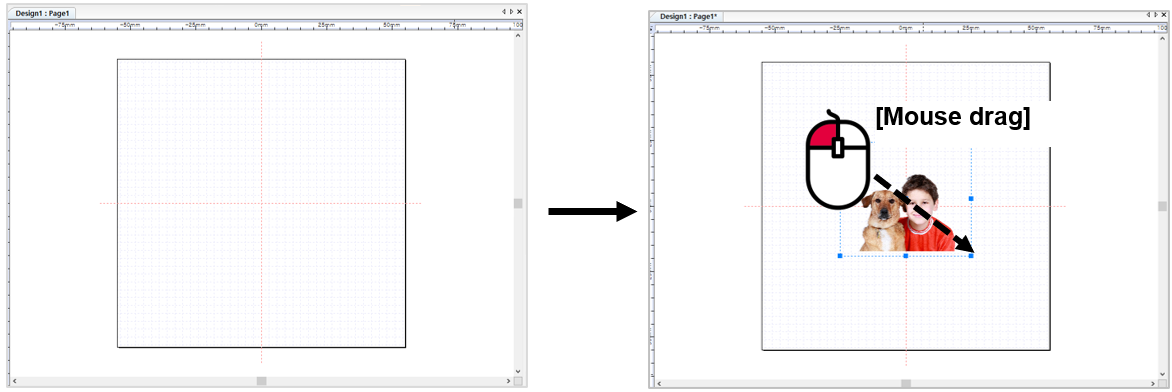
- Adjust the size and location of the image.
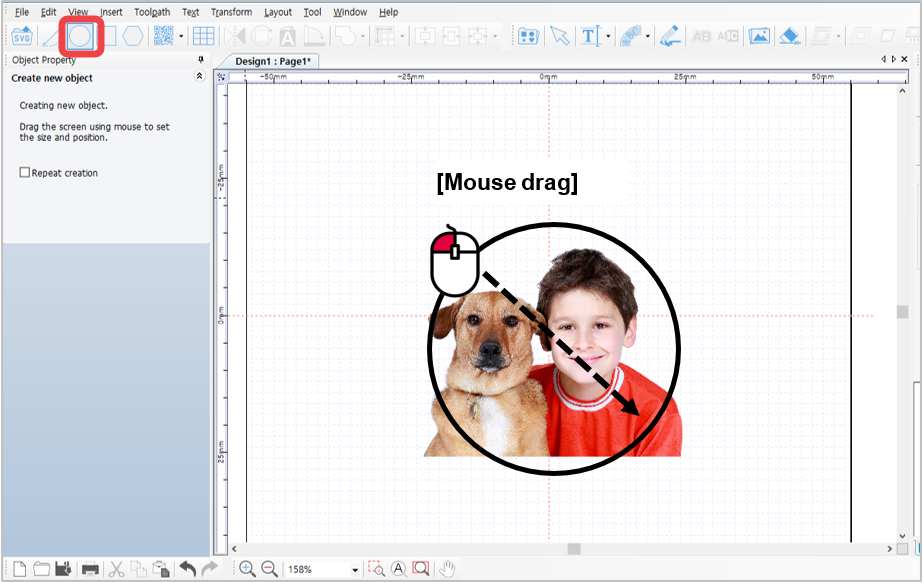
- [Clipping Mask] feature enables clipping or cropping of the target image. Drag the mouse over the image then create a shape.
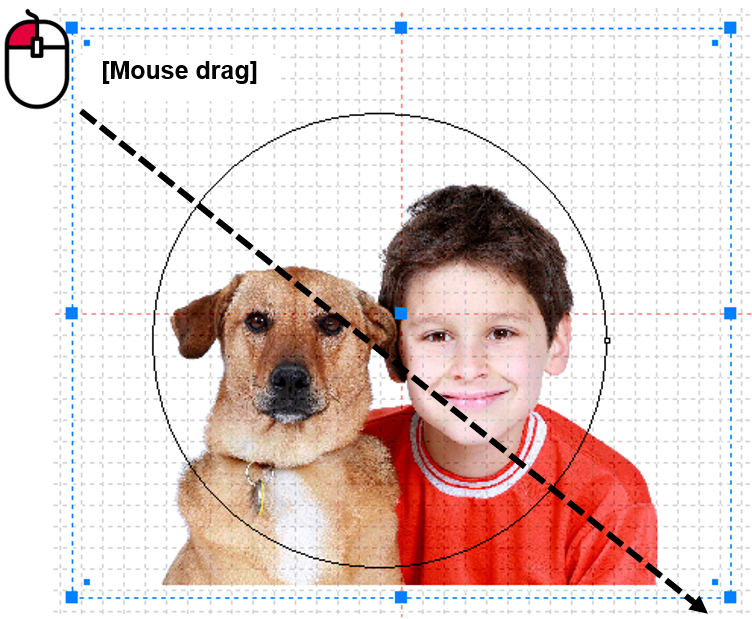
- Drag and hold the mouse to select the target image or select [Menu] → [Edit] → [Select All].
6. Then select [Menu] → [Transform] → [Make Clipping Mask]. Only the cropped image (target image) remains.
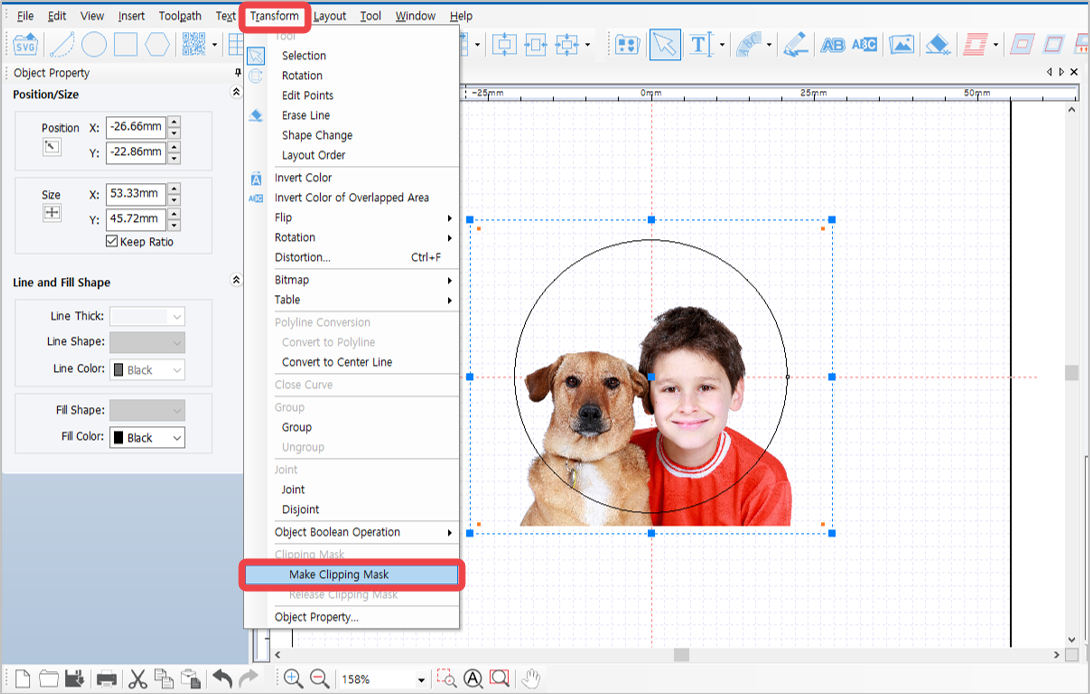
The original image is saved; not deleted or cropped out.
- Click
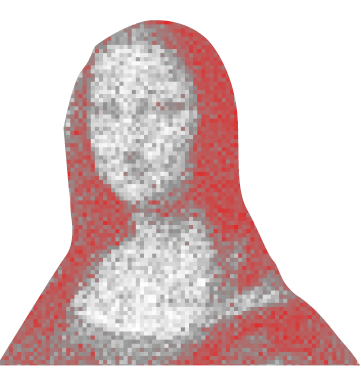 [Photo Impact Engraving Toolpath] button.
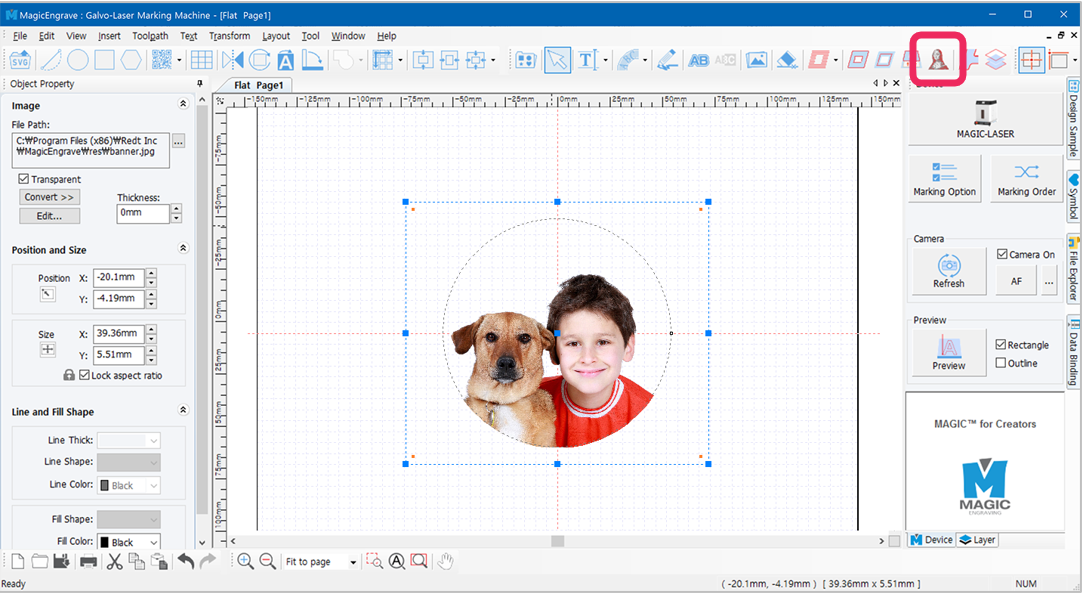
- Adjust marking options in photo marking option window.
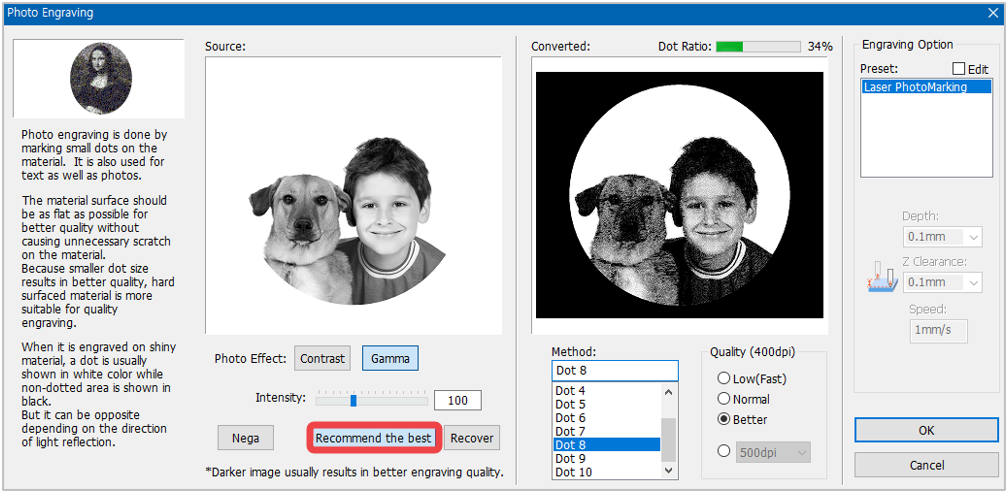
✽ The black area is not engraved; only the cropped image.
During photo marking process, the brighter area (white area) of an image is not visibly expressed with dots unlike the darker area where dots are highly visible with higher marking quality. Therefore, it is recommended to adjust the brightness of an image to darker. Normally, a dot ratio of 10-20% provides the best marking quality for a portrait. Take note that the image’s optimal conditions vary depending on the brightness of background of the image. Check image preview then adjust the image’s brightness and dot ratio. If ‘image adjustment’ is confusing, click “Recommend the best” button to automatically adjust the image.
- Click “OK” button to create a toolpath for photo marking. Set the marking option then click
 button.
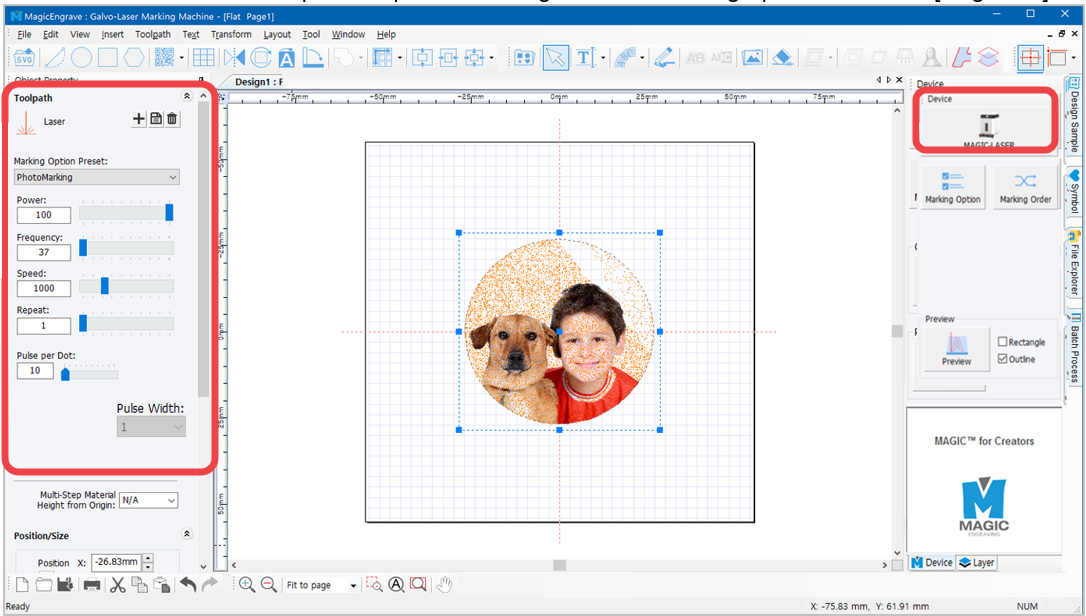
During marking process, the white area of the image appears with dots. The image result of the toolpath is shown as a negative image.
- Once the tool is positioned to the center of the material and the laser pointer turns on, use the direction key buttons to position the laser pointer to the engraving area.
The area that the laser pointer points to is where the actual engraving takes place.
The round laser pointer in the middle represents the origin of the height of laser focus.
 |
Whenever the direction key is pressed, the laser pointer moves up/down/left/right, showing a marking area.
Check if the marking zone is matched with the area on the material to be actually marked. If unmatched, adjust the position, using the direction keys. The laser pointer automatically points to the area where marking takes place (based on the target location on the work area). When the direction key is pressed, the laser pointer moves to the area to be marked (left, top, right or bottom) from its target location. If the marking area needs to be adjusted to the left, press  key to move the pointer to the left. key to move the pointer to the left.
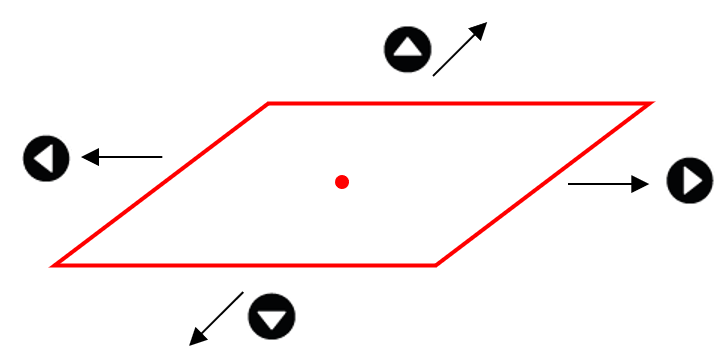 |
- After positioning the laser pointer and determining the location of the marking area, click [Start] button on the program or long-press [
 ] button on the machine (for more than 2 seconds) until the cover closes and the marking process begins.
· Repeat marking: Press and hold button to complete marking, then double-click button to repeat marking on the same material.