Protect your hands, wrists and fingers. Do not let any of your body parts or any foreign objects get caught in the machine during operation. The tools of the machine are sharp, and may cause serious physical injury.

Please wear safety glasses during engraving process for safety. Debris like metal chips and dusts may cause serious eye injury if they get stuck in the eye.

¶ Set up the machine before cutting
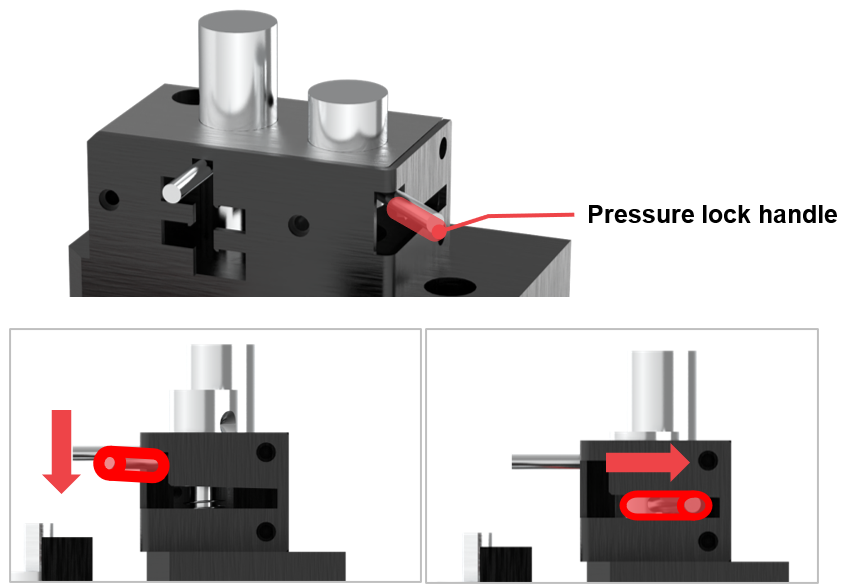
1. Lock the tension by pushing the pressure lock handle down and to the right, as shown below, to engage it in the groove and lock the head pressure.
[When using endmill/ V-cutter etc]
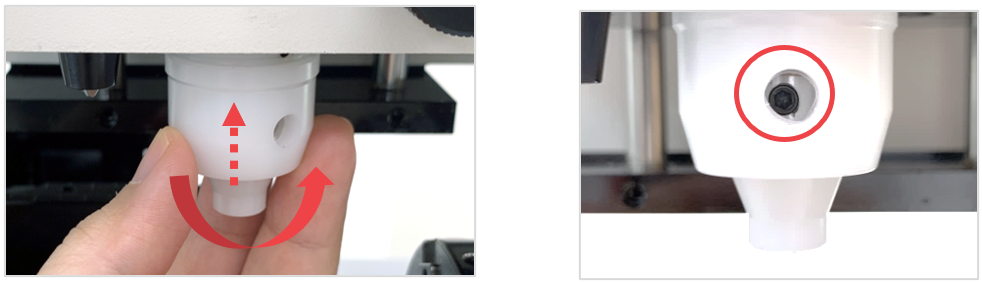
2. Turn the cutting nose counterclockwise to align it to the tool hole.
3. Replace the tool with a cutting tool.
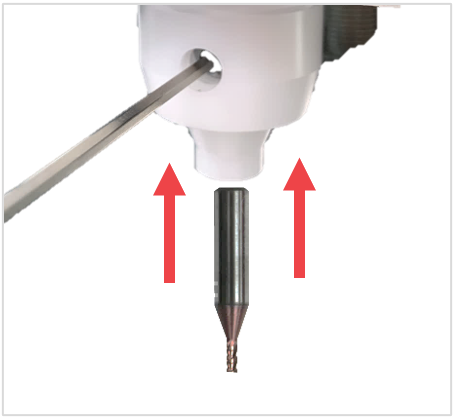
4. Put a flat plate (like a ruler) under the cutting nose (as shown in the picture below) then unscrew the tool fixing screw with a 2mm wrench. Lower the tool until it touches the plate then secure the tool in place.

5. Press on the keypad to enter  [MENU] mode. Select a [1. Tool Change] then press
  button to measure tool height.
6. Set the cutting clamp then secure the material to cut on the clamp.
¶ Program
※Honeycomb table is sold separately.
- Measure the thickness of a material to be cut.
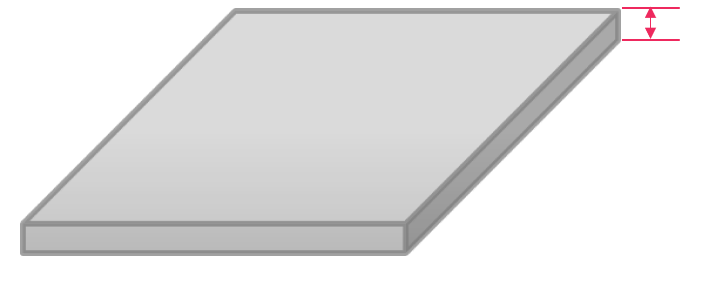
- Place the material on the clamp.
Please use only the AF function.
In CNC cutting, even slight tool height misalignment can cause tool breakage; therefore, accurate measurement using AF is essential rather than manual adjustment.
Press the AF button on the keypad to measure the material height.
- Click
 [Text Input] button on the toolbar to enter the text input mode then click at any target area to enter text.
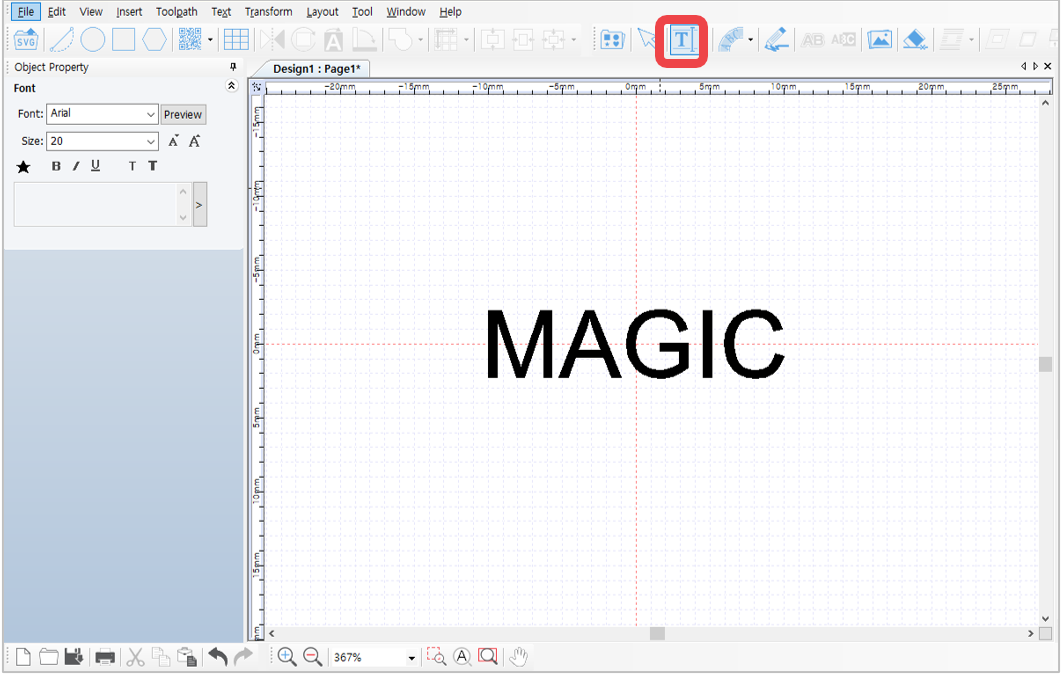
4. After entering the text, click  [Selection] on the toolbar to select the text and designate the font.
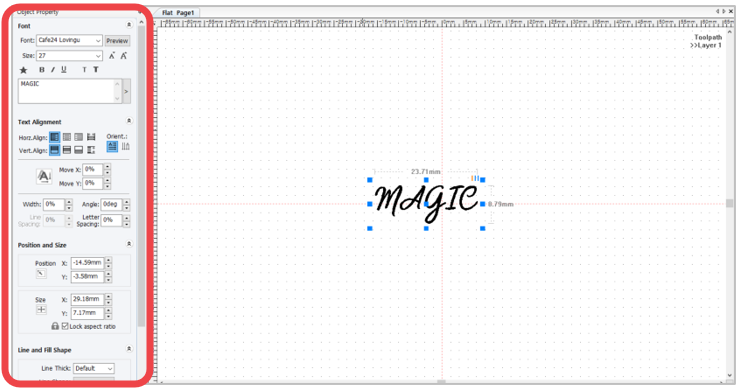
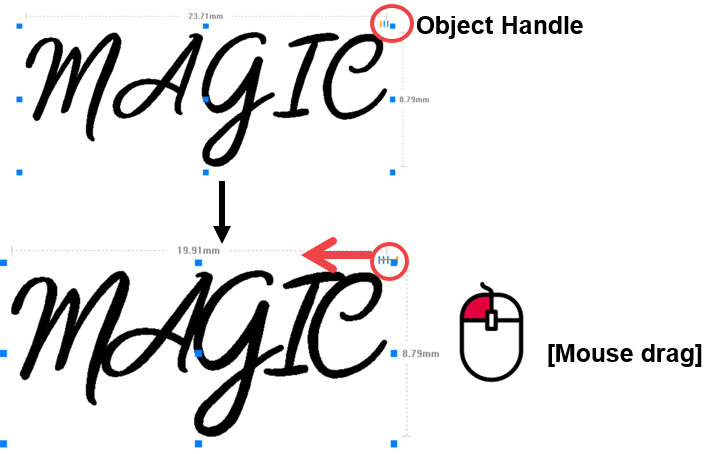
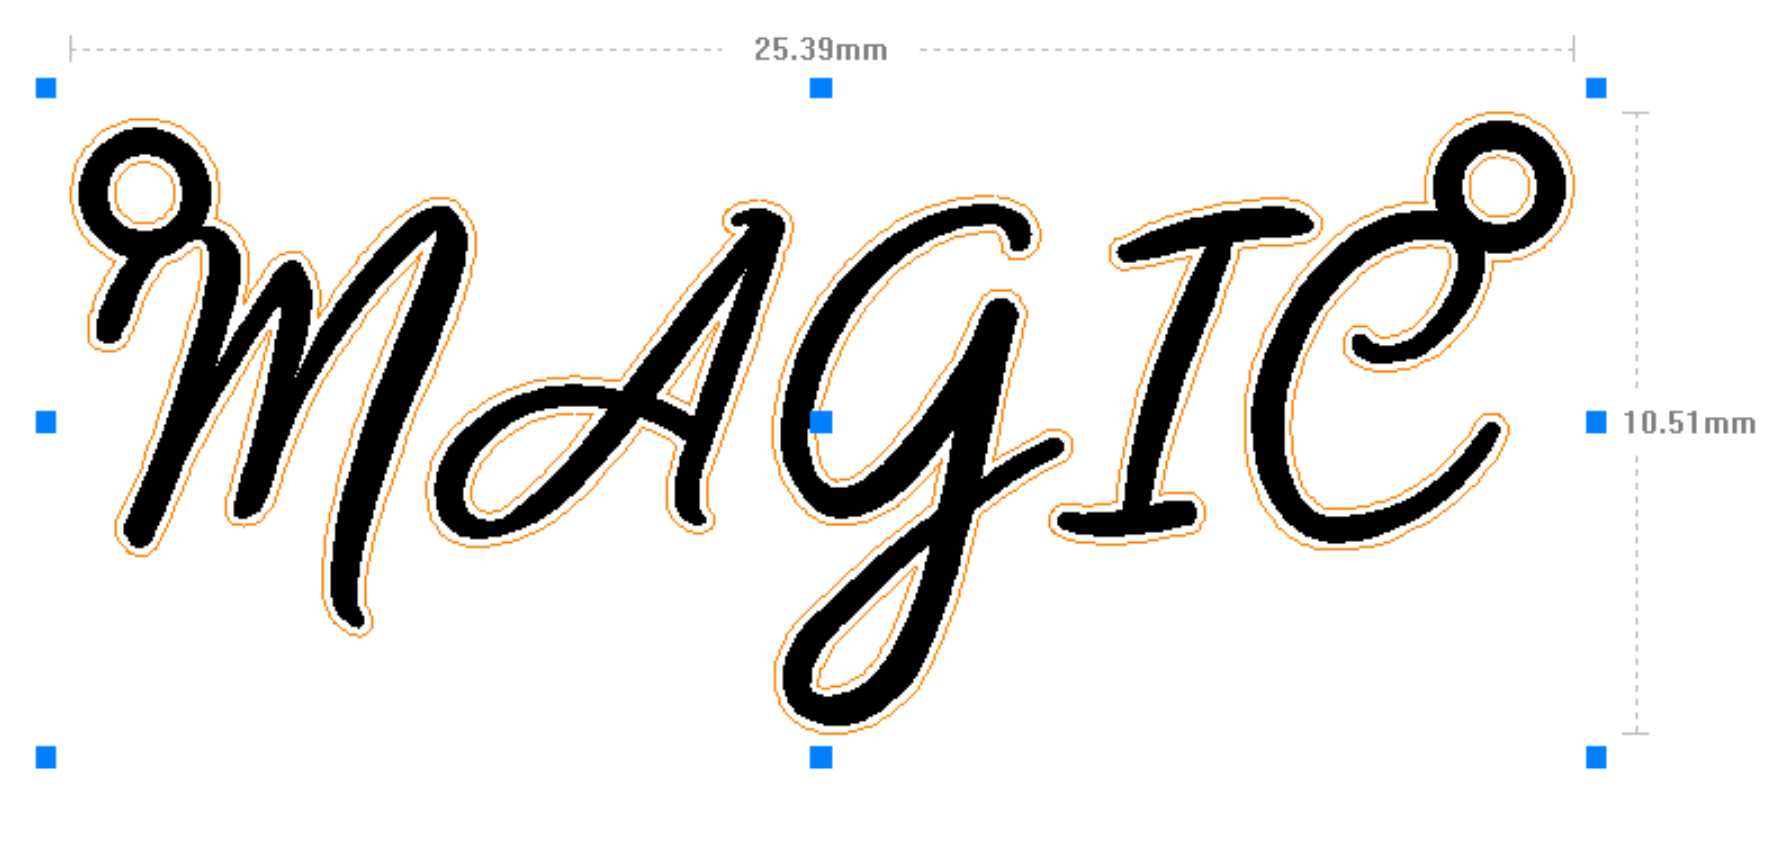
Adjust the text according to the desired size. Use the object handle (shown in the picture below) or go to object property window.
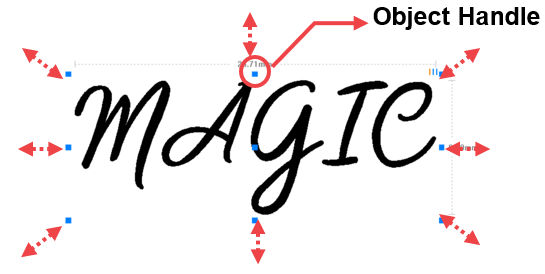
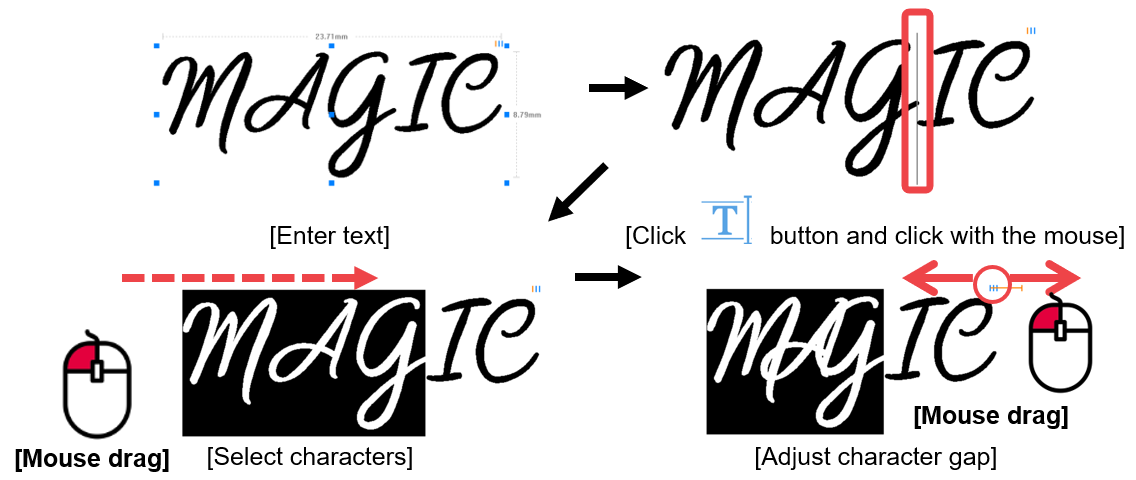
- Drag with the mouse the text gap adjustment handle (shown in the picture below) to narrow or widen the gap between the characters.
If the gap in between each character is partially adjusted, click [Text Input] button then drag the mouse to select the characters. Drag the text gap adjustment handle with the mouse then adjust the gap.
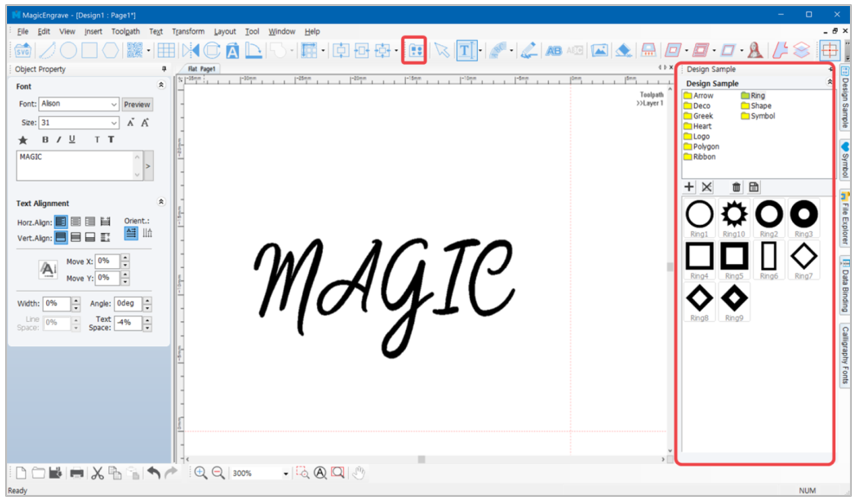
- Insert a ring design that matches your characters from the design sample section.
*Design sample: Click or [Menu] → [View] → [Design sample].
- Double-click the chosen ring design then designate its location on the work area.
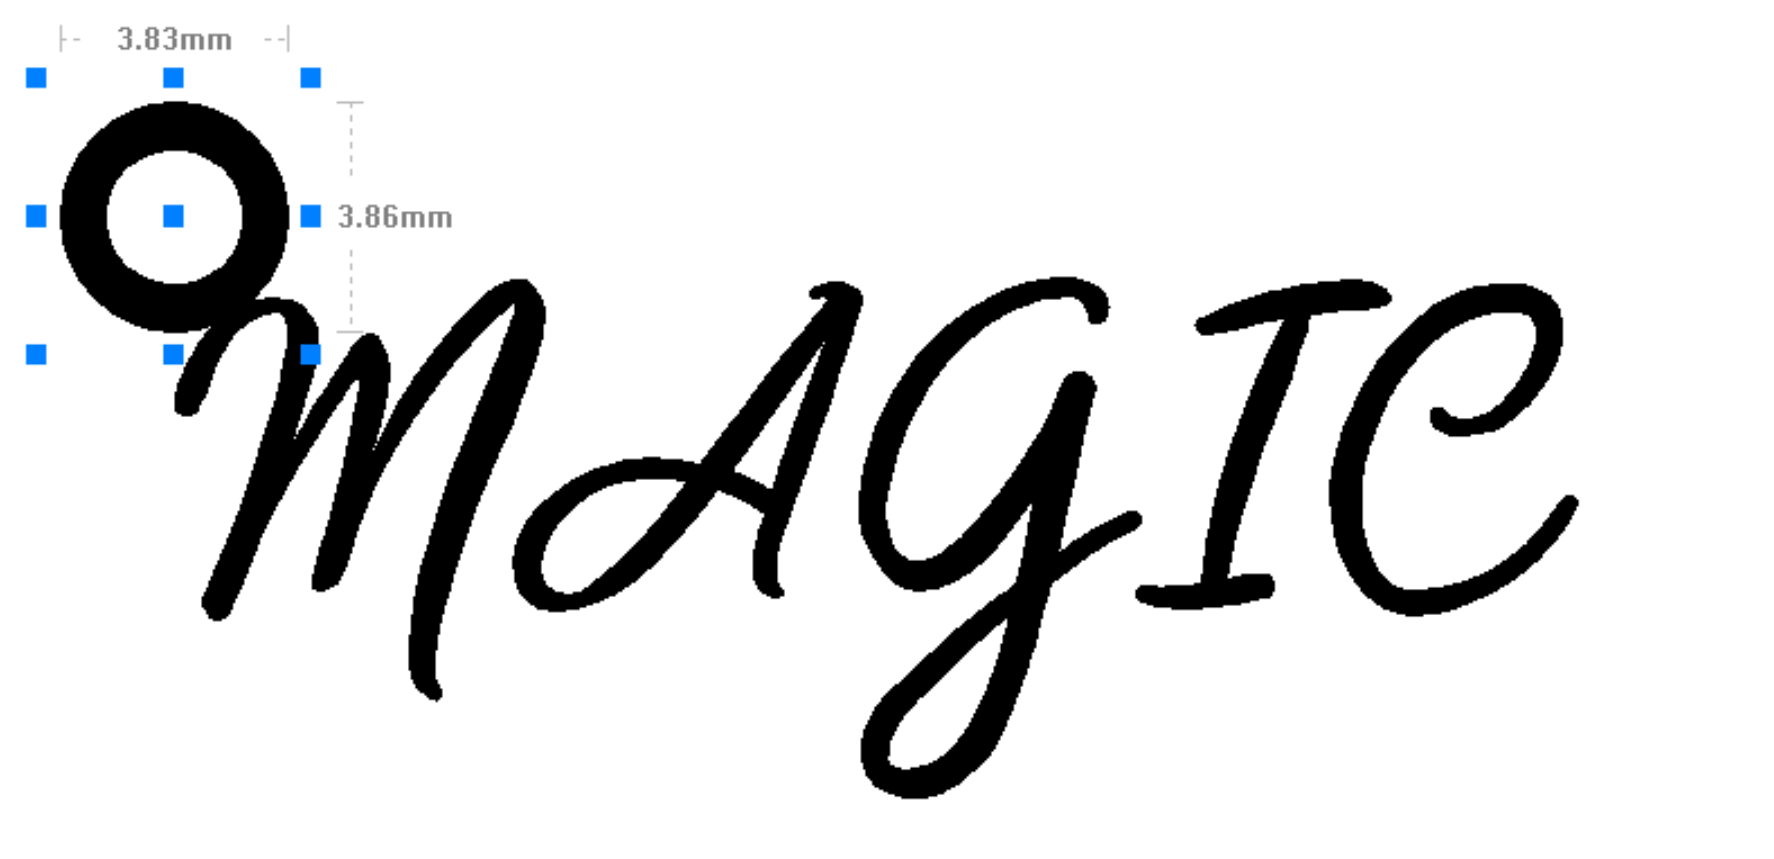
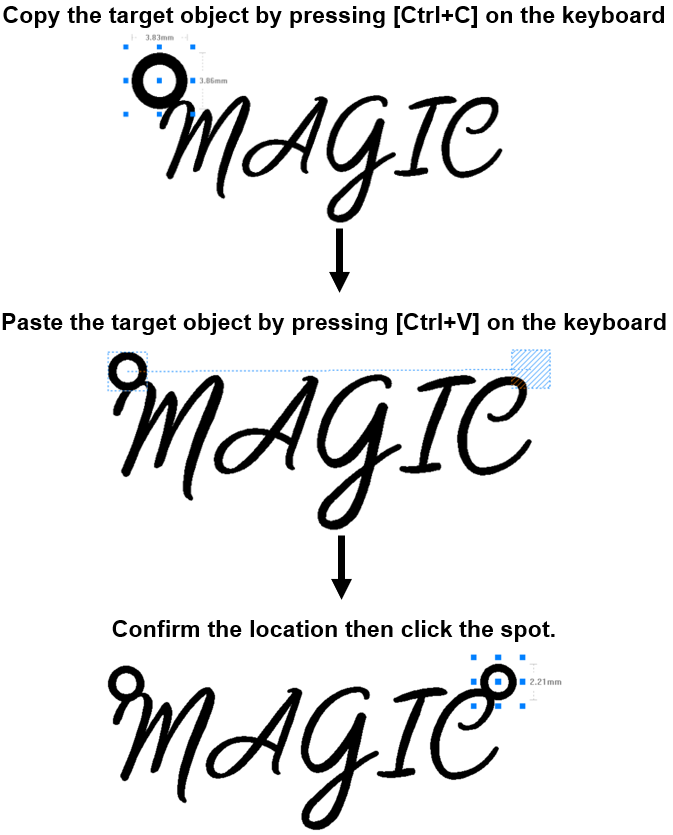
8. [Copy] and [Paste] the ring design to reveal a guideline for the location of the ring. Adjust the location, then left-click with the mouse.
- Select all the objects, then right-click to see the menu then select [Group].
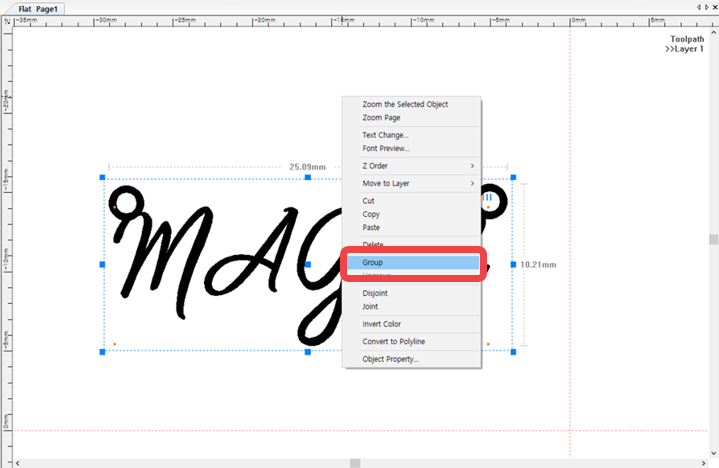
✽Select all objects: Drag the objects with the mouse or select [Menu] → [Edit] → [Select All].
- Upon completing the design, click
 [Cut-Out Toolpath].
- Once the “Cut-Out” window appears (as seen in the figure below), select the tool to be used for cutting. Enter the material’s thickness and other options then click “Create Toolpath.”
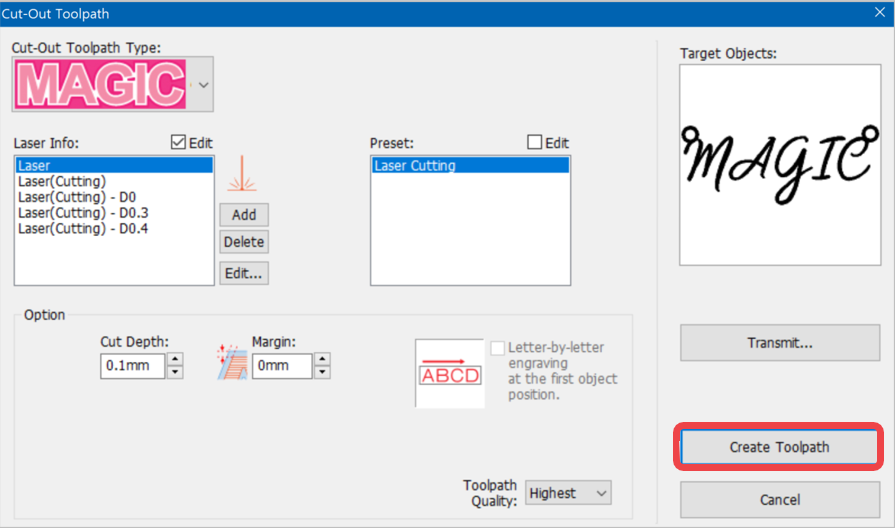
- “Toolpath” is created.
- After creating the toolpath, set the laser marking option then click [Engraver] button.
- Once the tool is positioned to the center of the material and the laser pointer turns on, use the direction key buttons to position the laser pointer to the marking area. The area that the laser pointer points to is where the actual marking takes place. The round laser pointer in the middle represents the origin of the height of laser focus.
 |
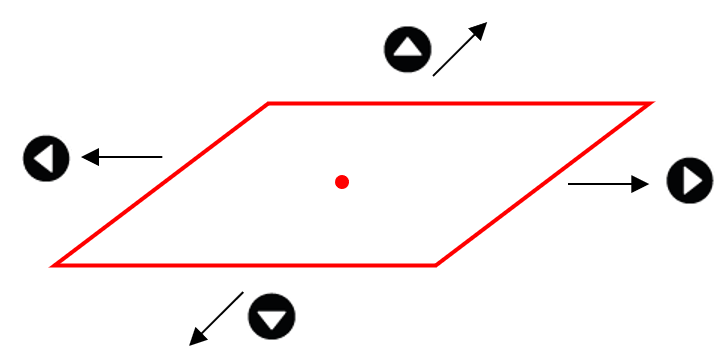
Press the direction key buttons to move the laser pointer to the left, top, right and bottom areas of the engraving area. (Long press to move the laser pointer farther). Check if the laser pointer points to the area on the material where you want to engrave. If the laser pointer is out of range, adjust the position using the direction keys.
The laser pointer automatically points to the area where marking takes place (based on the target location on the work area). When the direction key is pressed, the laser pointer moves to the area to be marked (left, top, right or bottom) from its target location. If the marking area needs to be adjusted to the left, press  key to move the pointer to the left. key to move the pointer to the left.
 |
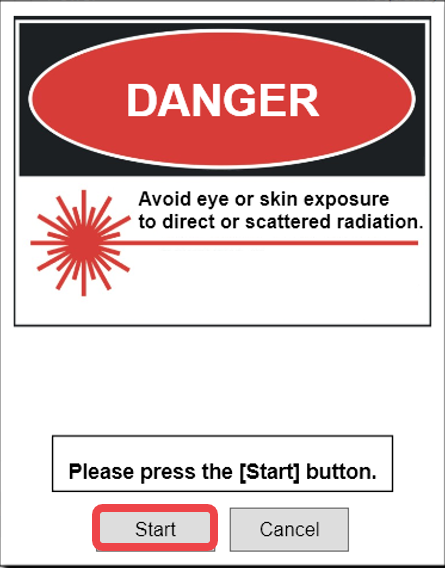
- After positioning the laser pointer and determining the location of the marking area, click [Start] button on the program or long-press [ ] button on the machine (for more than 2 seconds) until the cover closes and the marking process begins.
· Repeat marking: Press and hold button to complete marking, then double-click button to repeat marking on the same material.