Protect your hands, wrists and fingers.
Do not put any of your body parts inside the machine or anywhere near the head during operation.

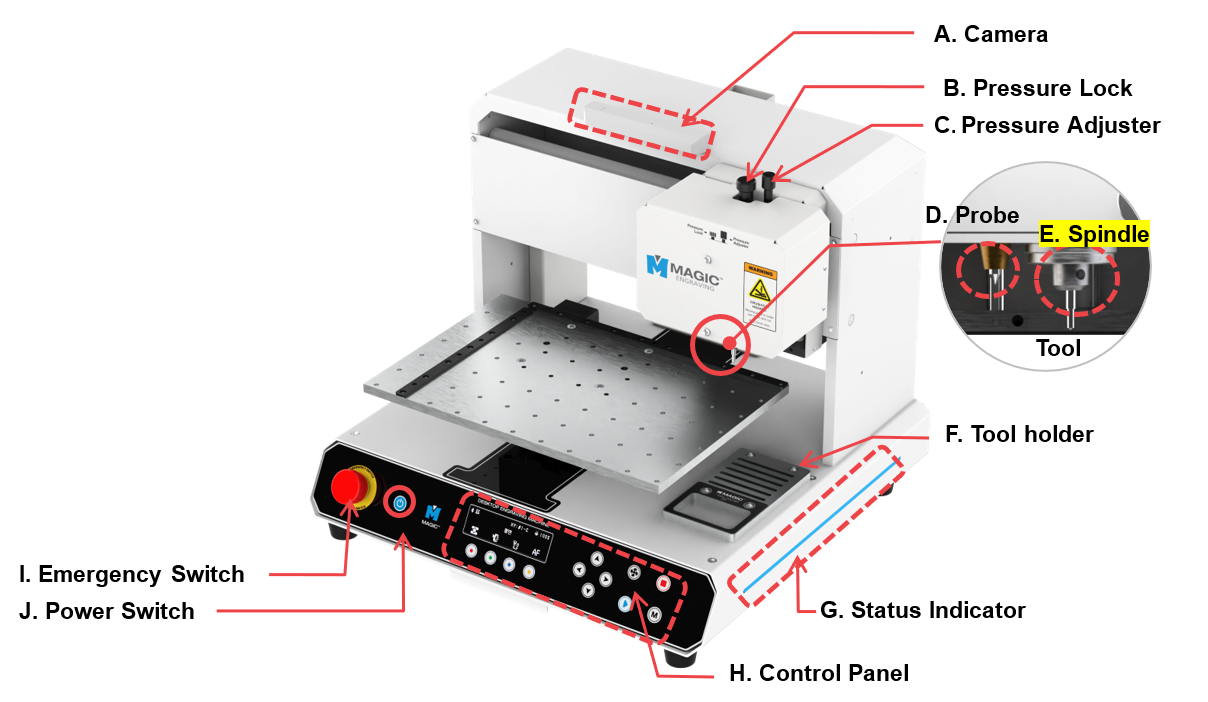
| A | Camera | Shows actual view of material to design. |
| B | Pressure Lock | Sets the pressure lock. |
| C | Pressure Adjuster | Adjusts the pressure of the engraving tool. |
| D | Probe | Measures the height of the engraving material. |
| E | Spindle | Secures the tool for engraving.
※To change tools, use a 2mm T-wrench. |
| F | Tool holder | Storage for tools. |
| G | Status Indicator | Shows the status of the device via blinking interval |
| H | Control Panel | Controls the power button and the manual control for regulating engraving operations. |
| I | Emergency Switch | Stops the machine during emergency. |
| J | Power Switch | Switches the power on/off. |
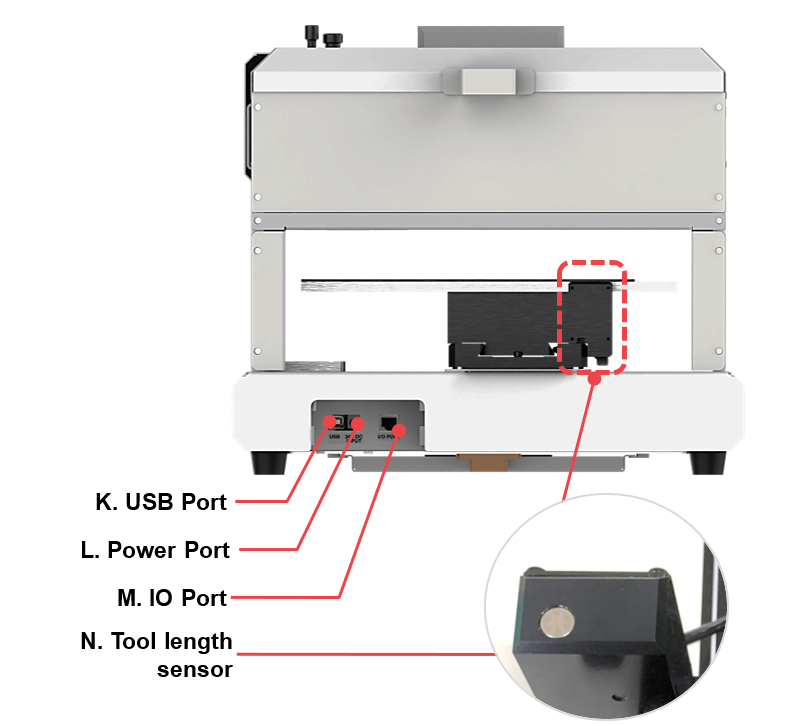
| K | USB Port | To connect USB cable to PC. |
| L | Power Port | To connect power adapter to supply power to the machine. ※Use a grounded outlet only. Do not plug the machine into an ungrounded outlet. |
| M | IO Port | To connect the dust connector. |
| N | Tool length sensor | Automatic tool length measurement sensor. |